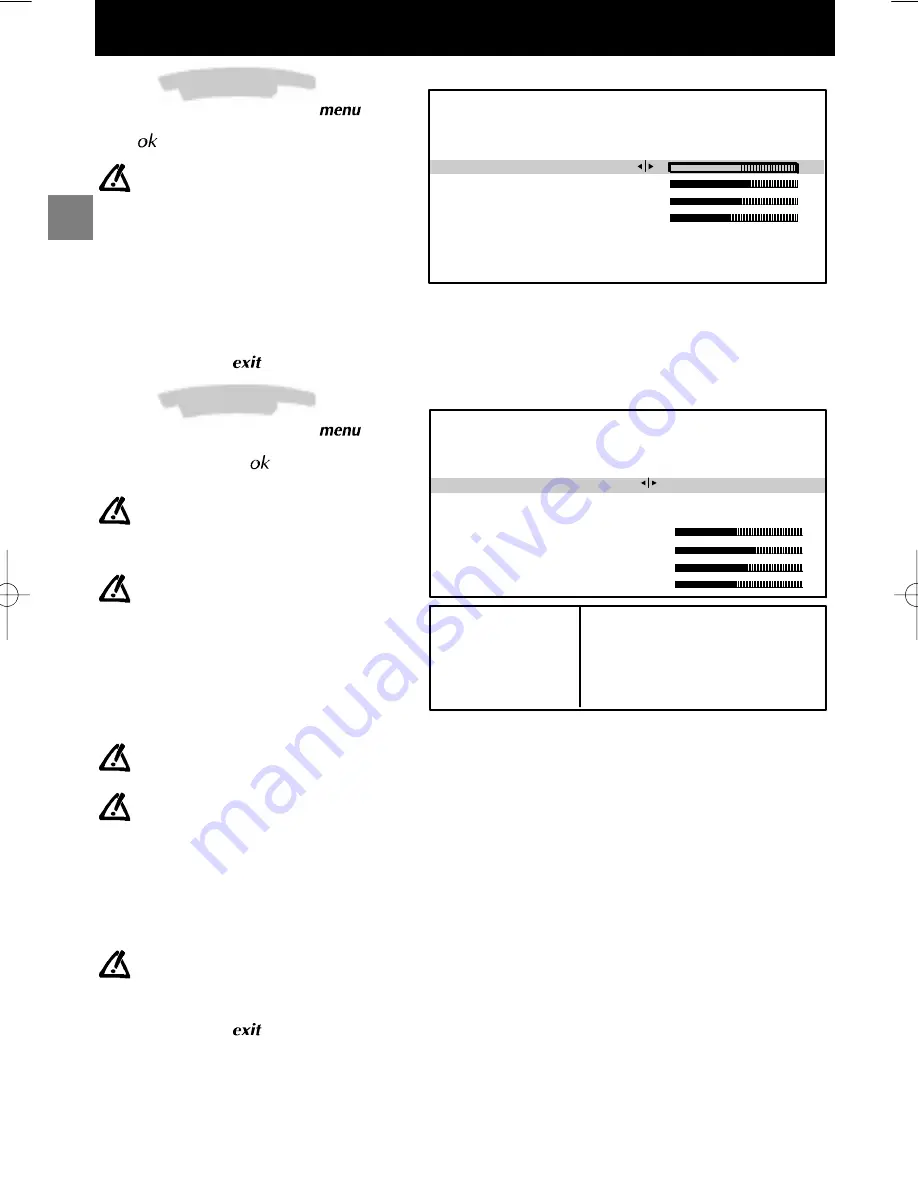
background image

GB

PICTURE

Return

Brightness
Colour
Contrast
Sharpness

Contrast expand
Tone

Neutral
Cold

Select the line marked

Return

to return to the previous

menu.

SOUND

Return

Sound type
Sound mode

Balance L/R
Treble
Bass
Surround effect

Automatic
Normal

Broadcast

mono

stereo

dual

NICAM-3

AV

Choice

automatic - mono

mono - stereo

sound 1 - sound 2

sound 1 - sound 2 - sound 3

stereo - sound 1 - sound 2

Mode

Effect

Normal

:

reproduces the original sound (
mono or stereo).

Wide

:

gives a stereo effect on mono sounds.

Stereo wide

:

accentuates the stereo effect.

Magic

:

accentuates the stereo effects and
adds echo.

Dolby Virtual

:

Virtual Dolby Surround.

Virtual Dolby Surround is based on Dolby Pro Logic
decoding for the reproduction of the Left, Right, Centre and
Virtual Surround sound channels using two loudspeakers.

“”Dolby”, “”Pro Logic” and the double -D symbol are trademarks of the
Dolby Laboratories Licensing Corporation.

Manufactured under licence from

Dolby

Laboratories Licensing

Corporation.

Daily viewing

12

Daily viewing

Picture Adjustment

Display the

SUMMARY

using the

key on

the remote control. Select

Picture

. Validate

using

. The

PICTURE

menu is displayed.

Select and set the proposed options. Use
the information below to help you.

Brightness

,

Colour

,

Contrast

,

Sharpness

:

Select each of these lines one after the other and
set as required.

Contrast expand

:

Select this line then choose the desired Contrast
expand setting (High or Low).

Tone

:

Select this line then choose the desired colour
tone (Warm, Neutral or Cold).

Exit the menu using

.

Sound Settings

Display the

SUMMARY

using the

key on

the remote control. Select the line marked

Sound

.

Validate using

. The

SOUND

menu

is displayed.

Select and set the proposed options. Use
the information below to help you.

Sound type

:

The choices available to you depend on
your television model and the broadcast.
Stereo, Dual or NICAM reception and the
corresponding choices are only available
on Stereo or NICAM Stereo televisions.

Select this line, then select the type of sound you
desire.

Sound mode

:

Select this line, then choose the desired mode
using the Left/Right keys.

The choices available to you depend on
your television model and the type of
sound.

Magic

and

Dolby Virtual

modes

are only available in stereo on TV’s
equipped with Virtual Dolby Surround.

Stereo wide

is only available on Stereo or

Nicam televisions not equipped with
Virtual Dolby Surround.

Balance L/R

:

Select this line, then balance the sound between
the Left and Right loudspeakers.

Treble

,

Bass

:

Select each of these lines and adjust to suit you.

Surround effect

:

This line appears only if you have selected

Dolby Virtual

on the

Sound mode

line.

Select this line and adjust the surround effect to
suit you.

Exit the menu using

.

Содержание Telefunken DS 521 E

Страница 1: ...a n u a l e d i u t i l i z z a z i o n e U s e r m a n u a l M a n u a l d e u t i l i z a c i ó n G e b r u i k s a a n w i j z i n g DF 421 C DF 421 E DS 521 E DS 521 EF B r u k s a n v i s n i n g B e t j e n i n g s v e j l e d n i n g F o l h e t o d e u t i l i z a ç ã o ...

Страница 2: ...10 cm 10 cm 5 cm 10 cm ...

Страница 3: ...mains plug must be easily accessible In the following cases we recommend that you pull out the mains connector 1 During a thunderstorm In such a case it is advisable that you also disconnect the TV set from the aerial socket 2 When odour or smoke emanates from the set Never attempt to open your TV set yourself Further information The TV set shielding is sufficient to prevent X radiation to the ext...

Страница 4: ...s 5 Installing your television for the first time 6 Automatic installation 7 Programme organisation 8 Manual programming 9 Personal settings 10 Preferences 11 Instructions for Use Daily viewing 12 Picture Adjustment 12 Sound Settings 12 Time 13 List of Channels 14 Selecting Programmes 15 Scrolling the Programmes 15 Audio visual AV Programmes 15 Volume Control 15 Muting the Sound 15 Zoom 16 9 model...

Страница 5: ...memorise it see Manual Programming of channels Then when you wish to use the appliance simply select its programme number on the television This procedure is not required for VCR s not equipped with a modulator The SCART socket AV1 3 located on the rear of the television is intended to connect a VCR or a camcorder VHS 8 mm a Canal decoder a video games console or RGB signal emitting appliances The...

Страница 6: ...wn in menus Change programme Volume adjustment To leave a menu or Teletext Sound mute Call up programme list green button Selecting appliances connected to the television AV1 AV2 Confirm an action or validate a menu option Reminder of picture preferences red button For programme numbers higher than 10 press the 0 key on the remote control appears on the screen Now use the number keys on the remote...

Страница 7: ...ing your television Calling up a Menu Select the menu you wish using the Up Down keys Press the key to validate Navigating within the Menus Use the Up Down keys 1 to select a line Use the Left Right keys 2 to Increase or decrease a value for example Fine tuning Select an option for example Reception Aerial Reception Cable Activate or deactivate an option for example Decoder Access a sub menu for e...

Страница 8: ...s to be displayed 2 Then validate using 3 A list of countries is now displayed Fig 2 Select the country in which you live or the country from which you wish to receive the broadcasts if you live in a border area 4 Then validate using 5 A welcome message is displayed 6 Run the automatic installation sequence using 7 A message appears to inform you that automatic installation has started Fig 3 Wait ...

Страница 9: ... country so see the Manual programming chapter to install any channels not found For cable networks if you have not found certain channels select Other instead of a country name in the PERSONAL SETTINGS menu then run automatic installation again 1 Press and hold the key on the remote control to display the INSTALLATION MAIN MENU The SUMMARY appears first followed by the INSTALLATION MAIN MENU 2 Se...

Страница 10: ...NSTALLATION MAIN MENU then select Programme organisation and validate using To delete a programme for which reception is too poor 1 Select the line marked Select program 2 Use the or Left Right keys to list your channels 3 When you get to a channel you wish to delete select the line marked Delete program 4 Press to delete the programme 5 Validate using To organize your channels to suit you 1 Selec...

Страница 11: ...the same frequencies as the RF channels If this is the case you must select Aerial instead of Cable Autosearch Enter the programme number if you know it If not search using the Left Right keys Your television will stop at the first channel it tunes into If you wish to memorize it go to the line marked Store on PR number If not resume the search using the Left Right keys Fine tuning You can use thi...

Страница 12: ...me level between different channels and between different programmes on the same channel Activate or deactivate the auto volume level as required On models equipped with Virtual Dolby Surround this function remains inactive if Dolby Virtual has been selected in the SOUND menu see Volume Control AV1 AV2 AV3 name Use these to give a name to each of your audio visual programmes Select the character y...

Страница 13: ...ed on the front or the side of the television Format control Use the Left Right keys to select the desired picture format Auto if the transmitter for 16 9 format TV s or the appliance connected to one of the peripheral jacks delivers the switching signal the television automatically adapts to the transmitted picture format 16 9 manually selects widescreen picture format 4 3 manually selects this p...

Страница 14: ... each of these lines one after the other and set as required Contrast expand Select this line then choose the desired Contrast expand setting High or Low Tone Select this line then choose the desired colour tone Warm Neutral or Cold Exit the menu using Sound Settings Display the SUMMARY using the key on the remote control Select the line marked Sound Validate using The SOUND menu is displayed Sele...

Страница 15: ...switched on again from the remote control Current time The current time is given by the Teletext see PERSONAL SETTINGS menu You can also set the time manually using the number keys 0 to 9 on your remote control Wake up timer If you wish to be woken up by your television on the channel of your choice you must first set the television clock to the correct time see above Use the Left Right keys to ti...

Страница 16: ...ote control or Display the SUMMARY using the key on the remote control Select the line marked List Validate using The page displayed is the page containing the programme you are watching It is identified in the list by the symbol TV To display the next page press the Right key To display the previous page press the Left key If you wish to watch one of the programmes on the page displayed Enter the...

Страница 17: ...ctures black bands at the top and bottom of the screen Use the Left Right keys to select the desired zoom position ZOOM 0 4 3 picture black bands at the sides FULL SCREEN for a 4 3 picture that fills the screen ZOOM 1 for letterbox pictures Displaying Information Press the key to display the following information on the screen channel number and name time zoom type of sound Television Lock You can...

Страница 18: ...return to the normal display Sub code You can use this to access a sub page directly Select using the Up Down keys Then enter the four digits of the required sub page number Certain programmes have Alarm pages that you can set to appear at the time you require For example for 15h30 enter 1530 as the sub page number then press You must of course leave the television on the programme which is to tra...

Страница 19: ...control to select a programme The headphone socket 2 is provided to connect a headphone or earphones Connecting headphones mute the sound from the television loudspeakers Other Possibilities Copying a cassette Plug the VCR you wish to record to into the SCART socket AV2 Plug the appliance you wish to copy from as follows into the peripheral jack AV1 for a VCR into the CINCH AV3 jacks for a camcord...

Страница 20: ...THOMSON multimedia 46 47 Quai A Le Gallo 92648 Boulogne Cedex France RCS Nanterre B 322019464 10 98 253 534 60 ...

Отзывы: