background image

English

   - 6 -

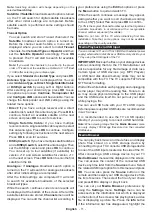
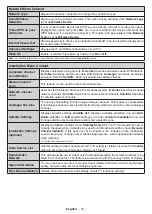
3.6. Reset Apps

You can reset your customisations on the 

Home

 menu 

to defaults using this


option (availability depends on 

TV model and its features). Highlight and press 

OK

A confirmation message will be displayed. Highlight 

Yes

 and press 

OK

 to proceed. Note that you will not 

be able to perform this operation again within the next 

few minutes.

3.7. Accessibility

You can access the accessibility settings menu directly 

using this option.

3.8. Privacy Settings

You can access the privacy settings menu directly 

using this option. This option may not be available 

depending on the model of your TV and the selected 

country during the first time installation process.

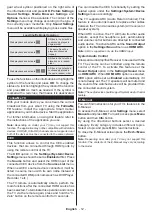
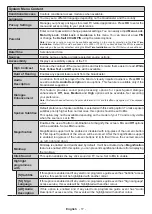
4. Settings

You can manage the settings of your TV using the 

options of this menu. Refer to 

Settings Menu Content 

section for more information.

5. 

Sources

You can manage your input source preferences using 

the options of this menu. To change the current source 

or use your TV as a wireless display device highlight 

one of the options and press 

OK

5.1. 

Source Settings

You can access the source settings menu directly using 

this option. 

Edit the names, enable or disable selected 

source options.

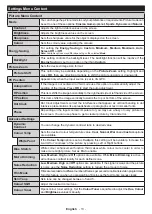
Inserting the Batteries into the Remote

Remove the back cover to reveal the battery compart-

ment. Insert two size 

AAA

 batteries. Make sure the (+) 

and (-) signs match (observe correct polarity). Do not 

mix old and new batteries. Replace only with same or 

equivalent type. Place the cover back on. 
A message will be displayed on the screen when the 

batteries are low and must be replaced. Note that when 

the batteries are low, the performance of the remote 

control may be impaired.
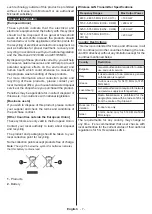
Batteries should not be exposed to excessive heat 

such as sunshine, fire or the like.

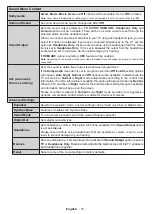
Power Connection

IMPORTANT

: The TV set is designed to operate on a 

220-240V AC, 50 Hz

 supply. After unpacking, allow the 

TV set to reach the ambient room temperature before 

you connect the set to the mains. Plug the power cable 

to the mains socket outlet.

Antenna Connection

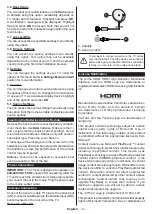
Connect the aerial or cable TV plug to the aerial input 

(ANT) socket or satellite plug to the satellite input (LNB) 

socket located on the rear side of the TV.

Rear side of the TV

1

2

LNB

ANT

1. 

Satellite

2. 

Aerial or cable

 If you want to connect a device to the TV, make 

sure that both the TV and the device are turned off 

before making any connection. After the connection 

is done, you can turn on the units and use them.

License Notification

The terms HDMI, HDMI High-Definition Multimedia 

Interface, and the HDMI Logo are trademarks or 

registered trademarks of HDMI Licensing Administrator, 

Inc.

Manufactured under license from Dolby Laboratories. 

Dolby, Dolby Audio, and the double-D symbol 

are trademarks of Dolby Laboratories Licensing 

Corporation. 
YouTube and the YouTube logo are trademarks of 

Google Inc.
This product contains technology subject to certain 

intellectual property rights of Microsoft. Use or 

distribution of this technology outside of this product 

is prohibited without the appropriate license(s) from 

Microsoft.
Content owners use Microsoft PlayReady™ content 

access technology to protect their intellectual property, 

including copyrighted content. This device uses 

PlayReady technology to access PlayReady-protected 

content and/or WMDRM-protected content. If the 

device fails to properly enforce restrictions on content 

usage, content owners may require Microsoft to revoke 

the device’s ability to consume PlayReady-protected 

content. Revocation should not affect unprotected 

content or content protected by other content access 

technologies. Content owners may require you to 

upgrade PlayReady to access their content. If you 

decline an upgrade, you will not be able to access 

content that requires the upgrade.
The “CI Plus” Logo is a trademark of CI Plus LLP.
This product is protected by certain intellectual property 

rights of Microsoft Corporation. Use or distribution of 

Содержание TE24550B42V2D

Страница 1: ...COLOUR TELEVISION WITH REMOTE CONTROL ISTRUZIONI PER L USO OPERATING INSTRUCTIONS Questo manuale d istruzione è fornito da trovaprezzi it Scopri tutte le offerte per Telefunken TE24550B42V2D o cerca il tuo prodotto tra le migliori offerte di Televisori ...

Страница 2: ...dell elenco canali 22 Configurazione delle impostazioni genitori 22 Guida elettronica ai programmi 22 Servizi televideo 23 Aggiornamento software 23 Guida alla risoluzione dei problemi e suggerimenti 23 Modalità tipica monitor ingresso PC 25 Compatibilità segnale AV e HDMI 25 Formati di file supportati per la modalità USB 26 Formati video compatibili 26 Formati immagine compatibili 26 Formati audi...

Страница 3: ... fare mai un nodo nel cavo né legarlo con altri cavi Se danneggiato deve essere sostituito ma unicamente da personale qualificato Non esporre la TV a gocce o schizzi di liquidi e non mettere oggetti pieni di liquidi ad esempio vasi tazze ecc sulla TV ad esempio sui ripiani sopra all unità Non esporre la TV alla luce solare diretta non collocare fiamme libere come ad esempio candele accese sopra o ...

Страница 4: ...ncendio Il collegamento a un sistema di distribuzione via televisione deve quindi essere eseguito tramite un dispositivo che fornisce isolamento elettrico al di sotto di una certa gamma di frequenza isolatore galvanico AVVERTENZE PER L INSTALLAZIONE A PARETE Leggere le istruzioni prima di montare la TV a parete Il kit di montaggio a parete è opzionale Sarà possibile rivolgersi al proprio rivendito...

Страница 5: ...resso ad esempio da un antenna o da una sorgente HDMI per 3 miinuti passa in modalità standby Alla successiva riaccensione viene visualizzato il seguente messaggio TV passata in modalità stand by automaticamente perché non c è stato segnale a lungo L o p z i o n e A u t o s p e g n i m e n t o n e l m e n u Impostazioni Sistema Altro può essere impostato su un valore compreso fra 1 e 8 ore in moda...

Страница 6: ...itorna per uscire Sullo schermo del menu principale della TV si possono anche vedere informazioni su luogo meteo ora e data Le piccole icone verdi indicano lo stato attuale per l ora la rete e la sincronizzazione delle app Se queste icone appaiono in verde significa che le informazioni sull ora sono aggiornate la rete è connessa e la sincronizzazione è stata completata con successo In caso contrar...

Страница 7: ...privacy Questa opzione potrebbe non essere disponibile a seconda del modello del televisore e del paese selezionato durante il primo processo di installazione 4 Impostazioni Rimandiamo alla sezione Indice menù impostazioni per ulteriori informazioni in merito 5 Sorgenti È possibile gestire ile preferenze della sorgente di ingresso utilizzando le opzioni di questo menù Per cambiare la sorgente corr...

Страница 8: ...otto è protetto dalle norme sulla proprietà intellettuale di Microsoft Corporation L uso o la distribuzione di tale tecnologia sono vietati salvo esplicita approvazione di Microsoft o di una sussidiaria autorizzata Informazioni sullo smaltimento Unione Europea Questo simbolo sul prodotto o sulla confezione significa che l apparecchio elettrico o elettronico alla fine del ciclo di esercizio non dev...

Страница 9: ...esta per uso all esterno e servizio pubblico Francia Unicamente per uso all interno per 2454 2483 5 MHz Italia Se usata all esterno è richiesta un autoriz zazione generica Grecia Uso all interno solo per banda da 5470 MHz a 5725 MHz Lussemburgo Autorizzazione generale richiesta per la fornitura della rete e del servizio non per spectrum Norvegia La trasmissione radio è proibita per l area geografi...

Страница 10: ...suna funzione 15 Play Inizia a riprodurre i media selezionati 16 Pausa Mette in pausa il file in fase di riproduzione 17 Arresto Interrompe il media in fase di riproduzione 18 Avanzamento veloce Sposta i frame in avanti nei media come ad esempio i film 19 Prime Video Lancia l applicazione Amazon Prime Video 20 Esci Chiude ed esce dai menù visualizzati o torna alla schermata precedente 21 Info Visu...

Страница 11: ...riore con un cavo audio YPbPr PC per il collegamento audio Quando viene usato il kit di montaggio a parete disponibile da terzi in mercato non fornito in dotazione consigliamo di collegare tutti i cavi sul lato posteriore della TV prima dell installazione a parete inserire o rimuovere il modulo CI solo quando la TV è SPENTA Per dettagli sulle impostazioni consultare il manuale d uso del modulo Ogn...

Страница 12: ...isualizzata la schermata di selezione della modalità immagine Affinché il televisore consumi meno energia e sia più rispettoso dell ambiente selezionare Naturale e premere OK per continuare Sarà possibile modificare la selezione in un secondo momento utilizzando l opzione Modalità nel menu Impostazioni Immagine A seconda del modello della TV e della selezione paese il menù Impostazioni Privacy pot...

Страница 13: ...ellite Singolo Nel caso in cui si disponga di ricevitori multipli e di un cavo satellite unico selezionare questo tipo di antenna Premere OK per continuare Configurare le impostazioni attenendosi alle seguenti istruzioni sulla schermata successiva Premere OK per eseguire una scansione dei dispositivi Interruttore DiSEqC Nel caso in cui si disponga di più parabole satellitari e di un DiSEqC selezio...

Страница 14: ...ine casuale Avviare la riproduzione e attivare Tutti i file nell elenco verranno riprodotti a ciclo continuo nello stesso ordine casuale Per utilizzare le funzioni della barra informativa evidenziare il simbolo della funzione e premere OK Per modificare lo stato di una funzione evidenziare il simbolo della funzione e premere OK se necessario Se il simbolo è contrassegnato da una croce rossa signif...

Страница 15: ...spositivo audio deve supportare la funzionalità Controllo audio del sistema Manuale Elettronico Sarà possibile trovare istruzioni per le caratteristiche della TV nel Manuale elettronico Per accedere al Manuale elettronico aprire il menu Impostazioni selezionare Manuali e premere OK Per un accesso rapido premere il pulsante Menu e il pulsante Info Usando i pulsanti direzionali selezionare la catego...

Страница 16: ...te la posizione dell immagine Premere OK per iniziare la regolazione automatica Posizione H Questo comando sposta l immagine orizzontalmente sul lato destro o sinistro dello schermo Posizione V Questa voce sposta l immagine verticalmente verso la parte superiore o inferiore dello schermo Orologio Le regolazioni Orologio correggono l interfaccia che compare come una banda verticale in presentazioni...

Страница 17: ...lori visualizzati sullo schermo del televisore Quando impostata su On i colori vengono impostati secondo il segnale sorgente Quando impostata su Off la capacità massima dei colori della TV viene impostata di default opzione consigliata Nota Questa opzione potrebbe non essere disponibile a seconda del modello TV e delle sue caratteristiche HDMI Full Range Quando si guarda da una sorgente HDMI quest...

Страница 18: ...à modificata Le opzioni Auto Notte Normale e Off saranno disponibili In Modalità Auto la TV passerà da Normale a Notte automaticamente a seconda delle informazioni sull ora Se non sono disponibili informazioni sull ora questa opzione funzionerà sempre come Normale Quando la TV passa in Modalità Notte per la prima volta dopo aver impostato questa opzione su Auto sullo schermo apparirà una finestra ...

Страница 19: ... rete satellite Sintonizzazione analogica Sarà possibile utilizzare questa impostazione per la sintonizzazione dei canali automatici Questa funzione non è disponibile se non sono memorizzati canali analogici e se il canale attualmente visualizzato non è un canale analogico Impostazioni satellite Visualizza le impostazioni del satellite Elenco satelliti Visualizza i satelliti disponibili Sarà possi...

Страница 20: ...rnisce opzioni di post elaborazione sonora per il miglioramento del dialogo vocale Saranno disponibili le opzioni Basso Medio Alto e Off Impostare secondo preferenza Nota Questa funzione è efficace solo se il formato audio in ingresso è AC 4 e l effetto si applica solo all uscita degli altoparlanti TV Sottotitoli parlati La preferenza predefinita dei sottotitoli parlati è selezionata con questa op...

Страница 21: ...itata Funziona con Alexa Avvia il processo d impostazione per questa funzione manualmente Se la configurazione è stata completata in precedenza l opzione Sign Out sarà disponibile Cfr la sezione Alexa Ready per ulteriori informazioni Sign Out Usare questa opzione per uscire Se si esce la funzione Works With Alexa sarà disa bilitata Assistente Google Avvia il processo di configurazione per consenti...

Страница 22: ... sia installato sarà possibile condividere riprodurre foto sulla TV Consultare le istruzioni del software di condivisione per ulteriori informazioni Modalità accensione Questa impostazione configura la preferenza relativamente alla Modalità accensione Sono disponibili le opzioni Ultimo stato e Standby Telecomando virtuale Attiva o disattiva la funzione di telecomando virtuale OSS Visualizza le inf...

Страница 23: ...e è impostata questa opzione la TV riceve le informazioni genitori dalla trasmissione mentre se il blocco genitori è disattivato viene disattivato l accesso alla trasmissione Nota Se l opzione paese della Prima installazione è impostata su Francia Italia o Austria il Blocco Genitori verrà impostato su 18 come valore predefinito Blocco bambini Se questa opzione è impostata su ON la TV può essere co...

Страница 24: ...er attivare la modalità mix che consente di visualizzare la pagina televideo e la trasmissione TV contemporaneamente Premere ancora una volta per uscire Quando è disponibile il sistema FASTEXT le sezioni della pagina del televideo sono codificate a colore e possono essere selezionate premendo i tasti colorati Attenersi alle istruzioni visualizzate a video Televideo digitale Premere il pulsante Tex...

Страница 25: ...lare le impostazioni di bilanciamento dal menu Audio Telecomando nessun funzionamento Le batterie potrebbero essere scariche Sostituire le batterie Le batterie potrebbero essere state inserite in modo errato Rimandiamo alla sezione Inserimento delle batterie nel telecomando Nessun segnale su una sorgente di ingresso È possibile che non vi sia nessun dispositivo connesso Controllare i cavi AV e i c...

Страница 26: ... 18 1440x900 75Hz 19 1920x1080 60Hz Compatibilità segnale AV e HDMI Sorgente Segnali supportati Disponibile AV posteriore PAL O SECAM O NTSC4 43 O NTSC3 58 O YPbPr 480i 480p 60Hz O 576i 576p 50Hz O 720p 50Hz 60Hz O 1080i 50Hz 60Hz O HDMI 480i 480p 60Hz O 576i 576p 50Hz O 720p 50Hz 60Hz O 1080i 50Hz 60Hz O 1080p 24Hz 25Hz 30Hz 50Hz 60Hz O X Non disponibile O Disponibile In certi casi i segnali dell...

Страница 27: ... MPEG1 2 H 263 MPEG4 H 264 mkv MPEG 1 2 MPEG4 H 264 flv Sorenson Sp MPEG4 H 264 asf wmv MPEG4 WMV3 VC1 webm VP9 VP8 mp4 mov 3gpp 3gp ts trp tp mkv HEVC H 265 Formati immagine compatibili Estensione Specifiche Risoluzione larghezza x altezza jpg jpeg Baseline 8192 x 8192 Progressive 3000 x 3000 bmp RGB 1 4 8 16 24 32 bit 8192 x 8192 RLE 4 8 bit png Scala di grigi 24 32 bit per pixel Formato interla...

Страница 28: ...mkv ASS SSA TEXT dat mpg mpeg vob Sottotitoli DVD mp4 Sottotitoli DVD TEXT Risoluzioni DVI supportate In fase di collegamento del dispositivo ai connettori della TV usando il cavo convertitore DVI cavo da DVI a HDMI non fornito in dotazione rimandiamo alle seguenti informazioni sulla risoluzione 56Hz 60Hz 66Hz 70Hz 72Hz 75Hz 640x400 x 640x480 x x x x 800x600 x x x x x 832x624 x 1024x768 x x x x x ...

Страница 29: ...zioni Avanzate e premere il pulsante OK Sulla schermata successiva sarà possibile modificare le impostazioni IP e DNS sulla TV Evidenziare la voce desiderata e premere il pulsante Sinistro o Destro per modificare l impostazione da Automatica a Manuale Ora sarà possibile accedere ai valori IP e o DNS Selezionare la voce desiderata dal menù a tendina e inserire i nuovi valori servendosi dei pulsanti...

Страница 30: ...chiesta nessuna ulteriore configurazione Evidenziare Test velocità Internet e premere il tasto OK per controllare la velocità di connessione a Internet Evidenziare Impostazioni avanzate e premere il pulsante OK per aprire il menù impostazioni avanzate Usare i tasti di navigazione e i tasti numerici per eseguire le impostazioni Evidenziare Salva e premere il tasto OK per salvare le impostazioni al ...

Страница 31: ... scoprire come impostare il dispositivo in modalità abbinamento Sarà possibile collegare i dispositivi audio o i telecomandi in modalità remota con la TV Scollegare o spegnere qualsiasi dispositivo audio affinché la funzionalità di collegamento wireless funzioni correttamente Per i dispositivi audio è opportuno usare l opzione Audio Link nel menu Impostazioni Audio per il telecomandi l opzione Sma...

Страница 32: ... MAC address viene autenticato ogni volta che ci si collega a Internet Si tratta di una precauzione per evitare accessi non autorizzati Dato che la TV dispone del proprio MAC address il fornitore del servizio internet non può convalidare il MAC address della propria TV Per questa ragione la TV non può essere connessa a Internet Contattare il proprio fornitore del servizio internet e richiedere inf...

Страница 33: ...e Per navigare nel browser web servirsi dei pulsanti direzionali sul telecomando o su un mouse collegato Per vedere la barra opzioni browser spostare il cursore verso la parte superiore della pagina Le opzioni Cronologia Schede e Segnalibri e la barra del browser che contengono i pulsanti precedente successivo il pulsante di aggiornamento la barra indirizzo ricerca i pulsanti Compositore veloce e ...

Страница 34: ...o per chiudersi di norma si usa il pulsante Esci Le applicazioni HbbTv si servono di tasti del telecomando per interagire con l utente Quando viene lanciata un applicazione HbbTv il controllo di alcuni tasti appartiene all applicazione La selezione dei canali numerici ad esempio potrebbe non funzionare su un applicazione televideo in cui i numeri indicano i numeri di pagina HbbTv richiede che la p...

Страница 35: ...rsione dell applicazione corrente Pagina dettaglio Per aprire la pagina dettaglio toccare un programma Sulla schermata pagina dettaglio sarà possibile ottenere informazioni dettagliate dei programmi selezionati In questa pagina si troveranno le schede Dettagli Cast Crew e Video DETTAGLI Questa scheda fornisce il riassunto e informazioni relativamente al programma selezionato Ci sono anche link all...

Страница 36: ...rimanda al manuale dell u tente della Microphone Box per ulteriori informazioni Funziona con Alexa Con Alexa è possibile controllare le funzioni del tele visore Per farlo il processo di installazione dovrebbe essere completato La configurazione può essere eseguita come descritto di seguito Utilizzare l opzione Works With Alexa nel menu Impostazioni Sistema Assistente Vocale Eseguire la procedura d...

Страница 37: ...disponibile Alexa prossimo canale su NA Il TV cambia canale sintonizzandosi sul canale successivo della lista canali FN NA è l abbreviazione per Friendly Name Nome Amichevole Assistente Google Il tuo televisore funziona con Hey Google per il con trollo vocale dei dispositivi e degli apparecchi collegati Funziona con Hey Google Tramite questa funzione si può controllare le funzioni della TV con i d...

Страница 38: ...into nizzandosi sul canale più alto se disponibile canale giù su FN Il TV cambia canale sinto nizzandosi sul canale più basso se disponibile FN NA è l abbreviazione per Friendly Name Nome Amichevole Google è un marchio registrato Google LLC Informazioni sulla funzionalità DVB II ricevitore DVB è adatto unicamente per essere usato nel paese per il quale è stato progettato Nonostante questo ricevito...

Страница 39: ... al riciclaggio al trattamento o allo smaltimento ambientalmente compatibile contribuisce ad evitare possibili effetti negativi sull ambiente e sulla salute e favorisce il riciclo dei materiali di cui è composta l apparecchiatura Lo smaltimento abusivo del prodotto da parte dell utente comporta l applicazione delle sanzioni amministrative di cui al D Lgs n 152 del 3 aprile 2006 Prodotto conforme a...

Страница 40: ...Using the Channel List 20 Configuring Parental Settings 20 Electronic Programme Guide 20 Teletext Services 21 Software Upgrade 21 Troubleshooting Tips 21 PC Input Typical Display Modes 22 AV and HDMI Signal Compatibility 22 Supported File Formats for USB Mode 23 Video File Formats 23 Picture File Formats 23 Audio File Formats 23 Subtitle File Formats 24 Supported DVI Resolutions 24 Connectivity 25...

Страница 41: ...er cords When damaged it must be replaced this should only be done by qualified personnel Do not expose the TV to dripping or splashing of liquids and do not place objects filled with liquids such as vases cups etc on or over the TV e g on shelves above the unit Do not expose the TV to direct sunlight or do not place open flames such as lit candles on the top of or near the TV Do not place any hea...

Страница 42: ...ision distribution system using coaxial cable may in some circumstan ces create a fire hazard Connection to a television distribution system has therefore to be provided through a device providing electrical isolation below a certain frequency range galvanic isolator WALL MOUNTING WARNINGS Read the instructions before mounting your TV on the wall The wall mount kit is optional You can obtain from ...

Страница 43: ...hours by default If this setting is not set as Off and the TV has been left on and not been operated during the set time it will switch into standby mode after the set time has expired When you next switch on the TV the following message will be displayed TV switched to stand by mode automatically because no operation was made for a long time Before the TV switches into standby mode a dialogue win...

Страница 44: ...ress OK In order to move a menu item use the Right and Left direction buttons to select the position that you want the item to move to and press OK 2 Search You can search for Channels Guide TV menus Applications Web YouTube and Videos using this option Press OK and enter a key word using the virtual keyboard Then highlight OK and press OK to start the search Results will be displayed on the scree...

Страница 45: ...V set to reach the ambient room temperature before you connect the set to the mains Plug the power cable to the mains socket outlet Antenna Connection Connect the aerial or cable TV plug to the aerial input ANT socket or satellite plug to the satellite input LNB socket located on the rear side of the TV Rear side of the TV 1 2 LNB ANT 1 Satellite 2 Aerial or cable If you want to connect a device t...

Страница 46: ... Other Countries outside the European Union These symbols are only valid in the European Union Contact your local authority to learn about disposal and recycling The product and packaging should be taken to your local collection point for recycling Some collection points accept products free of charge Note The sign Pb below the symbol for batteries indicates that this battery contains lead 1 2 1 P...

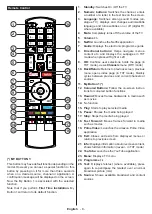
Страница 47: ...ctions 13 Rewind Moves frames backwards in media such as movies 14 No function 15 Play Starts to play selected media 16 Pause Pauses the media being played 17 Stop Stops the media being played 18 Fast Forward Moves frames forward in media such as movies 19 Prime Video Launches the Amazon Prime Video application 20 Exit Closes and exits from displayed menus or returns to previous screen 21 Info Dis...

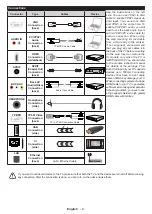
Страница 48: ...PC audio cable for audio connection When using the wall mounting kit available from a third party in the market if not supplied we recommend that you plug all your cables into the back of the TV before mounting on the wall Insert or remove the CI module only when the TV is SWITCHED OFF You should refer to the module instruction manual for details of the settings The Each USB input of your TV suppo...

Страница 49: ...gs menu may appear at this point Using this menu you can set your privacy privileges Highlight a feature and use Left and Right directional buttons to enable or disable Read the related explanations displayed on the screen for each highlighted feature before making any changes You can use Programme buttons to scroll up and down to read the entire text You will be able to change your preferences at...

Страница 50: ...ll be displayed You can edit the channel list according to your preferences using the Edit tab options or press the Menu button to quit and watch TV While the search continues a message may appear asking whether you want to sort channels according to the LCN Select Yes and press OK to confirm LCN is the Logical Channel Number system that organizes available broadcasts in accordance with a recogniz...

Страница 51: ...ources List menu When new CEC source device is connected it will be listed in source menu with its own name instead of the connected HDMI ports name such as DVD Player Recorder 1 etc The TV remote is automatically able to perform the main functions after the connected HDMI source has been selected To terminate this operation and control the TV via the remote again press and hold the 0 Zero button ...

Страница 52: ...the top or bottom of the screen Dot Clock Dot Clock adjustments correct the interference that appear as vertical banding in dot intensive presentations like spreadsheets or paragraphs or text in smaller fonts Phase Depending on the input source computer etc you may see a hazy or noisy picture on the screen You can use phase to get a clearer picture by trial and error Advanced Settings Dynamic Cont...

Страница 53: ...ption Note This option may not be available depending on the TV model and its features HDMI Full Range While watching from a HDMI source this feature will be visible You can use this feature to enhance blackness in the picture Reset Resets the picture settings to factory default settings except Game mode While in VGA PC mode some items in Picture menu will be unavailable Instead VGA mode settings ...

Страница 54: ...Audio menu item is set to an option other than Off the AVL setting options will change Auto Night Normal and Off options will be available In Auto mode the TV will switch to Normal or Night mode automatically according to the current time information If no time information is available this option will always function as Normal When the TV switches to Night mode for the first time after setting th...

Страница 55: ...work channels D Cable Searches for cable network channels Satellite Searches for satellite network channels Analogue fine tune You can use this setting for fine tuning analogue channels This feature is not available if no analogue channels are stored and if currently watched channel is not an analogue channel Satellite Settings Displays satellite settings Satellite list Displays available satellit...

Страница 56: ...logue enhancement Off Low Medium and High options will be available Set according your preference Note This feature has an effect only if input audio format is AC 4 and this effect only applies to TV loudspeaker output Spoken Subtitles Default preference of spoken subtitles is selected with this setting option To make spoken subtitles priority higher than normal ones this option should be set to O...

Страница 57: ...Start and press OK If the setup is priorly completed Sign Out option will be available If you sign out Google Assistant feature will be disabled Refer to Google Assistant section for more information More Displays other setting options of the TV Menu Timeout Changes timeout duration for menu screens Standby LED If set as Off the standby LED will not light up when the TV is in standby mode Software...

Страница 58: ...ding the priority between the broadcast applications and CICAM AppMMI applications using this option In case a CICAM is inserted into the TV and a contention occurs between the applications the priority will be given to the selected type of application Note Some options may not be available depending on the model of your TV and the selected country in the First Time Installation ...

Страница 59: ...t to 18 as default Child Lock If this option is set to On the TV can only be controlled by the remote control In this case the control buttons on the TV will not work Internet Lock If this option is set to ON the internet using applications will be disabled Set to OFF to release these applications again Set PIN Defines a new PIN number Default CICAM PIN This option will appear as greyed out if no ...

Страница 60: ...ur TV is capable of finding and updating the firmware automatically via the broadcast signal or via Internet Software upgrade search via user interface On the main menu select Settings System and then More Navigate to Software upgrade and press the OK button Then select Scan for upgrade and press OK button to check for a new software upgrade If a new upgrade is found it starts to download the upgr...

Страница 61: ... 72Hz 6 800x600 75Hz 7 1024x768 60Hz 8 1024x768 70Hz 9 1024x768 75Hz 10 1152x864 75Hz 11 1280x768 60Hz 12 1360x768 60Hz 13 1280x960 60Hz 14 1280x1024 60Hz 15 1280x1024 75Hz 16 1400x1050 60Hz 17 1440x900 60Hz 18 1440x900 75Hz 19 1920x1080 60Hz AV and HDMI Signal Compatibility Source Supported Signals Available Back AV PAL O SECAM O NTSC4 43 O NTSC3 58 O YPbPr 480i 480p 60Hz O 576i 576p 50Hz O 720p ...

Страница 62: ...p MPEG1 2 H 263 MPEG4 H 264 mkv MPEG 1 2 MPEG4 H 264 flv Sorenson Sp MPEG4 H 264 asf wmv MPEG4 WMV3 VC1 webm VP9 VP8 mp4 mov 3gpp 3gp ts trp tp mkv HEVC H 265 Picture File Formats Extension Specification Resolution width x height jpg jpeg Baseline 8192 x 8192 Progressive 3000 x 3000 bmp RGB 1 4 8 16 24 32 bit 8192 x 8192 RLE 4 8 bit png Grayscale 24 32 bit per pixel Interlace format Progressive Au...

Страница 63: ...on mkv VOBSub mkv ASS SSA TEXT dat mpg mpeg vob DVD Subtitle mp4 DVD Subtitle TEXT Supported DVI Resolutions When connecting devices to your TV s connectors by using DVI converter cable DVI to HDMI cable not supplied you can refer to the following resolution information 56Hz 60Hz 66Hz 70Hz 72Hz 75Hz 640x400 x 640x480 x x x x 800x600 x x x x x 832x624 x 1024x768 x x x x x 1152x864 x x x 1152x870 x ...

Страница 64: ...nd DNS settings of the TV Highlight the desired one and press Left or Right button to change the setting from Automatic to Manual Now you can enter the IP and or DNS values manually Select the related item in the drop down menu and enter the new values using the numeric buttons of the remote Highlight Save and press the OK button to save settings when complete Wireless Connectivity To Connect to a...

Страница 65: ... Other Information The status of the connection will be displayed as Connected or Not Connected and the current IP address if a connection is established Connecting to your mobile device via WLAN If your mobile device has WLAN feature you can connect it to your TV via a router in order to access the content in your device For this your mobile device must have an appropriate sharing software Connec...

Страница 66: ...ion is successfully established If the connection fails try it again Image transfer and audio streaming You can also use this type of connection to transfer images or stream audio from your mobile device to your TV Pair the mobile device and the TV as described before Start a device search in your hand held device Select your TV from listed devices Confirm the request for connection on your TV scr...

Страница 67: ... you to view and play photos music and videos stored in the media server connected to your home network 1 Server Software Installation The Audio Video Sharing feature cannot be used if the server programme is not installed onto your PC or if the required media server software is not installed onto the companion device Prepare your PC with a proper server programme 2 Connect to a Wired or Wireless ...

Страница 68: ...vigation Some web pages include flash content These are not supported by the browser Your TV does not support any download processes from the internet via the browser All sites on the internet might not be supported According to the site content problems may occur In some circumstances video contents might not be able to be played HBBTV System HbbTV Hybrid Broadcast Broadband TV is a new industry ...

Страница 69: ...laced TV You can watch content through the TV tab In this mode you can navigate through the channel list retrieved from your TV and click on thumbnails to view the detail pages RECORDINGS You can view your active recordings if available and reminders through this tab To delete any item simply press on the delete icon found on each row EPG Electronic programme guide You can view the broadcast sched...

Страница 70: ...droid and iOS platforms 5 Router modem 6 USB storage device in FAT32 format required for USB Recording feature if available Notes For Android devices Normal mdpi Large hdpi and Extra Large xhdpi screen sizes are supported Devices with 3 or smaller screen sizes are not supported For iOS devices all screen sizes are supported User interface of the Smart Center application is subject to change accord...

Страница 71: ...ayback Alexa pause FN Pauses media playback Alexa resume FN Resumes media playback Alexa stop FN Stops media playback Alexa fast forward on FN Advances media in fast forward mode Alexa rewind on FN Rewinds media Alexa set the volume of FN to 50 Sets the volume to the specified level Command Function Alexa turn the volume up on FN Increases volume by 10 units Alexa turn the volume down on FN Decrea...

Страница 72: ...eases volume set mute volume on FN Mutes sound switch input to input_ name on FN The TV switches to the input source with the spec ified name e g HDMI 1 switch to input_name on FN change channel to chan nel_number on FN The TV switches to the channel with the specified number e g channel 200 change channel to chan nel_name on FN The TV switches to the channel with the specified name channel up on ...

Страница 73: ...regarding disposal of your unit we recommend that you contact the competent public agencies the waste collection service or the shop where you purchased the product In conformity with applicable rules and regulations Due to the continuous evolution of the products the features and design of this model may change without notice ASSEMBLED IN TURKEY Manufacturer Fabbricante VESTEL TICARET AS Organize...

Страница 74: ...na RF 75 Ohm non bilanciato RF Aerial Input 75 Ohm unbalanced Tensione Operativa 220 240V CA 50Hz Operating Voltage 220 240V AC 50Hz Audio German Nicam Stereo Audio German Nicam Stereo Potenza Uscita Audio WRMS 10 THD 2 x 2 5 Audio Output Power WRMS 10 THD 2 x 2 5 Consumo energetico W 45 Power Consumption W 45 Standby di rete Consumo energetico W 2 Networked Standby Power Consumption W 2 Dimension...

Страница 75: ...relser Længde X Tråd Y Русский РАЗМЕРЫНАСТЕННОГОКРЕПЛЕНИЯVESA Размерысистемыотверстий Размерывинтов Длина Х Резьба Y беларуская ПАМЕРЫНАСЦЕННАГАМАЦАВАННЯVESA Памерысістэмыадтулін Памерывінтоў Даўжыня X Разьба Y македонски МЕРКИЗАМОНТИРАЊЕНАЅИДЗА ВЕСА Шеманаголемининадупката мм Големинанашрафот Должина Х Навој Y українськa РОЗМІРИНАСТІННОГОКРІПЛЕННЯVESA Відстаньміжкріпильнимиотворами мм Розміригвин...

Страница 76: ...2014 53 EU Cjeloviti tekst EU izjave o sukladnosti dostupan je na sljedećoj internetskoj adresi doc vosshub com HU VESTEL Elektronik Sanayi ve TicaretA Ş igazolja hogy a TFT IDTV típusú rádióberendezés megfelel a 2014 53 EU irányelvnek Az EU megfelelőségi nyilatkozat teljes szövege elérhető a következő internetes címen doc vosshub com IT Il fabbricante VESTEL Elektronik Sanayi ve Ticaret A Ş dichi...

Страница 77: ...50588582 ...

Отзывы: