background image

DIAMOND SERIES USER GUIDE   

www.teledex.com


5

These telephone devices are intended for 
commercial use only, primarily in hotel guestrooms. 
They must be used with a PBX (private branch 
exchange), and are not intended to be connected 
directly to a PSTN line (public switched telephone 
network). There are no user-serviceable parts 
inside the equipment.

Care and Maintenance

• 

Keep the telephone dry. If it gets wet, wipe it 
dry immediately. Liquids might contain minerals 
that can corrode the electronic circuits.

• 

Use and store the telephone in a normal 
temperature environment.
 Temperature 
extremes can shorten the life of electronic 
devices and distort or melt parts.

• 

Keep the telephone away from excessive 
dust and dirt
 which can cause premature 
wear of parts.

• 

Wipe the telephone with a damp cloth 
occasionally to keep it looking new. Do not use 
harsh chemicals, cleaning solvents, or strong 
detergents to clean the system.

Technical Specifications

This guide covers product made from 2009 
forward with a serial number beginning with XX. 
For all other models please refer to the Teledex 
website for legacy product documentation.

DIMENSIONS

6.25” (w) x 9.5” (l) x 3.75” (h)

WEIGHT

With handset: 1.85 lbs.

User Guides

If additional User Guides are needed, please go 
to www.teledex.com to download the PDF.

Service

When problems arise that cannot be resolved 
using this or related documents, please go to 
www.teledex.com/support for information about 
customer support, technical support, warranty, 
and product returns.

Statement of Limited Warranty

Teledex product warranty information is available 
at www.teledex.com.

Converting from Desk to Wall 

Mount

The Diamond Series phone can be converted for 
wall mounting applications. The conversion is 
easiest when the handset and line cords are not 
connected.
  1.   Located on the top of the telephone above 

the speaker grill is the wall/desk mount 
clip. Remove this clip by firmly pushing 
upward (towards the hookswitch).

  2.   Flip the clip over (top to bottom) so that 

the protruding edge is towards the top of 
the phone, and reinsert into cutout. This 
protruding edge will hold the handset.

  3.   Turn the telephone over so the bottom is 

up, facing you. Place the telephone on a 
non-abrasive surface to prevent scratching.

  4.   Locate and remove the mounting bracket, 

firmly push back and pull up to remove two 
of the four retaining tabs.

  5.   Rotate the mounting bracket 180 degrees 

clockwise so that the mounting eyelet on 
the bracket is facing in the same direction 
as the other mounting eyelet located on 
the bottom of the telephone.

  6.   Insert the top two retaining tabs of the 

mounting brackets into the mounting 
bracket slots (located near the middle of 
the telephone). Then firmly push down to 
insert the retaining tabs on the opposite 
side of the mounting bracket.

  7.   Connect a short modular line cord into the 

jack on the back of the phone (labeled LINE). 
Route the line cord through the line cord 
channel. Connect the other end of line cord 
to the phone jack on the wall mounting plate.

  8.   Turn the telephone over, and slide the 

telephone down onto the mounting posts 
in downward direction. Both eyelets should 
line up with the mounting posts.

  9.   Complete the wall mounting by installing 

the handset and handset cord.

Содержание DIAMOND SERIES

Страница 1: ...DIAMOND SERIES USER GUIDE For Diamond 1 Line and 2 Line Corded with and without Speakerphone ...

Страница 2: ...hock when the appliance is subsequently used 9 Unplug this product from the wall outlet and refer servicing to qualified service personnel under the following conditions When the power supply cord or plug is damaged or frayed If liquid has been spilled into the product If the product has been exposed to rain or water If the product does not operate normally by following the operating instructions ...

Страница 3: ...users should ensure that it is permissible to be connected to the facilities of the local telecommunications company The equipment must also be installed using an acceptable method of connection The customer should be aware that compliance with the above conditions may not prevent degradation of service in some situations Repairs to certified equipment should be coordinated by a representative des...

Страница 4: ...ost but not all areas the sum of RENs should not exceed five 5 0 To be certain of the number of devices that may be connected to a line as determined by the total RENs contact the local telephone company For products approved after July 23 2001 the REN for this product is a part of the product identifier that has the format US AAAEQ TXXXX The digits represented by are the REN without a decimal poi...

Страница 5: ...ted Warranty Teledex product warranty information is available at www teledex com Converting from Desk to Wall Mount The Diamond Series phone can be converted for wall mounting applications The conversion is easiest when the handset and line cords are not connected 1 Located on the top of the telephone above the speaker grill is the wall desk mount clip Remove this clip by firmly pushing upward to...

Страница 6: ...ng Submerged Store and Flash 9 Storing a Number into Memory Keys Store 9 Programming Flash Timing 10 Programming Pause Timing 10 Flash Hook Function Flash 10 Message 10 Diamond Series 2 Line Corded Phones 11 Unpacking Your Telephone 11 Installation 11 Caution Information 11 Connecting the Handset Cord 11 Connecting the Line Cord 11 Features 11 Operation 12 Volume 12 Indicators 12 Calling 12 Progra...

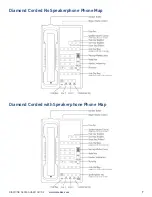
Страница 7: ...DIAMOND SERIES USER GUIDE www teledex com 7 Diamond Corded No Speakerphone Phone Map Diamond Corded with Speakerphone Phone Map ...

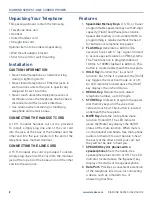
Страница 8: ...se are storable Speed dial memory is non volatile RAM so programming is retained without the need for batteries or telephone line power 2 FLASH Key Generates a 600 ms 0 6 seconds hook switch tap signal Utilized to access special features on PBX systems The Flash function is programmable at 100 ms to 1000Ms default is 600 ms This button is located underneath the faceplate 3 HOLD Key Controls the lo...

Страница 9: ...ER On a single line telephone when the phone rings lift the handset or press the speaker key if you have a speakerphone to begin the conversation PLACING A CALL USING THE SPEAKERPHONE The Diamond Series speakerphones are equipped with a high quality speakerphone feature to allow hands free operation To use simply press the Speaker key when placing or answering a call The telephone line will activa...

Страница 10: ... 5 Press PAUSE REDIAL 6 Hang up phone to exit programming FLASH HOOK FUNCTION FLASH The Flash function is used to access PBX features or Telco line features such as Call Waiting The Flash function is a 600 ms timed line break If the Flash function will be used often store the feature into memory located for easy access as follows 1 Lift the handset then press the STORE Key 2 Press the FLASH Key 3 ...

Страница 11: ... programming is retained without the need for batteries or telephone line power 2 Line 1 Key Press Line 1 to place a call to a party on Line 1 Place the call on hold if you want to initiate a call on Line 2 3 Line 2 Key Press Line 2 to place a call to a party on Line 2 Place the call on hold if you want to initiate a call on Line 1 4 CONF Conference Key The Conf key allows three way conversations ...

Страница 12: ...s of the speakerphone 10 STORE Key Utilized to program the speed dial memory keys and the voice mail retrieval touch bar This button is located underneath the faceplate 11 Data Port Provides a convenient extension of the connected telephone line for connecting a device such as a modem fax or answering machine Operation VOLUME HANDSET AND SPEAKER VOLUME CONTROL The handset volume control increases ...

Страница 13: ... ms increments The default Flash timing is 600 ms 1 Lift the handset off hook position 2 Press the STORE key once 3 Program FLASH by pressing 1 for 100 ms 2 for 200 ms etc 4 Press STORE 5 Press FLASH 6 Exit programming by hanging up the handset PROGRAMMING PAUSE TIMING Pause timing options are 1 second through 5 seconds programmable in 1 second increments The default pause timing is 3 5 seconds 1 ...

Страница 14: ...is document subject to change without notice CetisTM Teledex TeleMatrix Scitec ExpressNet and Teledex iPhoneTM are trademarks or registered trademarks of Cetis Inc TDX D UG 122012 Toll Free 1 800 462 9446 Tel 1 719 638 8821 Email info teledex com www teledex com ...

Отзывы: