background image

Power off the instrument

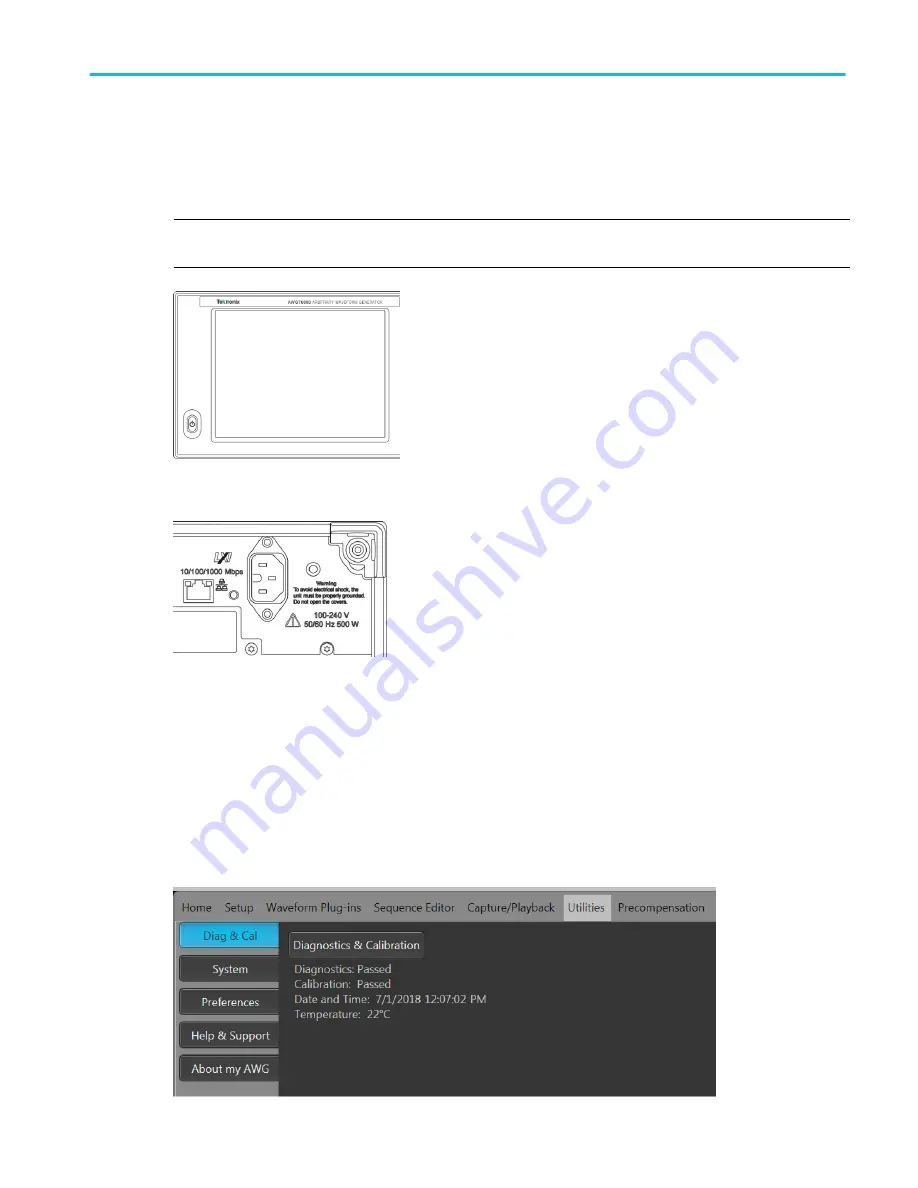
1. Press the front-panel power button to shut down the instrument.

The shutdown process takes approximately 30 seconds to complete, placing the instrument in standby mode. Alternatively,
use the Windows Shutdown menu.

NOTE. You can force an immediate shutdown by pressing and holding the power button for four seconds. Unsaved data is
lost.

2. To completely remove power to the instrument, perform the shutdown just described, and then remove the power cord from

the instrument.

Inspect the instrument

Two types of diagnostics are provided to verify the functionality of your instrument: 

Power-on self test (POST) – Every time you power on the instrument, the instrument automatically performs the POST
internal diagnostics. 

Diagnostics from the System menu – You can run the internal diagnostics from the System menu. Use the following
procedure: 

1. Select Utilities from the workspace tabs, then select Diag & Cal.
2. Click Diagnostics & Calibration.


Install the instrument

AWG70000B Series Installation and Safety Instructions 

9

Содержание AWG70001B

Страница 1: ...AWG70001B and AWG70002B Arbitrary Waveform Generators Installation and Safety Instructions P071359700 071 3597 00 ...

Страница 2: ......

Страница 3: ...AWG70001B and AWG70002B Arbitrary Waveform Generators Installation and Safety Instructions www tek com 071 3597 00 ...

Страница 4: ...sued and pending Information in this publication supersedes that in all previously published material Specifications and price change privileges reserved TEKTRONIX and TEK are registered trademarks of Tektronix Inc Contacting Tektronix Tektronix Inc 14150 SW Karl Braun Drive P O Box 500 Beaverton OR 97077 USA For product information sales service and technical support In North America call 1 800 8...

Страница 5: ...s taxes and any other charges for products returned to any other locations This warranty shall not apply to any defect failure or damage caused by improper use or improper or inadequate maintenance and care Tektronix shall not be obligated to furnish service under this warranty a to repair damage resulting from attempts by personnel other than Tektronix representatives to install repair or service...

Страница 6: ......

Страница 7: ...ment Standard accessories 3 Models 4 Product upgrades 4 Plug ins 5 Replaceable parts 6 Operating requirements 7 Cooling 7 Environmental requirements 7 Power supply requirements 7 Cleaning 7 Power on the instrument 8 Power off the instrument 9 Inspect the instrument 9 Self calibration 10 Connecting to the instrument 12 Connecting to a network 12 Connecting peripheral devices 12 Controlling the inst...

Страница 8: ... interface 25 Run state control 25 Run state status indicators screen Play Stop button 25 Run state status indicators front panel Play Stop button 26 Run mode 26 Changing control settings 26 Preferences 27 System 28 Restoring instrument operating system and product software 29 Operating system restore 29 Internal recovery utility 29 AWG product software installation 29 Basic guidelines to play a w...

Страница 9: ...uct This product is grounded through the grounding conductor of the power cord To avoid electric shock the grounding conductor must be connected to earth ground Before making connections to the input or output terminals of the product ensure that the product is properly grounded Do not disable the power cord grounding connection Power disconnect The power cord disconnects the product from the powe...

Страница 10: ...provided for ventilation and should never be covered or otherwise obstructed Do not push objects into any of the openings Provide a safe working environment Always place the product in a location convenient for viewing the display and indicators Avoid improper or prolonged use of keyboards pointers and button pads Improper or prolonged keyboard or pointer use may result in serious injury Be sure y...

Страница 11: ... a hazard to property including the product Symbols on the product When this symbol is marked on the product be sure to consult the manual to find out the nature of the potential hazards and any actions which have to be taken to avoid them This symbol may also be used to refer the user to ratings in the manual The following symbols may appear on the product Important safety information AWG70000B S...

Страница 12: ...Important safety information vi AWG70000B Series Installation and Safety Instructions ...

Страница 13: ... 4 4 Electrical fast transient burst immunity IEC 61000 4 5 Power line surge immunity IEC 61000 4 6 Conducted RF immunity IEC 61000 4 8 Power frequency magnetic field immunity test IEC 61000 4 11 Voltage dips and interruptions immunity EN 61000 3 2 AC power line harmonic emissions EN 61000 3 3 Voltage changes fluctuations and flicker EMC Compliance Meets the intent of Directive 2014 30 EU for Elec...

Страница 14: ...ory Use Part 1 General Requirements Equipment type Test and measuring equipment Safety class Class 1 grounded product Pollution degree description A measure of the contaminants that could occur in the environment around and within a product Typically the internal environment inside a product is considered to be the same as the external Products should be used only in the environment for which they...

Страница 15: ...es with RoHS2 Directive 2011 65 EU Product end of life handling Observe the following guidelines when recycling an instrument or component Equipment recycling Production of this equipment required the extraction and use of natural resources The equipment may contain substances that could be harmful to the environment or human health if improperly handled at the product s end of life To avoid relea...

Страница 16: ...Compliance Information x AWG70000B Series Installation and Safety Instructions ...

Страница 17: ...Sample rates Up to 50 GS s for single channel instruments Up to 25 GS s for two channel instruments Waveform memory Up to 32 GSamples for single channel instruments Up to 16 GSamples per channel for two channel instruments Sequencer Streaming Waveform ID Streaming WID 80 dBc Spurious Free Dynamic Range 10 bit vertical resolution Removable hard disk drive 6 USB ports 2 front USB 2 0 4 rear USB 3 0 ...

Страница 18: ...ronix part number 077 1446 xx Programmer commands Programmer manual Tektronix part number 077 1452 xx Specifications and performance verification procedures Specifications and Performance Verification Technical Reference Tektronix part number 077 1453 xx Conventions used in this manual The following icons are used throughout this manual Step Front panel power Connect power Network SVGA USB Preface...

Страница 19: ...9 7275 xx Windows compatible mouse 119 7054 xx Analog output SMA adapters Pre installed on outputs 131 8689 xx Two with the AWG70001B Three with Option AC Four with the AWG70002B 50 Ω SMA Termination Male DC to 18 GHz 015 1022 xx One with the AWG70001B Two with the AWG70002B Power cord one of the following North America Option A0 161 0348 xx Universal Euro Option A1 161 0343 xx United Kingdom Opti...

Страница 20: ...sion to 16 GSamples per channel AWG70002B SEQ Adds Sequencing AWG70000 STRID Adds Streaming Waveform ID Streaming WID requires AWG70002B SEQ Product upgrades AWG70001B upgrades Description AWG70001B STRID Adds Streaming Waveform ID Streaming WID requires AWG70001B SEQ AWG70001B SEQ Adds sequencing AWG701BUP SSD Provides an additional or replacement preprogrammed solid state drive AWG701BUP AC Adds...

Страница 21: ... are included with HSSPACK RF Generic plug in Create digitally modulated signals with multiple carrier groups RFGENNL SS01 RFGENFL SS01 S Parameters unlocked with S Parameters plug in license Optical plug in Create waveforms with complex modulation schemes for optical testing OPTICALNL SS01 OPTICALFL SS01 S Parameters unlocked with S Parameters plug in license Spread Spectrum Clocking unlocked wit...

Страница 22: ...loating FL Node Locked Licenses NL provide your own copy of the application on your instrument and are permanently assigned to a product model serial number Floating Licenses FL can be moved between product models Replaceable parts Item Tektronix part number Rear panel foot four per instrument 348 2037 xx Screw 211 1459 xx Front bottom flip foot two per instrument 348 1950 xx Screw 211 1459 xx Foo...

Страница 23: ...dity at up to 30 C 86 F 5 to 45 relative humidity above 30 C 86 F up to 50 C 122 F noncondensing Altitude operating Up to 3 000 m 9 843 feet Power supply requirements The power supply requirements for your instrument are listed in the following table WARNING To reduce the risk of fire and shock ensure that the mains supply voltage fluctuations do not exceed 10 of the operating voltage range Source...

Страница 24: ... clean the instrument If needed use a 75 isopropyl alcohol solution as a cleaner Do not spay liquids directly on the instrument Power on the instrument 1 Connect the AC power cord to the rear of the instrument 2 Use the front panel power button to switch the instrument on The power button indicates four instrument power states No light no power applied Yellow standby mode Green powered on Flashing...

Страница 25: ... the shutdown just described and then remove the power cord from the instrument Inspect the instrument Two types of diagnostics are provided to verify the functionality of your instrument Power on self test POST Every time you power on the instrument the instrument automatically performs the POST internal diagnostics Diagnostics from the System menu You can run the internal diagnostics from the Sy...

Страница 26: ...he Loop selection 7 Click Start to run the diagnostics The Start button changes to Abort while tests are actively running Verify that the instrument passes all tests If diagnostic failures occur contact your local Tektronix service personnel Self calibration The self calibration uses internal calibration routines that adjust the internal calibration constants as necessary If the instrument detects...

Страница 27: ...eselected 5 Click Start The Start button changes to Abort once the calibration has started Clicking Abort stops the calibration process and restores all values to their previous state All calibration items should indicate Pass If not contact your local Tektronix service personnel Install the instrument AWG70000B Series Installation and Safety Instructions 11 ...

Страница 28: ...ainst overheating damage by continuously monitoring the internal temperature If the internal temperature exceeds the maximum rated operating range two actions occur The instrument shuts down The Power button flashes red NOTE An indication that the internal temperature is escalating is continual calibration warnings due to temperature change If an overheat condition was detected the power button wi...

Страница 29: ...tive Your instrument can be enhanced by several different methods Software enhancements Enhancements ordered at the time of your purchase are pre installed These can also be purchased post sales and may require the installation of software in addition to installing a license to activate Hardware enhancements Features that require enable hardware on the instrument These can be ordered with the purc...

Страница 30: ...tored the license file 3 Select the license file and select Open After the successful installation is finished the name of the licensed feature is listed along with the expiration date and time Floating licenses display the expiration date for that application The expiration date for a floating license is defined when the license is checked out from the Tektronix Asset Management system After the ...

Страница 31: ...ol Panel Avoid making changes to any controls with which you are unfamiliar Do not delete or change any system fonts this can affect the quality of the display Be careful when making changes to the system Display properties Changing settings such as resolution text size fonts and orientation affects the usability of the display and the touchscreen Do not change the contents of the Windows folder o...

Страница 32: ...Install the instrument 16 AWG70000B Series Installation and Safety Instructions ...

Страница 33: ...Operation basics AWG mode overview The following illustration and table provide a high level overview of the AWG mode AWG70000B Series Installation and Safety Instructions 17 ...

Страница 34: ...he channel is enabled The All Outputs Off is not active outputs are connected 3 All outputs off The All Outputs Off button provides a quick disconnect of the analog and marker outputs whether those outputs are enabled or not All Outputs Off overrides the channel output enable controls The outputs are electrically disconnected When the All Outputs Off is disabled the outputs return to their defined...

Страница 35: ...Display the instrument help 11 Waveform display Toggles the channel s waveform plot display on or off 12 Channel settings display Shows or hides additional channel controls Functions mode overview The Functions interface provides you with a quick and easy way to generate simple types of waveforms Refer to the following illustration and table for information on the key screen elements Operation bas...

Страница 36: ...and the Functions mode 5 Workspace The workspace area shows the parameters of the selected waveform type 3 All outputs off The All Outputs Off button provides a quick disconnect of the analog and marker outputs whether those outputs are enabled or not All Outputs Off overrides the output enable controls The outputs are electrically disconnected When the All Outputs Off is disabled the outputs retu...

Страница 37: ...f different types of connectors The instruments ship with SMA type adapters installed AC output option AC AWG70001B only This connector supplies a single ended analog signal The AC output provides for additional amplification and attenuation of the output signal The AC output LED lights to indicate when the AC output is enabled and the output is electrically connected The LED color matches the use...

Страница 38: ...on either the front panel button or the screen button to quickly disable the Analog Marker and Flag outputs When the All outputs off is enabled the output connectors are electrically disconnected from the instrument Do not connect a DUT to the front panel signal output connectors when the instrument signal outputs are on Do not power on or off the DUT when the arbitrary waveform generator signal o...

Страница 39: ...uchscreen Off The Touchscreen Off button enables or disables touchscreen control When disabled the button lights When the touchscreen is enabled you can use your finger or the stylus to control all operations of the instrument from the display The touchscreen can be used alone or in combination with the mouse and front panel controls When the touchscreen is disabled you can still access the on scr...

Страница 40: ... USB devices Tektronix does not provide support or device drivers for USB devices other than the supplied mouse and keyboard USB Device USB Device connector type B interfaces with the TEK USB 488 GPIB to USB adapter and provides connectivity with GPIB based control systems Pattern Jump In 15 pin DSUB connector to provide a pattern jump event for Sequencing Option 03 Sync to Hub Connector for use w...

Страница 41: ...n but no signal is output through the Analog Output connectors unless the Channel output is enabled Run state status indicators screen Play Stop button The play button in the graphical interface changes appearance to indicate the waveform play out status Below are the various indicators Indicator Description Not lighted stopped or idle with no waveforms being played Green with sine wave currently ...

Страница 42: ...tes an entire cycle For two channel instruments both waveforms must complete a cycle Pressing a Force Trig A or B button has no effect if play out is in process Triggered Continuous Waveform play out starts when a proper external trigger event occurs or a Force Trig A or B button is pressed Once a trigger event occurs waveform play out continues until stopped by the user Changing control settings ...

Страница 43: ...ontrol You can choose to disable all error pop up screens When enabled errors messages are displayed in the status bar at the bottom of the display Brightness controls Adjust the brightness levels of the display and front panel LEDs NOTE Marker front panel LEDs are not adjustable Display size control You can choose to reduce the display size of all text and dialog screens NOTE The display size con...

Страница 44: ...rol the instrument directly from it s interface This setting is retained for subsequent power on cycles GPIB You can enter a unique GPIB address here If changing the address you must disconnect and reconnect the external USB to GPIB converter Security Adjust the security settings for the instrument Lock Instrument Displays the Windows lock screen The programmable interface is not affected USB Port...

Страница 45: ...g restore images preinstalled on the hard drive This method retains the restore images providing the ability to repeat the restore process 1 Attach the keyboard to the instrument 2 Restart the instrument During the boot up process you will see the following message at the top of the screen Starting Acronis Loader press F5 for Acronis Startup Recovery Manager 3 Repeatedly press the F5 key until the...

Страница 46: ...nstrument controls and functions Load a waveform or waveforms into the waveform list Assign a waveform from the waveform list to a channel Set the Run mode see Run mode on page 26 If using a triggered run mode supply the necessary trigger event Enable the channel output Make sure All Outputs Off control is not active Press the Play button front panel or screen To deal with problems or errors refer...

Страница 47: ...panel 24 Continuous Run mode 26 Control panel 22 Control settings how to change 26 Controls touchscreen 23 Cooling 7 D Diagnostics 9 Disable outputs 18 20 Disconnect outputs 18 20 Display properties 15 Display size 27 Documentation 1 E Enable channel 18 20 Environmental requirements 7 error indication 25 Error message display 27 eSATA port rear panel 24 External Clock Input rear panel 24 External ...

Страница 48: ...n installation 13 list 13 Output on off 25 Outputs disabled 18 20 Overheat protection 12 Overview AWG mode 17 Functions mode 19 P Pattern Jump In rear panel 24 Play a waveform 18 Play button 18 20 Play Stop button 18 20 22 Play Stop button screen green with sine wave 25 green with T symbol 25 no light 25 red 25 yellow with clock symbol 25 Play Stop front panel button amber 26 flashing green 26 gre...

Страница 49: ...rity Lock instrument 28 Lock USB ports 28 Self calibration 10 Sequences 18 Setup default 19 20 open 20 save 20 Shutdown forced 9 Software installation 29 SourceXpress connection 28 Standard accessories 3 Status bar Screen interface 20 Status indicators Play Stop button 26 Status indicators screen 25 Status message calibration recommended 10 Stop button 18 20 Streaming ID rear panel 24 Sync Clock O...

Страница 50: ... ports Lock 28 V VGA port rear panel 24 Video port 24 View installed options 13 W Waveform screen interface 18 Waveform color 21 Waveform plot display On Off 19 Windows remote desktop 12 Windows shutdown 9 Index 34 AWG70000B Series Installation and Safety Instructions ...

Отзывы: