my
LOG
User Manual (1.1) Page: 13 / 24
ADDING NEW ENTRY
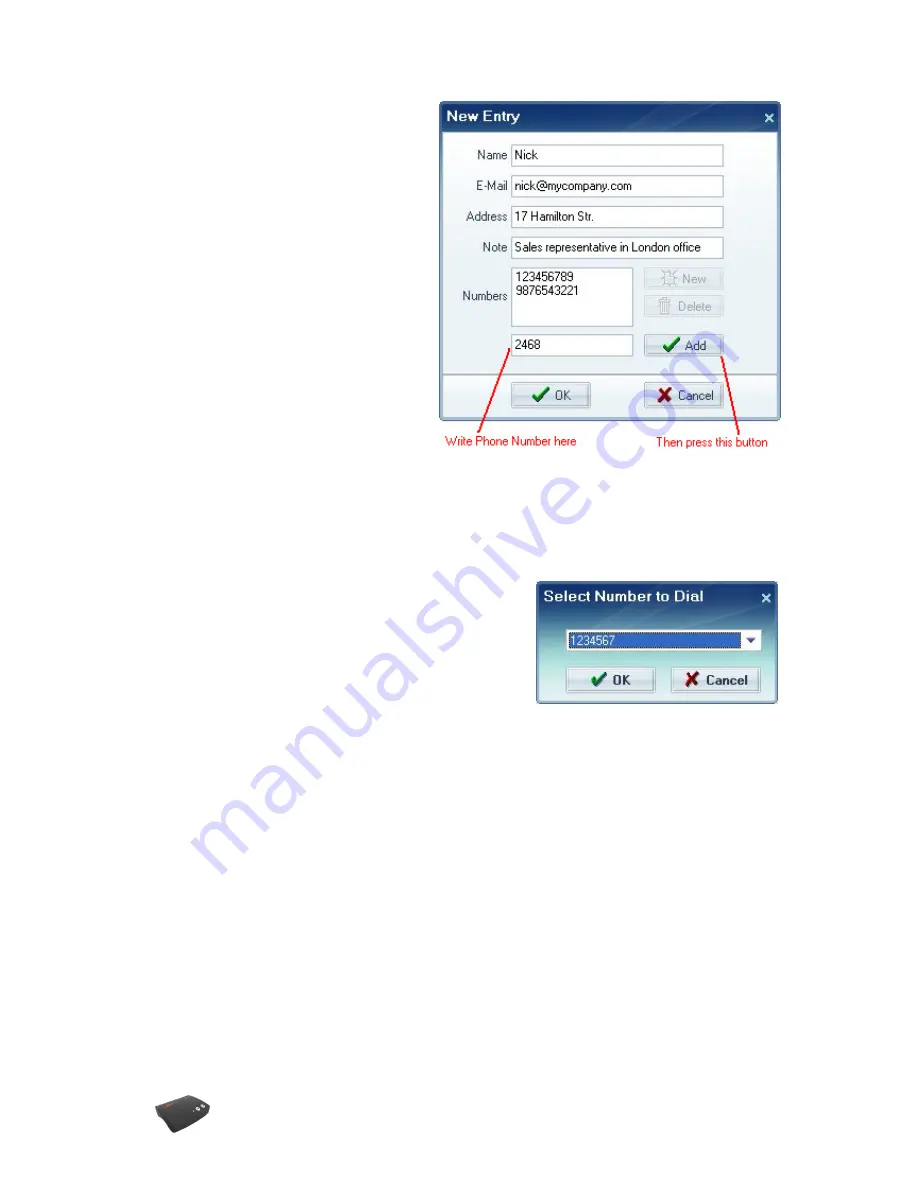
Window in figure-11 is opened when
“New” option selected from the right-click
menu.
Fill in the necessary fields, add telephone
numbers and press the “OK” button to
save new entry in the phone book. You
may abort new entry by pressing “Cancel”
button.
MODIFYING ENTRIES
Similar window as in figure-11 is opened
when “Edit” option selected from the right-
click
menu.
Make
necessary
modifications and press the “OK” button
to save modified entry.
Figure-11
DIALING THE NUMBER FROM THE PHONE BOOK
To make
my
LOG
dial the number stored in the phone book, first select the entry, then press
the F8 on the keyboard or select “Dial Number” option from the right-click menu.
If there is only one number stored for that entry,
my
LOG
immediately dials the number. Otherwise a
window is opened to let you select which number to
dial. After selecting the number from the pull-down
menu, press the “OK” button.
DATA EXCHANGE WITH OTHER APPLICATIONS
my
LOG
can import/export phone book data from/to other applications, such as Outlook,
Outlook Express, Excell or another
my
LOG
. You may use “Import” and “Export” buttons on
top left of phone book tab.
In order to import data to
my
LOG
, you should first generate a text file with “csv” extension
from other application. Take care about below listed 5 fields must be in the same order and
separated with “;” (semicolumn) as generating the file. Unused fields should be left blank and
also separated.
•
Name: Name and surname together.
•
E-Mail address
•
Postal adress.
•
Number(s): Phone numbers must have digits only. Multiple numbers can be written
by separating with commas.
•
Note.
To import data to
my
LOG
press the “Import” button and point the “csv” file.


