


Quick Operation Guide of Network Video Recorder
22
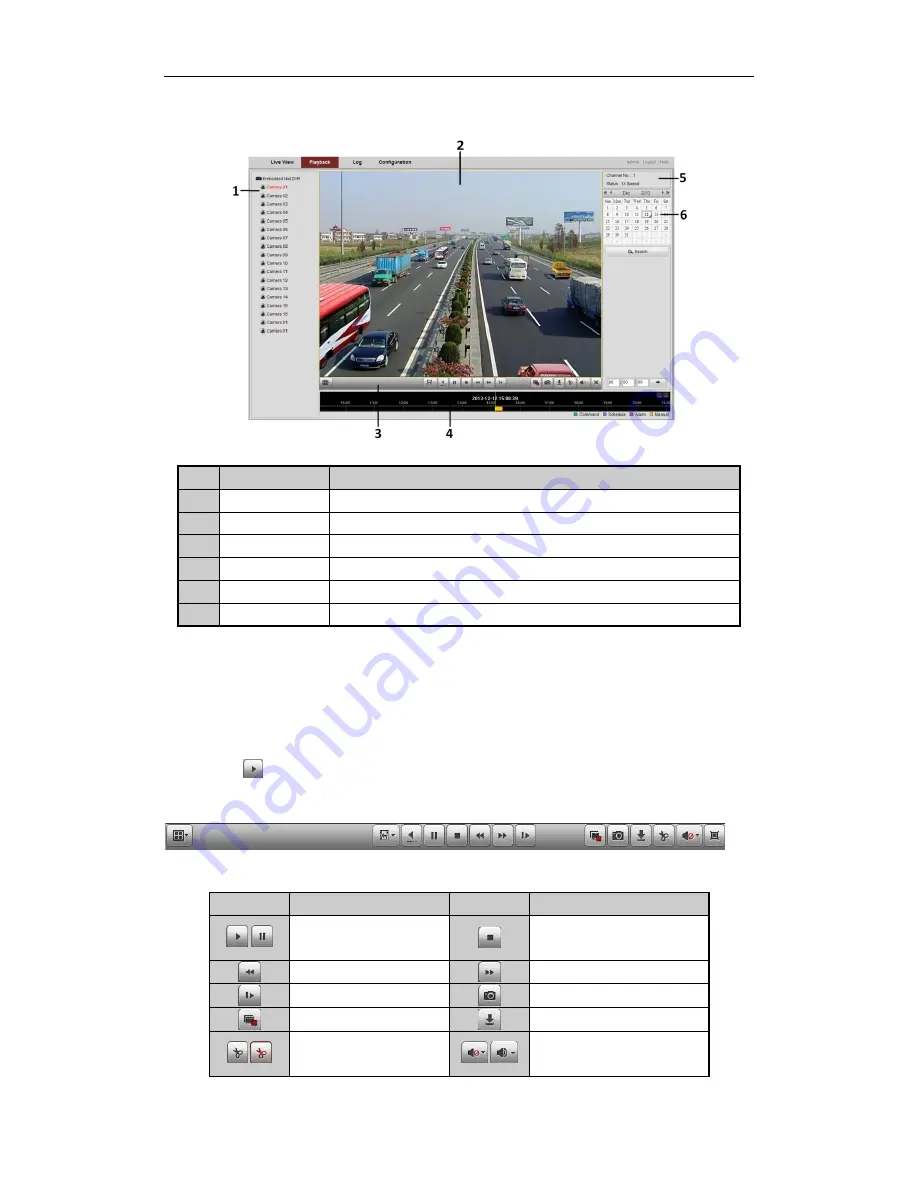
Playback
Interface Introduction
No.
Name
Description
1
Channel List
Displays the list of channels and the playing status of each channel.
2
Playback Window
Displays the image of channel.
3
Play Control Bar
Play control operations are supported.
4
Time Line
Displays the time bar and the records marked with different colors.
5
Playback Status
Displays the playback status, including channel number and playback speed.
6
Calendar
You can select the date to play.
Start Playback
Steps:
1.
Click
Playback
on the menu bar to enter playback interface.
2.
Click the camera from the device list for playback.
3.
Select the date from the calendar and click
Search
.
4.
Click the
button to play the searched video file on the current date.
5.
Use the buttons on the toolbar to operate in playback mode.
Playback Control Buttons Description
Area
Description
Area
Description
/
Play/Pause
Stop
Slow down
Speed up
Play by single frame
Capture
Stop all playback
Download
/
Video clip
/
Open/Close audio