Technika SH340T Скачать руководство пользователя страница 15

0002/0020

02:20

ORGANISING AUDIO RECORDINGS

Delete:

Select and delete a file

Delete All:

Delete all files

• Protect:

Protect/Unprotect a file from deletion

Auto Repeat:

Continuously repeat one file

Auto Next:

When one file ends, start the next one

At any time:

Press the

button to return to the Mode Screen

MODE

Press

MENU

Delete

OK

OFF

OK

OFF

OFF

Delete a file

Delete All Files

Protect a file

Auto Repeat

Auto Next

This menu can only be accessed from Stop mode

24

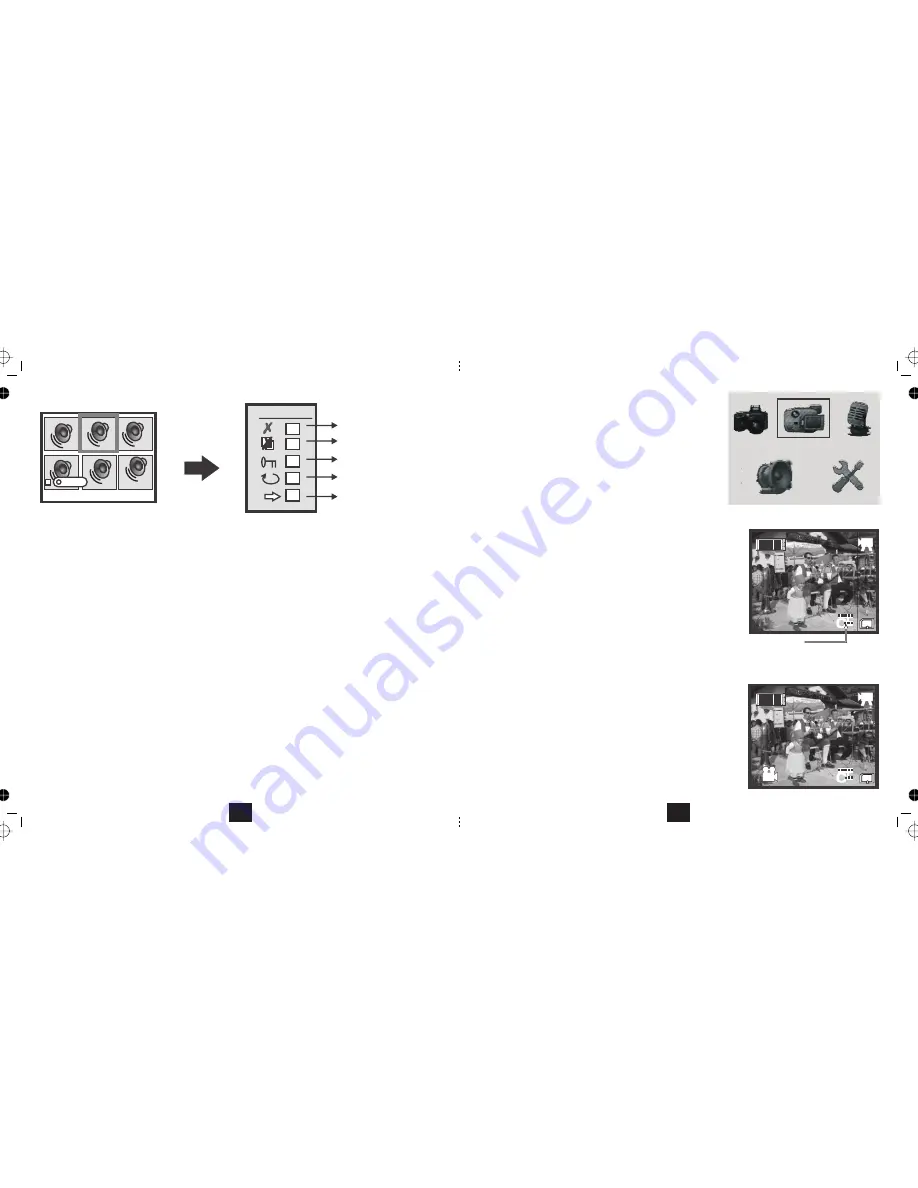
USING YOUR CAMERA AS A CAMCORDER

• Switch the camera on by pressing the

button.

ON/OFF

Wait for the welcome screen to load.
• Press the

button. The main menu displays

MODE

• Navigate to the

icon using the

Camcorder

buttons.

• Press the

button to confirm.

OK

The Camera will now enter Camcorder mode.

• Line up your subject and press the Shutter
The Action Icon will display and the timer will begin running.

During recording:

• Move the camera slowly to avoid "trails"
• Press the

buttons to Zoom in and out

In camcorder mode the microphone is operational.
To stop recording:

• Press the Shutter.
• Press the Shutter again to start a new recording

To Exit Camcorder mode:

• Press the Shutter to stop recording.
• Press the MODE button to return to the Mode Screen

or

• Press the POWER button to switch the Camera off.

*You cannot switch off the icons or the display in this mode.

(See Page 8).

00:00:01

Camcorder Recording mode

Camcorder ready mode

Resolution

Set in Video Camera menu

25/01/2007

25/01/2007

13

Содержание SH340T

Страница 1: ...Tesco Stores Ltd Delamare Road Cheshunt Herts EN8 9SL SH340T 3 1 MP Digital Camera User Guide...

Страница 2: ...ERA SOFTWARE Page 29 TRANSFERRING FILES FROM CAMERA TO PC Page 30 INSTALLING THE CAMERA AS A WEBCAM Page 31 USING THE CAMERA AS A WEBCAM IN WIN XP Page 32 INSTALLING USING PHOTO EXPLORER 8 Page 33 TRO...

Страница 3: ...ranty innowayaffectsyourconsumerrights Producedafter13thAugust2005 Waste electrical products should not be disposedofwithhouseholdwaste Please recycle where facilities exist Check with your Local Auth...

Страница 4: ...drive on connection allowing you to upload and view your pictures Installation of the driver is necessary to upload to a PC and view your files Refer to Page 29 2 TROUBLESHOOTING If your camera does n...

Страница 5: ...andsaveittoafolderon thePCharddrive 5 Close Click toexitthemenu NowunplugthecamerafromthePC 3 4 5 34 8 9 10 11 DISP OK 19 20 21 18 22 7 12 13 14 15 16 17 23 24 CAMERA LAYOUT 1 Lens 2 Wrist Strap Hook...

Страница 6: ...ENU DISP OK Snapshot Audio Recorder Video Cam CAPTURE MODE MODE SCREEN 4 Installing and Using Ulead Photo Explorer 8 Photo Explorer 8 SE BASIC enables you to access archive and catalogue all the image...

Страница 7: ...d Image Size If you do not see this icon and a card is inserted you should format the card See P 26 Macro Mode if selected Burst Snapshot if selected Timed Snapshot if selected 25 01 2007 USINGTHECAME...

Страница 8: ...USY 5M 0354 5M 0354 READY BUSY READY 5M 0354 5M 0354 Because the flash needs to be charged the rate at which you take successive pictures is reduced Battery life is reduced when using flash photograph...

Страница 9: ...camera processes the image and the picture you have taken appears on the screen After a while the screen clears and you may now take another picture The pictures remaining indicator on the monitor sc...

Страница 10: ...ximumZoomis4 0 8 INSTALLING THE CAMERA SOFTWARE The utilities disc supplied with this camera include The camera driver Ulead Photo Express 5 SE Installing the Camera Driver DO NOT CONNECT THE CAMERA T...

Страница 11: ...Setup screen To exit the Setup Screen MODE Press the button PC Cam 5 MIN 50 5 MIN OK 50 50 Restore default System settings Continue OK OK 50 50 O7 01 23 01 Press Press 50 60 Press Yes OK No MENU 28 P...

Страница 12: ...to recognise the camera if set to NTSC to toggle between Press to confirm and return to the list of items Press to confirm and exit Setup MODE TV Output USB Connection Format Storage Setting the TV S...

Страница 13: ...T Large resolutions offer higher picture definition but only if you are printing large pictures The downside is that large formats take up more space and need more processing time which shortens batte...

Страница 14: ...ime has elapsed the camera will take the picture The Selftimer will reset to Off when you switch the camera off Time Stamp Select with the Time Stamp keys You can overprint your snaps with the Date th...

Страница 15: ...plays MODE Navigate to the icon using the Camcorder buttons Press the button to confirm OK The Camera will now enter Camcorder mode Line up your subject and press the Shutter The Action Icon will disp...

Страница 16: ...MODE Press the key to return to the Video Camera mode or press to exit 14 PLAYING BACK AUDIO RECORDINGS SWITCH THE CAMERA AND THE HI FI OR TV SET OFF Connect the jack plug of the supplied A V lead to...

Страница 17: ...d the TV off then unplug the connecting lead You can carry out all the functions of the camera using the TV screen This includes taking and viewing still and video images recording and playing audio f...

Страница 18: ...Protect Screen Press to select ON OFF Protected or Not Protected Press to return to the previous screen MENU Protecting a video or a picture prevents it being erased You can select which images on the...

Страница 19: ...OK YES NO MENU 25 01 2007 12 30 2048x1536 50 50 20 Viewing one picture at a time to move back a picture Press to move forward one picture Zoom and Pan to increase Zoom to decrease Zoom Press to the p...

Страница 20: ...Press to delete the picture OK Press to return to thumbnail view MENU 18 Video Playback Press the button to begin play Press the button to pause Press the button to resume play During Play button to...

Отзывы: