background image

English   

- 18 -

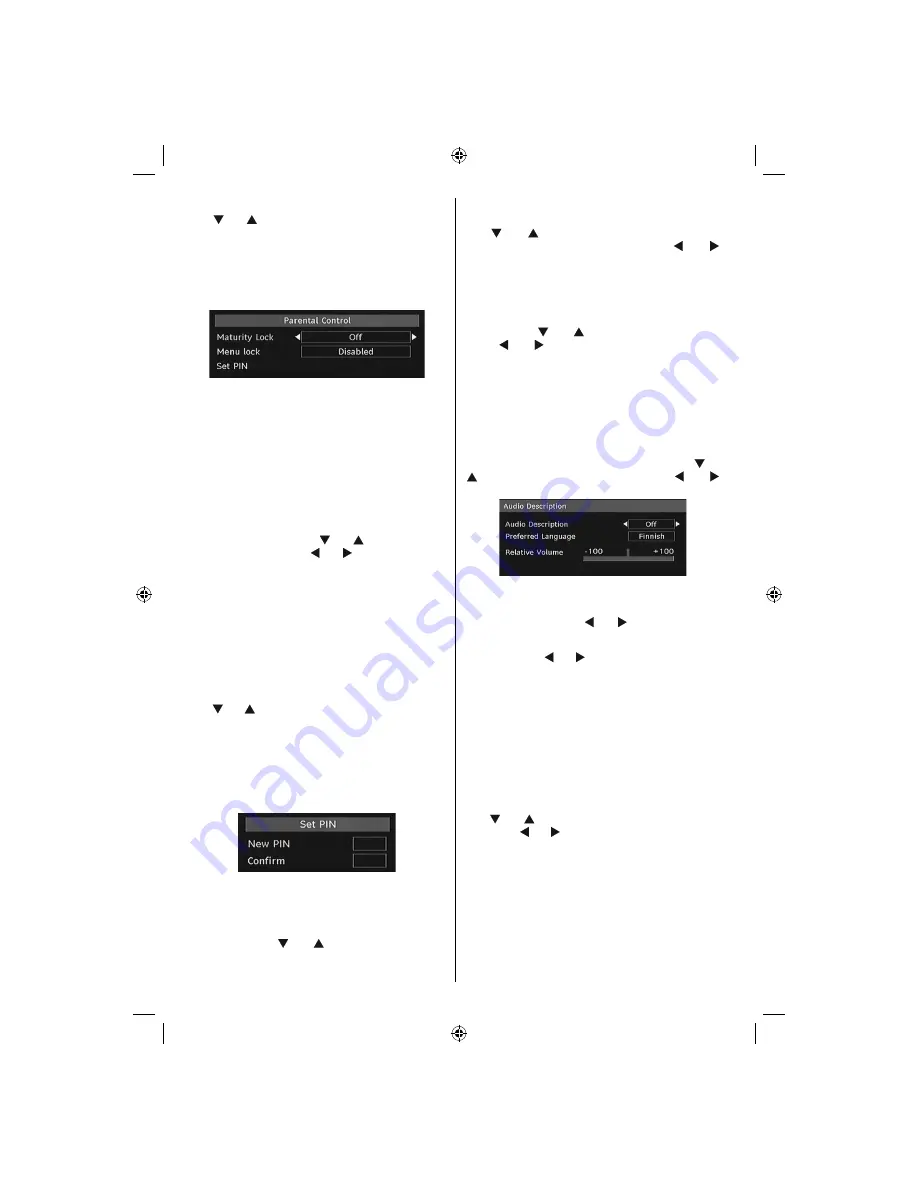
 Parental Control 

 Use “ ” or “ ” buttons to go to Parental Lock option. 
Press OK button to enter the menu. A dialog box 
asking for the lock key will be displayed. The key is set 
to “0000” initially. Enter PIN. If it is incorrect, “Wrong 
Pin” OSD will be displayed. If it is correct, the Parental 
Control menu will be displayed: 


 Maturity Lock (**) 

 (**) If you set Country option as UK in the 

fi

 rst time 

installation, Maturity Lock option will not be visible.
When set, this option gets the maturity information 
from the broadcast and if this maturity level is disabled, 
does not show video-audio. 

 Menu Lock 

 In menu lock you can set locking for all menus, or the 
Installation Menu to restrict access to these menus. 
If the menu lock is disabled, there will be free access 
to the menu system. Use  “ ” or “ ” buttons to go to 
Menu Lock option. Use  “ ” or “ ” buttons to choose 
Menu Lock Mode. 
  

DISABLED

  : All menus are unlocked. 


ALL MENUS

  : All  Menus are  accessible only with 

the correct lock key. So the user cannot add, delete, 
rename, channels, cannot set timers. 
 

INSTALLATION MENU

 : Installation menu is locked.

So the user can’t add channels. Changes will be 
updated after exiting ‘Con

fi

 guration Menu’.

 Set PIN 

Use “ ” or “ ” buttons to go to “Set PIN” option. Press 
 

OK

  to display the “Set PIN” window. Use numeric 

buttons to enter new pin number you will need to 
input your new pin a second time for veri

fi

 cation 

purposes. The factory default pin number is 0000, 
if you change the pin number make sure you write it 
down and keep it safe. 


Time Settings (**) (Optional)

(**) If you set Country option as UK in the 

fi

 rst time 

installation, Time Settings option will not be visible.
In the con

fi

guration menu, highlight the Time Settings 

item by pressing “ ” or “ ” buttons. Press OK and 
Time Settings sub menu will be displayed on the 

screen. Current Time,Time Zone Setting and Time 
Zone will be available.
Use “ ” or “ ” buttons to highlight the Time Zone 
Setting. Time Zone Setting is set using “ ” or “ ” 
buttons. It can be set to AUTO or MANUAL. When 
AUTO is selected, Current Time and Time Zone 
options will not be available to be set. If MANUAL 
option is selected as the Time Zone Setting, Time 
Zone can be altered:
• By pressing “ ” or “ ” buttons select Time Zone. 

Use “ ” or “ ” buttons to change the Time Zone 
between GMT-12 or GMT+12. Current Time on the 
top of the menu list will then change according to 
the selected Time Zone.

Audio Description (Optional)

Audio description refers to an additional narration 
track for blind and visually impaired viewers of visual 
media. You can use this feature, only if the broadcaster 
supports that additional narration track. Use “ ” or 
“ ” buttons to select an item. Then use “ ” or “ ” 
buttons to set.

Audio Description (Optional)

This function enables or disables the audio description 
feature by pressing the “ ” or “ ” buttons.

Preferred Language (Optional)

By pressing the “ ” or “ ” buttons the preferred audio 
description language is being changed.
This setting can be used, only if it is available.

Relative Volume (Optional)

Using this option, the Audio Description volume level 
can be increased or decrased relatively, according to 
the general volume.

Standby Search (*) (Optional)

(*) This setting is visible only when the Country option 
is set to Denmark, Sweden, Norway or Finland.
Use “ ” or “ ” button to select Standby Search and 
then press “ ” or “ ” button to set this setting as On or 
Off. If you change Standby Search to Off, this function 
will be unavailable.
To use Standby search please make sure that
you select Standby Search as On.

 Language 

 In this menu the user can adjust the preferred 
language. Language is changed by pressing OK 
button. 

[GB]_MB35_COST_40882W-1810UK_PANEUIDTV_BRONZE2_10064946_50164710..indd   18

[GB]_MB35_COST_40882W-1810UK_PANEUIDTV_BRONZE2_10064946_50164710..indd   18

17.02.2010   14:17:16

17.02.2010   14:17:16

Содержание LCD40-920

Страница 1: ...COLOUR TELEVISION WITH REMOTE CONTROL OPERATING INSTRUCTIONS For assistance please call our Tesco Electrical Helpline on 0845 4566767 LCD40 920 ...

Страница 2: ...1 Operation with the Buttons on the TV 11 Operation with the Remote Control 11 Initial Settings 11 General Operation 12 Information Banner 12 Electronic Programme Guide EPG 12 Displaying Subtitles 13 Digital Teletext for UK only 13 Analogue Teletext 13 Widescreen 13 IDTV Menu System 14 Channel List 14 Timers 15 Conditional Access 16 TV Setup 16 Setup 16 Analogue TV Menu System 21 Picture Menu 21 S...

Страница 3: ...put Plug Play for Windows 98 ME 2000 XP Vista Audio line out Game Mode optional Active antenna power optional Accessories SUBTITLE SLEEP F IN O P ES T R E RETURN V P 1 4 7 2 5 8 3 6 9 JKL STU DEF MNO VWX PQR YZ M OK GHI SOURCE ABC EPG 0 SCREEN LANG FAV TV DTV S AP W Remote Controller Batteries 2 X AAA Instruction Book Introduction Thank you for choosing this product This manual will guide you for ...

Страница 4: ...at no open flame sources such as lighted candles are placed on top of the TV Batteries should not be exposed to excessive heat such as sunshine fire or the like Lightning In case of storm and lightning or when going on holiday disconnect the power cord from the wall outlet Replacement Parts When replacement parts are required make sure that the service technician has used replacement parts which a...

Страница 5: ... technology product with about a million thin film transistors giving you fine picture details Occasionally a few non active pixels may appear on the screen as a fixed blue green or red point Please note that this does not affect the performance of your product Warning Do not leave your TV in standby or operating mode when you leave your house GB _MB35_COST_40882W 1810UK_PANEUIDTV_BRONZE2_10064946...

Страница 6: ...mode Cursor up Page up in TXT mode 15 Cursor right 16 OK Select Freeze picture Hold in TXT 17 mode Cursor down Page down in TXT mode 18 Menu on off 19 Cursor left Subpage in TXT mode 20 Previous Programme Swap 21 Picture mode selection 22 Programme down Page up in DTV 23 mode Mute 24 Volume down 25 Favourite mode in DTV mode 26 Mono Stereo Dual I II Current language 27 in DTV mode Image size Expan...

Страница 7: ... Subwoofer Out is for connecting an external active subwoofer to the set to give a much deeper bass effect Use an appropriate RCA cable to connect the set to a subwoofer unit Audio Line Outs 3 output audio signals to an external device such as an optional sound system To connect the external speakers to your TV use AUDIO LINE OUTS of the TV with an audio cable 4 SCART 2 inputs or outputs for exter...

Страница 8: ... audio Connect the audio cable between AUDIO INPUTS on the TV and audio outputs of your device to enable component audio 8 S PDIF Coaxial Out outputs digital audio signals of the currently watched source Use an SPDIF coaxial cable to trasfer audio signals to a device that has S PDIF input 9 RF Input connects to an antenna or a cable Note that if you use a decoder or a media recorder you should con...

Страница 9: ...ocket on the TV and the VIDEO OUT jack on your device Audio Inputs are used for connecting audio signals of external 4 devices Connect the audio cable between the AUDIO INPUTS on the TV and the AUDIO OUTPUT jacks on your device Note If you connect a device to the TV via the VIDEO INPUT you should also connect your device with an audio cable to the AUDIO INPUTS of the TV to enable audio Aerial Conn...

Страница 10: ...HDMI When you connect to DVD player as illustrated below switch to HDMI source See Input Selection section Most DVD players are connected through COMPONENT SOCKETS Use a component video cable to connect video input For enabling audio use a component audio cable as illustrated below When the connection is made switch to YPbPr source See Input selection section You may also connect through the SCART...

Страница 11: ... AAA R3 or equivalent type batteries inside Place the batteries in the right directions and replace the battery cover Note Remove the battery from remote control handset when it is not to be used for a long period Otherwise it can be damaged due to any leakage of batteries Remote range is approximately 7m 23ft Switching the TV On Off To Switch the TV On Connect the power cord to the 220 240V AC 50...

Страница 12: ...stem of your TV Functions of the menu system are described in the following sections Volume Setting Press V button to increase the volume Press V button to decrease the volume A volume level scale slider will be displayed on the screen Programme Selection Previous or Next Programme Press P button to select the previous programme Press P button to select the next programme Programme Selection Direc...

Страница 13: ...eletext in DTV mode you should set country as UK in analogue AUTO PROGRAM for UK only General Operation Pressing the TV DTV button at any time while watching television programmes will switch the TV set between the digital terrestrial television broadcasting and its normal analogue broadcasting Information Banner Whenever you change channel using the P P button or the numeric buttons the TV displa...

Страница 14: ...on is set pressing the TELETEXT button causes the following warning message display on the screen for UK only Digital Teletext for UK only Press the TELETEXT button The digital teletext information appears Operate it with the coloured buttons cursor buttons and OK button The operation method may differ depending on the contents of the digital teletext Follow the instructions displayed on digital t...

Страница 15: ...f the channel display at the top right of the screen respectively Moving the channels in the channel list Press or buttons to select the channel that will be moved Press or buttons to select the Move item on Channel List menu Note If you enter the same programme number of the channel that you want to move channel services will be replaced Do you want to continue OSD will be displayed Press OK to c...

Страница 16: ... the same operation to cancel the lock Setting Favourites To set a favourite you should highlight the Favourites item at the bottom of the Channel List menu Then press OK button and Edit Favourite List menu appears on the screen How to Add a Channel to a Favourites List By pressing or buttons highlight the channel that you want to add to the favourite list By pressing OK button the highlighted cha...

Страница 17: ...ssible to insert fully if reversed The CAM or the TV terminal may be damaged if the CAM is forcefully inserted Connect the TV to the mains supply switch on and then wait for few moments until the card is activated Some CAMs may require the following set up Please set the CAM by entering the IDTV menu Conditional Access then pressing the OK button CAM set up menu is not displayed when it is not req...

Страница 18: ... process will locate the encrypted channels as well If it is set as OFF manually encrypted channels will not be located while in automatic search or manual search Use or button to select Scan Encrypted and then press or button to set this setting as On or Off Receiver Upgrade Over Air Download OAD To ensure that your TV always has the most update information use this setting Please ensure that the...

Страница 19: ...een Current Time Time Zone Setting and Time Zone will be available Use or buttons to highlight the Time Zone Setting Time Zone Setting is set using or buttons It can be set to AUTO or MANUAL When AUTO is selected Current Time and Time Zone options will not be available to be set If MANUAL option is selected as the Time Zone Setting Time Zone can be altered By pressing or buttons select Time Zone U...

Страница 20: ...ill be adjusted and then press or button to set Notes System Language determines the on screen menu language Audio Language is used for selecting the soundtrack of a channels Primary settings are the first priority when multiple choices are available on a broadcast Secondary settings are the alternatives when the first options are not available Installation The Installation menu is mainly intended...

Страница 21: ...r at the factory To install factory settings highlight First Time Installation menu item and press OK button then you will be asked whether or not to delete the settings Selecting Yes by pressing OK button while the Yes is highlighted will delete the existing channel table Then you will be asked to confirm for deleting all channels and settings By selecting Yes and pressing the OK button the exist...

Страница 22: ...Film Mode Press or button to set this feature On or Off Turn this feature on when you are watching films to see the fast motion scenes clearly Game Mode Select Game Mode by pressing or button Use or button to set Game Mode as On or Off When Game Mode is set to On specific game mode settings which are optimized for better video quality will be loaded Also Picture Mode Contrast Brightness Sharpness ...

Страница 23: ...n 0 and 63 Headphone Sound optional Press or button to select Headphone Sound Using or button you can select Main PIP PAP Active or Inactive Main Main window sound PIP PAP PIP PAP window sound Active Sound of the current selection Inactive Sound of the currently inactive window Sound Mode optional Press or button to select Sound Mode Using or button you can select Mono Stereo Dual I or Dual II mod...

Страница 24: ...ted at the end of the selected time the TV goes automatically to standby mode Child Lock Press or button to select Child Lock Use or button to set the Child Lock On or Off When On is selected the TV can only be controlled by the remote control handset In this case the control panel buttons except for the STANDBY button will not work Hence if one of those buttons is pressed Child Lock On will be di...

Страница 25: ...ber You can also enter a number using the numeric buttons on the remote control There are 200 programme storage between 0 and 199 Band Band can be selected either C or S Press or button to set Band Channel Channel can be changed by or button or numeric buttons Colour System Press or button to select Colour System Use or button to change the colour system to PAL PAL 60 SECAM or AUTO Sound System Pr...

Страница 26: ...mme to the decided programme space and press the GREEN button again Delete To delete a programme press the YELLOW button Pressing the YELLOW button again erases the selected programme from the programme list and the following programmes shift one line up APS Auto Programming System When you press the BLUE button for starting automatic tuning Auto Programming System menu will appear on the screen C...

Страница 27: ...ht hand side or left hand side of the screen Select H Position item by using or button Use or button to adjust the value V Vertical Position This item shifts the image vertically towards the top or bottom of the screen Select V Position item by using or button Use or button to adjust the value Phase Depending on the resolution and scan frequency that you input to the TV set you may see a hazy or n...

Страница 28: ...mic Natural and Cinema Freezing Picture You can freeze the picture on the screen by pressing the OK button on the remote control Press the OK button to freeze picture Press again to quit freeze mode Note This feature is available for analogue TV mode only Zoom Modes You can change the aspect ratio image size of the TV for viewing the picture in different zoom modes Press SCREEN button to directly ...

Страница 29: ...RETURN Index Selects the teletext index page SCREEN Expand Press once to enlarge top half of the page press again to enlarge the bottom half of the page Press again to revert back to normal size Reveal Shows hidden information e g solutions of games OK Hold Holds a text page when convenient Press again to resume Subcode Pages Selects subcode pages if available when the teletext is activated P P an...

Страница 30: ...une the channels The picture quality may degrade when two peripherals are connected to the TV at the same time In such a case disconnect one of the peripherals No Picture Is the aerial connected properly Are the plugs connected tightly to the aerial socket Is the aerial cable damaged Are suitable plugs used to connect the aerial If you are in doubt consult your dealer No Picture means that your TV...

Страница 31: ... 60 47 7 29 1280 768 75 60 2 VESA 30 1280 960 60 60 0 VESA 31 1280 960 75 75 0 VESA 32 1280 960 85 85 9 VESA 33 1280 1024 60 64 0 VESA 34 1280 1024 75 80 0 VESA 35 1280 1024 85 91 1 VESA 36 1400 1050 60 65 3 37 1400 1050 75 82 3 38 1440 900 60 55 9 39 1440 900 75 70 6 40 1600 1200 60 75 0 VESA 41 1680 1050 60 65 3 42 1920 1200 60 74 5 Appendix B AV and HDMI Signal Compatibility Input Signal Types ...

Страница 32: ...PAP with sources TV Scart 2 FAV If these sources are set to main window and Scart 1 does not have a RGB signal Pip Pap source can not be switched to the Scart 1 source If scart 1 source is set to main window and scart 1 does not have a RGB signal Pip Pap source can not be switched to TV Scart 2 and FAV sources Products Battery Information for Users on Disposal of Old Equipment and Batteries Europe...

Страница 33: ...l DVB modes Video MP ML PAL 4 3 16 9 Audio MPEG Layer I II 32 44 148kHz NUMBER OF PRESET CHANNELS 200 CHANNEL INDICATOR On Screen Display RF AERIAL INPUT 75 Ohm unbalanced OPERATING VOLTAGE 220 240V AC 50 Hz AUDIO German Nicam Stereo AUDIO OUTPUT POWER WRMS 10 THD 2 x 8 POWER CONSUMPTION W 190 W max 1 W Standby PANEL 16 9 display 40 Screen Size DIMENSIONS mm DxLxH With foot 246 x 970 x 653 Weight ...

Страница 34: ...terminal which is marked with the letter N or coloured Black The wire which is coloured brown or red must be connected to the terminal which is marked with the letter L or coloured Red For continued protection against risk of fire replace only with same type and rating of fuse ASTA approved 5A 250VAC fuse CAUTION TO PREVENT ELECTRIC SHOCK DISCONNECT FROM THE MAINS BEFORE REMOVING COVER NO USER SER...

Страница 35: ...50164710 ...

Отзывы: