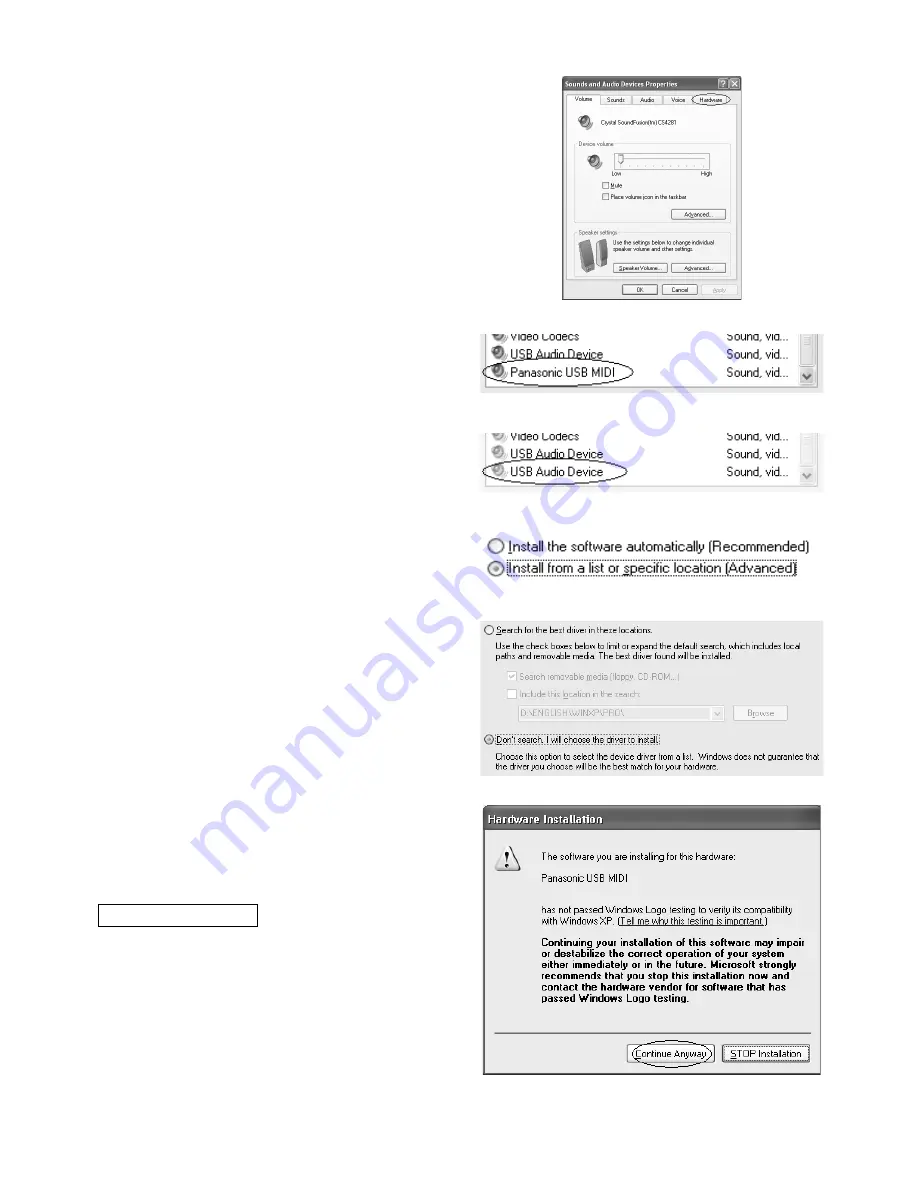
11.
Select the [Hardware] tab.
12.
If [Panasonic USB MIDI] does not appear in the
device box, perform the following procedure.
•
If [Panasonic USB MIDI] appears, the installation is
finished, so the following procedure does not need
to be performed.
13.
Two [USB Audio Device] will appear, so select
the one on the bottom and press the
[Properties] button.
14.
Select the [Driver] tab and press the [Update
Driver] button.
15.
Select [
o
Install from a list or specific location
(Advanced)].
16.
Confirm that the indication has changed to [
Install from a list or specific location
(Advanced)] and then press [Next].
17.
Select [
o
don’t search. I will choose the driver
to install].
18.
Confirm that the indication has changed to [
don’t search. I will choose the driver to install]
and press [Next].
19.
Select [Panasonic USB MIDI] from the [Model]
list.
•
If multiple [Panasonic USB MIDI] are displayed,
select the one with the most recent date.
20.
Press [Next].
•
If a message regarding the Microsoft digital signa-
ture or Windows Logo testing appears, press the
[Continue] button.
21.
When the installation completed message
appears, press the [Finish] button.
22.
Close the [Panasonic USB MIDI properties]
window.
23.
When restarting is required, restart the
computer.
•
This completes the installation.
Usage Precautions
•
When turning off the power to the instrument or un-
plugging the USB cable, first press the tasktray
bar’s “Disconnect” icon and then select [Safety re-
move Panasonic USB MIDI].
•
If an application is using the Panasonic USB MIDI,
it cannot be disconnected, so first exit the applica-
tion before disconnecting the instrument.
•
When turning the power to the instrument on or off,
or when connecting or disconnecting the USB
cable, make sure at least 10 seconds passes be-
tween each action.
(11.)
(12.)
(13.)
(16.)
(18.)
(20.)
4
QQTG0678


