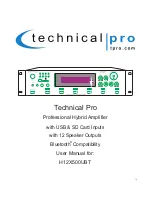
H12X500UBT
Front Panel
1.Power:
Press this button to power the unit on and off.
2.MP3(1/8”) Input:
Connect your MP3 player or computer here.Make sure to press the input selector button (5) until
“MP3” appears on the display screen to play the signal from the MP3 player or computer.
3.Play / Pause / Record Button:
PLAYING AUDIO FROM THE USB / SD CARD INPUT
When the input selected is USB/SD/Bluetooth, press this button to pause the signal from the USB flash drive,
SD card,bluetooth or iPod™(Classic and Nano) connected to the USB input. Press this button again to play.
The play/pause function will only work for the USB flash drive, SD card, bluetooth or iPod™(Classic and Nano).
THERE IS NO RECORDING FUNCTION WHEN INPUT SELECTED IS USB/SD/BLUETOOTH.
HOW TO MAKE A RECORDING
When the input selected is TUNER/MP3/DVD/CD/VCD and there is an USB flash drive or SD card (with blank
space on it) inserted into their respective slot, pressing and holding this button will activate the recording
function.Press this button and hold for several seconds and the word “REC” will display on the screen. The unit
will create a new file in the connected USB flash drive or SD card and get ready to make a recording. At this
point there is no actual recording yet. Press the button again and the unit will start recording onto the USB flash
drive or SD Card and the elapsed time and “REC” will display on the screen. Press the button a third time to
pause the recording and the word “REC” and the elapsed time displayed on the screen will start flashing. Press
again to continue the recording. Press and hold this button for several seconds to save the file and end the
recording and exit. If both USB flash drive and SD card are connected, the unit will begin recording onto the
USB flash drive. If the USB flash drive is full, remove it and then press the record button again to start another
recording. The unit will also be able to record the signal from microphone onto the USB flash drive or SD Card.
When the recording funcion is activated and there is a microphone connected and have it turned on, the unit
will mix the signal from Tuner, MP3 or DVD with the microphone’s into one track. If two microphone are
connected and turned on,both signals from them will be recorded and mixed into one track with the signal from
Tuner, MP3 or DVD.
THE RECORDING FILE FORMAT IS .MP3.
RELEASING A BLUETOOTH CONNECTION
In Bluetooth mode, press button and hold for several second to make the unit release current Bluetooth
connection and get ready for new paring and connecting.
4.Repeat and Random Control:
Press this button to repeat the current track, all tracks or play random tracks
on the USB flash drive,SD Card or iPod™(Classic and Nano).The unit’s default setup is repeating all tracks.
Press this button once to repeat the current track, press again to play random tracks, press three times to
repeat all tracks.In tuner mode to save a specific frequency (station), go to the station and then press the
“RPT/RDM” button on the face of unit or the “RPT” key on the remote control and then using the number keys
on the remote enter a number for the saved station. The number entered should be between1 and 30. After
H12X500UBT
1
2
17 18
16
19 20
21
25
22
26
23
24
11
4 5 6
8 9
10
3
12
13
14
15
7


