background image


IU_TechMaster_02_eng                                                                                           Page 15 of 32


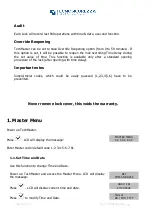
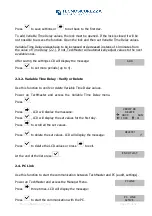
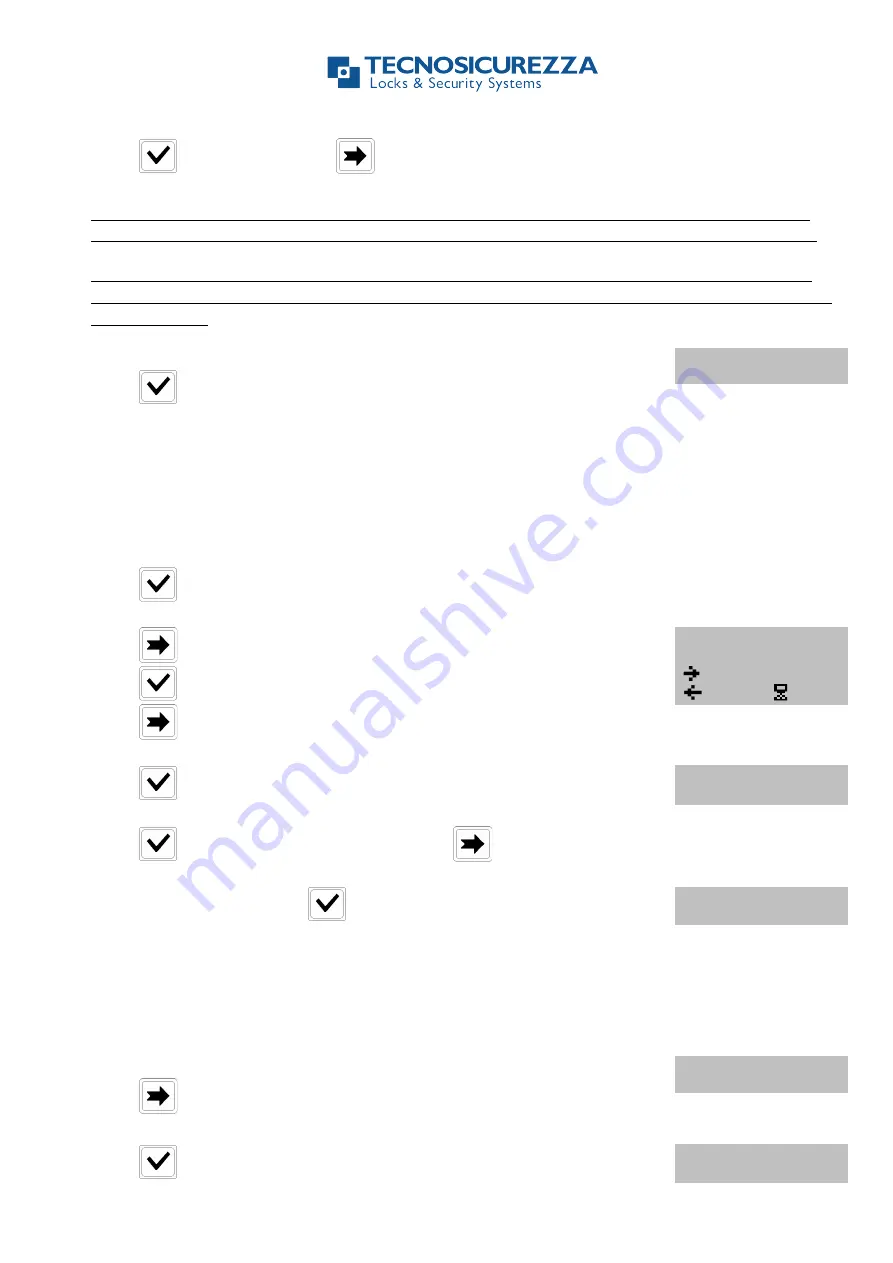
Press 

 to save settings or 

 to get back to the first day. 


  To add Variable Time Delay values, the lock must be opened. If the lock is closed it will be 

not possible to access the function. Open the lock and then set Variable Time Delay values. 


Variable Time Delay always have to be increased or decreased in steps of 10 minutes from 

the value of Time Delay (2.2.). If not, TechMaster will automatically adjust values to the next 
available ones.


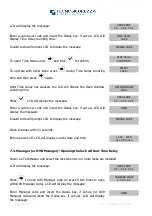
  After saving the settings LCD will display the message: 

Press 


to set more periods (up to 4). 


ADD 


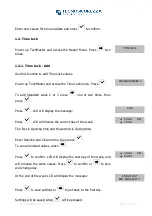
2.3.2. Variable Time Delay - Verify or Delete


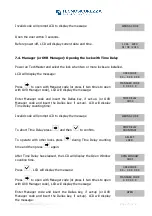
  Use this function to verify or delete Variable Time Delay values. 


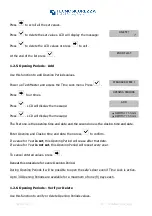
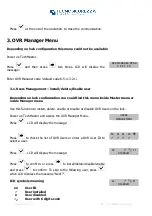
  Power  up  TechMaster  and  access  the  Variable  Time  Delay  menu. 

Press 


Press 


, LCD will display the message: 


VERIFY OR 

DELETE 


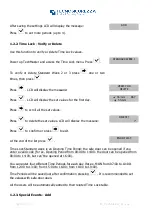
Press 


, LCD will display the set values for the first day.


   08:00            SUN        

  10:00       : 01 


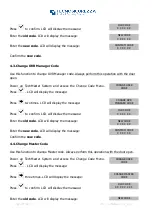
Press 

 to scroll all the set values. 


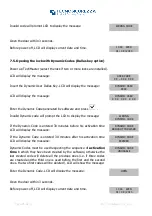
Press 


to delete the set values. LCD will display the message: 


DELETE? 


ü


Press 

 to delete the LCD values or press 

 to exit.  


At the end of the list press 


END OF LIST 


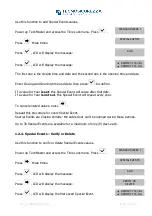
2.4. PC Link


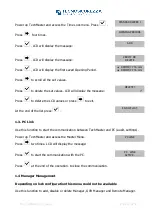
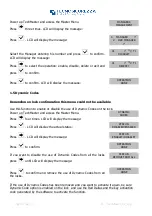
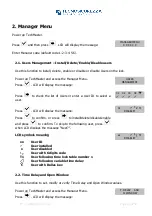
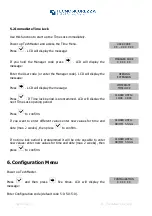
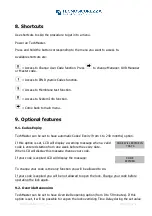
  Use this function to start the communication between TechMaster and PC (audit, settings). 


  Power up TechMaster and access the Manager Menu. 

Press 

 three times. LCD will display the message:


PC LINK 


Press 


to start the communication with the PC. 


PC   LINK 

        ACTIVE . . . . .  

Содержание T9530

Страница 1: ...TechMaster Lock system for safes PROGRAMMING AND OPERATING INSTRUCTIONS...

Страница 2: ......

Страница 3: ...6 4 Change Code Menu 17 4 1 Change Users and OVR Users Code 17 4 2 Change Manager Code 17 4 3 Change OVR Manager Code 18 4 4 Change Master Code 18 5 Time Menu 19 5 1 Opening Extension 19 5 2 Immediate...

Страница 4: ...ower off after 30 seconds of non operation TechMaster opening and administration codes Every user Manager Standard user or Override can be a numerical code or a numerical code Dallas key Master code c...

Страница 5: ...be set on each lock Delay Period 0 99 minutes Open Period 1 19 minutes Five Time Delays can run at once Dallas keys Can be set on each lock requires code and key Available for all Manager and Users no...

Страница 6: ...k after opening with time delay Important notes Simple trivial codes which could be easily guessed 1 2 3 4 5 6 have to be prevented Never remove lock cover this voids the warranty 1 Master Menu Power...

Страница 7: ...ress Press LCD will display the message ADD Press LCD will display the current day of the week hh mm DAY hh mm The first is Opening time and the second is Closing time Enter Opening and Closing time t...

Страница 8: ...Press to delete the set values LCD will display the message DELETE Press to confirm or press to exit At the end of the list press END OF LIST Time Lock Standard week is an Opening Time Period the safe...

Страница 9: ...fter that date If a value for Year is not set this Special Event will repeat every year To cancel entered values press Repeat this procedure for every Special Event Special Events are Closing Periods...

Страница 10: ...DD MM YY hh mm DD MM YY hh mm The first one is the opening time and date and the second one is the closing time and date Enter Opening and Closing time and date then press to confirm If a value for Y...

Страница 11: ...the message DELETE Press to delete the LCD values or press to exit At the end of the list press END OF LIST 1 3 PC Link Use this function to start the communication between TechMaster and PC audit se...

Страница 12: ...o enable or disable the use of Dynamic Codes on the lock Power up TechMaster and access the Master Menu Press four times LCD will display the message DYNAMIC CODES Press LCD will display the actual st...

Страница 13: ...s or enter a User ID to select a user 01 02 03 04 Press LCD will display the message 01 T1 DISABLE Press to confirm or press to install delete disable enable and press to confirm To skip to the follow...

Страница 14: ...3 Variable Time Delay Depending on lock configuration this menu could not be available Power up TechMaster and access the Manager Menu Press two times LCD will display the message VARIABLE TIME DELAY...

Страница 15: ...DD 2 3 2 Variable Time Delay Verify or Delete Use this function to verify or delete Variable Time Delay values Power up TechMaster and access the Variable Time Delay menu Press Press LCD will display...

Страница 16: ...this menu inside Master menu or inside Manager menu Use this function to install delete enable or disable or disable OVR Users on the lock Power up TechMaster and access the OVR Manager Menu Press LC...

Страница 17: ...to change Users and OVR Users code Always perform this operation with the door opened Power up TechMaster System and access the Change Code Menu Press LCD will display the message CHANGE USER CODE Pr...

Страница 18: ...times LCD will display the message CHANGE OVR MANAGER CODE Press to confirm LCD will display the message OLD CODE X X X X X X Enter the old code LCD will display the message NEW CODE X X X X X X Ente...

Страница 19: ...USER CODE X X X X X X X X If you hold the Manager code press LCD will display the message MANAGER CODE X X X X X X Enter the User code or enter the Manager code LCD will display the message OPENING EX...

Страница 20: ...IMMEDIATE TIME LOCK Press If Time lock period is programmed LCD will display the next Time Lock opening period CLOSED UNTIL 14 09 08 00 Press to confirm If you want to enter different values enter new...

Страница 21: ...de or press if the Master code is the default code 1 2 3 4 5 6 7 8 LCD will display the message LOCK X INSTALLED 6 2 Remove Locks Use this function to remove locks from TechMaster keypad Power up Tech...

Страница 22: ...e message LCD CONTRAST Press LCD will display the message ADJUST CONTRAST X Enter a contrast level between 1 and 9 and press to confirm 6 4 Language Use this function to set LCD language Power up Tech...

Страница 23: ...splay the message SYSTEM INFO Press to check information 7 Opening the Locks 7 1 Users or OVR Users Opening the lock without Time Delay Power up TechMaster and select the lock when two or more locks a...

Страница 24: ...USER CODE X X X X X X X X Enter a valid user code and insert the Dallas key if set up LCD will display the message OPEN Invalid code will prompt LCD to display the message WRONG CODE Open the door wi...

Страница 25: ...up or OVR Manager code and insert the Dallas key if set up LCD will display Time Delay counting time TIME DELAY 00 59 Invalid code will prompt LCD to display the message WRONG CODE To abort Time Delay...

Страница 26: ...he LCD to display the message WRONG DYNAMIC CODE If the Dynamic Code is entered 30 minutes before his activation time LCD will display the message DYNAMIC CODE BROUGHT FORWARD If the Dynamic Code is e...

Страница 27: ...activation time LCD will display the message DYNAMIC CODE EXPIRED Dynamic Codes must be used respecting the sequence of activation time in which they have been created by the software otherwise the l...

Страница 28: ...prompt LCD to display the message WRONG CODE To abort Time Delay press and then to confirm STOP DELAY COUNTING To operate with other locks press during Time Delay counting time and then press again S...

Страница 29: ...ic Codes Expiry from 1 to 240 months option If this option is set LCD will display a warning message when a valid code is entered starting from one week before the expiry date CODE WILL EXPIRE IN 7 DA...

Страница 30: ...chMaster Enter a valid user code LCD will display time delay counting TIME DELAY 00 59 After Time Delay LCD will display open window counting OPEN WINDOW 00 01 Enter a valid user code LCD will display...

Страница 31: ...4 EN 61000 4 5 EN 61000 4 6 EN 61000 4 11 EN 61000 6 1 EN 61000 6 3 EN 60335 1 EN55022 EN55024 EN50130 4 We the Company Tecnosicurezza s r l declare herewith on our own responsability that the above m...

Страница 32: ...trical Electronic Equipment Applicable in the European Union and other European countries with separate collection systems This marking displayed on the product or its literature indicates that it sho...

Отзывы: