24
25
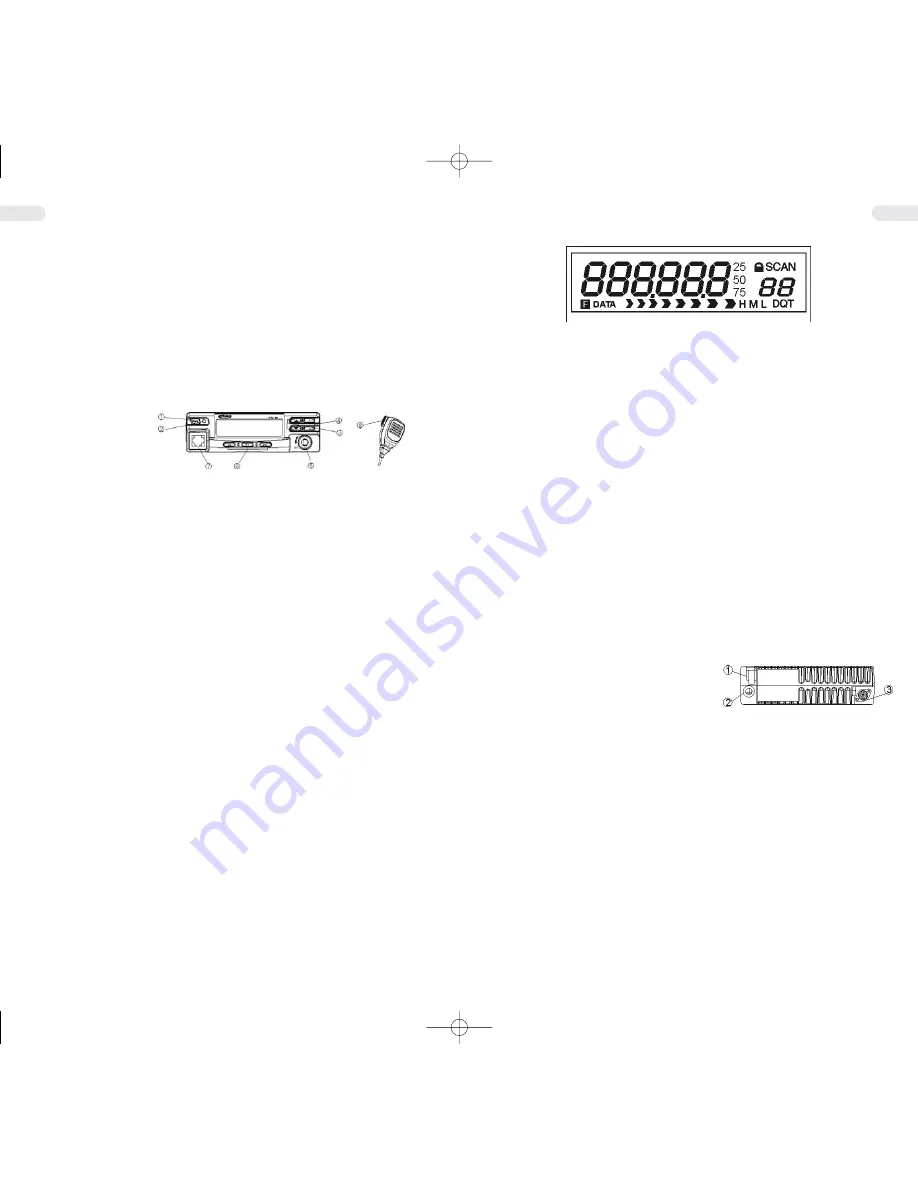
3.2 Display
( 888.88.8 )
Indicate the current channel frequency or channel No.
(
A )
Displays that current channel has been added to
the scanning list.
( P )
Displays Priority channel.
( DQT )
Active CTCSS Code
( QT
Acitve DQT Code
( SCAN )
Acitive Scan Function
( >>>>>>> )
RSSI ( Receive-Signal-Strength-Indicator )
( H M L )
Indicates power level ( high, medium or low )
( F )
Indicates secondary function mode.
( lock )
Indicates key lock.
( PC )
Indicates data transmission
( 25 / 50 / 75 ) Frequencies with 5 digits, will specifiy their last two
digits with one of the numbers.
Notice:
Any key action will light the LCD for about 10 seconds. If the keys have
no action in 10 seconds, the background light of LCD will
be turned off automatically.
3.3 Rear Panel
1 - Jack for power cable plug 1
2 - Jack for external speaker
3 - Jack for antenna
4 The Secondary Functions
Note: the secondary function can be prohibited by dealer.
4.1 Transmission Power Selection
You may select high RF power, medium RF power or low RF power
conveniently. Press FUN key, the F indicator will light ,then press the
key to select transmission power,e.g. L
Press the
/
keys to select RF power you want. After the transmis-
sion power have been selected, H, M or L indicator will light on LCD. It
means that current transmission power is high, medium or low respec-
tively. Press FUN key to confirm it. If you do not want to change the
transmission power, press the
B
key to cancel the current setting.
GB
GB
2.4 Aerial Connection
Before pressing the transmit key, a suitable aerial must be connected.
The BNC-plug of the aerial cable has to be connected to the socket
on the rear panel. Make sure, that all plugs are firmly tightened and
properly soldered. Unsatisfactory connections can damage the radio
and will reduce the range of operation.
The antenna should be matched with the radio, otherwise a part of the
transmit power will be reflected at the antenna and will not be radiat-
ed. This causes also a drop in the range of operation.
3. Getting Acquainted
3.1 Front Panel and Microphone
1. PWR-Power switch
Press and hold this switch about 2 seconds, then power turn on/off.
2. LED indicator
Be red while transmitting and green while receiving a signal.
3.
/
keys
Press these keys to select the operation channel, with FUN key to
set the other functions. (See page 8 for additional information on
this function.)
4. Channel A / B
If have been set up channel A or B, press one of the key to choose
channel A or B, with FUN key to set the other functions. (See page
8 for additional information on this function.)
5. Volume control
Use this control to adjust the volume from the speaker. Clockwise
rotation increases the volume; counterclockwise rotation decrease
the volume.
6. SCAN, FUN and MON Keys
SCAN key, when more than two channels are added to the scan
list, use this key to start up scan function. (Reference to channel
scan), with FUN key to set the other functions. (See page 8 for addi-
tional information on this function.)
7. Jack for microphone or programming cable connector
This jack is used for handset microphone, and it is used for program-
ming cable connector too.
8. PTT key (on microphone)
Press PTT key, then enter transmission state release this key, then
return to standby mode.
manual.qxp 14.07.2006 16:08 Seite 25


