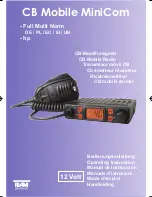
Team Electronic CB3208 Скачать руководство пользователя страница 8

Power source 

Before connecting the unit to a suitable power source via the fused
DC power cable, the device must be switched off by turning the vo-
lume control (5) [ 

VOL

] counterclockwise to the very end until a clik-

king sound is heard.
Then, connect the two naked leads at the end of the cable with the
supply voltage of the vehicle battery. The unit is designed to operate
with 12 volts and a negative ground electrical system. Lay the cable
as far as possible away from aggregates which can cause interfe-
rence. Watch for the correct polarity during the connection. 

BLACK connect to - MINUS / ground of the car battery.
RED

connect to 12 volts + PLUS of the vehicle’s battery. 

If the cable is not disconnected from the power source, the last settings
will remain stored after the radio and the car are switched off.
After proper connection of the aerial and the power source, radio
operation can be started. 

Aerial Connection 

Before pressing the transmit key, a suitable aerial must be con-
nected. The PL259 plug of the aerial cable (coax) is connected to
the SO239 socket (8) on the rear panel. Make sure, that all plugs are
firmly tightened and properly soldered. Insufficient connections can
damage the radio and will reduce the range of operation. 
The antenna should be matched with the radio, otherwise a part of
the transmit power will be reflected at the antenna and will not be ra-
diated. This reduces the range of operation. The matching of antenna
to radio, is performed by a length adjustment of the antenna radial
in aim for a minimal SWR ratio which can be measured by a SWR
meter, e.g. TEAM SWR 1180P. After the measurement the SWR
meter should be removed from the antenna line. 

Installation in the car

When you want to fix the unit in your car, you can either fasten it with
the help of the included mounting bracket below the dashboard. Always
mount the transceiver where the switches are easily accessible. Other
important points to consider for a correct mounting position are: 

> no interference of the roadworthiness, 
> good access to the controls of the car, 
> sufficient air circulation to prevent overheating of the radio in 

transmit mode. 

Please consider the perspective onto the display while driving. Star-
ting from a certain angle of view, the readability of the display dimi-
nishes. An intensive solar irradiation can also affect the readability
of the display. So it is recommended to check the best position before
the final installation. The unit can easily be fixed onto different posi-
tions in the car by using the enclosed mounting bracket.

Microphone 

The microphone is permanently connected to the radio, it cannot be re-
moved. It contains the PTT key, as well as the channel selectors UP and
DOWN.  

14

15

manual_cb-mobile-minicom5:Layout 1  11/11/2014  9:42 AM  Page 14

Содержание CB3208

Страница 1: ...n Manual de Instrucci n Manuale d istruzioni Mode d emploi Handleiding Full Multi Norm DE PL EC EI UK hp CB Mobile MiniCom CB Mobilfunkger t CB Mobile Radio Transmisor m vil CB Cb metteur r cepteur Ri...

Страница 2: ...Bedienelemente elements l ments elementen elementos elementi 2 3 manual_cb mobile minicom5 Layout 1 11 11 2014 9 42 AM Page 2...

Страница 3: ...es Fahrzeuges gebohrt werden muss gibt es noch weitere M glichkeiten z B die Dachrinnen oder Kofferraumdeckel Montage sowie die Befestigung mit Magnetfu oder Scheibenan tenne Alle angeschlossenen Leit...

Страница 4: ...Antennenkabels mit dem Antennenfu zu achten Nicht einwandfreie Verbindungen k n nen zu einem Defekt des Ger tes f hren und die Funkreichweite er heblich verringern Die Antennenanlage nicht im Lieferum...

Страница 5: ...n sind alle anderen Bedienelemente gesperrt 8 9 Mikrofon zu ndern Nach kurzer Zeit erscheint in der Anzeige der ak tuelle Kanal Um denASQ Wert anzuzeigen gen gt ein kurzes Dr cken der SQ Taste 1 Hinwe...

Страница 6: ...n Die genauen L nderbestimmungen der verschiedenen Versionen entnehmen Sie bitte dem beiliegenden Ger tepass Entsorgung Bitte werfen Sie Ihr TEAM Altger t nicht einfach auf den M ll sondern senden Sie...

Страница 7: ...fix the antenna onto the car without the necessity to drill a hole into the bodywork of your car e g mounting the antenna onto the gutter mounting the antenna onto a holder on the cover of the boot o...

Страница 8: ...erwise a part of the transmit power will be reflected at the antenna and will not be ra diated This reduces the range of operation The matching of antenna to radio is performed by a length adjustment...

Страница 9: ...selection of the permissible norm in the country of operation Note the radio mono band version hp operates on 40 FM 4 W 40 AM 4 W only OPERATION On Off VOL To turn on off the radio turn the volume sw...

Страница 10: ...LCD For best quality speak normally at a distance of 2 4 inches Speaking too loudly will cause distortion and makes the signal difficult to understand While the set is in the transmit mode there is n...

Страница 11: ...ble a reo debe estar en buen estado y los conectores conec tados satisfactoriamente Aseg rese que el cable de la antena no est muy doblado ni ha ciendo demasiados ngulos Cuanto m s grande sea el tama...

Страница 12: ...ar con un sistema el ctrico negativo a masa Tender el cable lo m s lejos posible del conjunto ya que puede producir interferencias Vigilar la polaridad correcta durante la conexi n BLACK Negativo cone...

Страница 13: ...es UP y DN en el micr fono Selecci n de modulaci n A F El CB Mobile MiniCom puede funcionar en modulaci n AM o FM sta se puede cambiar pulsando el bot n 2 A F entre los tipos de modulaci n AM y FM El...

Страница 14: ...unciona bien En este caso desconectar inmediatamente el equipo de la fuente de alimentaci n DC En caso de encontrarse alg n defecto podr n contactar con el especialista autorizado o el equipo TEAM Con...

Страница 15: ...ria capote L antenna deve essere a massa con la parte metallica dell auto mezzo Ci sono anche alcune alter possibilit per fissare l antenna sulla mac china senza la necessit di forare la carrozzeria p...

Страница 16: ...orrettamente saldati Connessioni inadeguate possono danneggiare la radio e ridurne di funzionamento L antenna deve essere collegata alla radio altrimenti una parte della trasmissione di potenza si rif...

Страница 17: ...crofono Sul dis play LCD appare il simbolo TX Al termine della trasmissione rilasciare il tasto PTT 4 e si ritorna alla modalit di ricezione Funzionamento dell apparato TEAM CB Mobile MiniCom Accensio...

Страница 18: ...l selettore canale rotatoriosono disabilitati Per ritornare al canale precedente premere il tasto 4 EMG una volta Funzione blocco tasti EMG Premendo il tasto 4 EMG e mantenendolo premuto per circa 1 s...

Страница 19: ...antenne mobile doit avoir le contact le mieux possible une surface bien conductible de la carrosserie En dehors de la montage fixe de l antenne mobile qui demande la per age d un trou dans la carross...

Страница 20: ...ur PL du type PL259 du c ble d antenne coax doit tre raccord la prise d antenne 8 plac au panneau arri re L crou raccord doit tre viss fond pour une bonne jonction Il faut galement veiller au bon racc...

Страница 21: ...prioritaires 9 et 19 Le canal 9 est activ via un appui unique sur la touche canal prioritaire 4 EMG Pour activer le canal 19 comme canal prioritaire la touche canal prioritaire doit tre appuy e deux...

Страница 22: ...tr s forts car ils peuvent tre difficiles com prendre parfois en raison de lourdes distorsions Apr s avoir appuy sur la touche RFG 3 la valeur r elle est affi ch e c est dire 6 12 18 24 30 36 42 48 54...

Страница 23: ...olariteit Het opzetten van de TEAM CB Mobile MiniCom Installeren van een CB antenne De antenne is een van de meest belangrijke onderdelen van de in stallatie Het type antenne en de montageplaats heeft...

Страница 24: ...965 27 405 MHz 4 W 40 AM 26 965 27 405 MHz 4 W ZWART Sluit deze aan op de MIN massa van de auto accu ROOD Sluit deze aan op de 12 volt PLUS van de auto accu Bij het verwijderen van de plus blijven de...

Страница 25: ...ymbolen zijn niet zichtbaar De toets gewenste norm word ingesteld door met de kanalen toets Betreffende de toestemmingen en de beperkingen van de indivi duele normen in de diverse Europese landen te c...

Страница 26: ...05 21 27 215 22 27 225 23 26 255 24 27 235 25 27 245 26 27 265 27 27 275 28 27 285 29 27 295 30 27 305 31 27 315 32 27 325 33 27 335 34 27 345 35 27 355 36 27 365 37 27 375 38 27 385 39 27 395 40 27 4...

Страница 27: ...c de L nder Version Vertrieb Betrieb Anmelde Geb hrenfrei Countries Distribution Operation Registration Chargefree AT FMN EI CH hp CZ FMN EC DE FMN DE DK FMN EC ES FMN EI FR FMN EI FIN FMN EU GB FMN U...

Отзывы: