background image

DEUTSCH

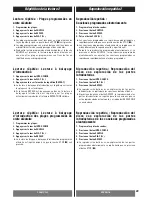
Wiedergabe 1

44

Mit Schalter POWER EINschalten. 

Der CD-Teller wird automatisch im Uhrzeigersinn gedreht.

Mit Taste OPEN/CLOSE (

L

) die CD-Lade öffnen.

Eine (mehrere) CD(s) mit nach oben weisendem Etikett in den
(die) CD-Halter einlegen. 

<

Zur Belegung aller 5 CD-Halter die Taste DISC SKIP drücken.

<

Mit jedem Antippen der Taste DISC SKIP wird der CD-Teller im
Uhrzeigersinn bis zur nächsten CD-Halterposition weiter-
gedreht.

Achtung:

<

Den sich drehenden CD-Teller nicht berühren.

<

Außer CDs keine anderen Gegenstände in die Halter legen, da
diese den Mechanismus beschädigen können.

Die OPEN/CLOSE-Taste (

L

) erneut betätigen.

Die Taste DISC NO. (1~5) für den CD-Halter mit der zuerst
abzuspielenden CD drücken.

Die PLAY-Taste (

y

) drücken.

6

5

4

3

2

1

Der Musikkalender leuchtet, um die verfügbaren, nicht
gespielten Titel anzuzeigen. Hat eine Disc mehr als 14 Titel,
leuchten Titelnummer 1–14 und Anzeige OVER.

Verstrichene Zeit

Titelnummer

Der Musikkalender

Disc-Marke

Gewählte Disc

1

1

3

6

2

4

5

2

6

4

5

CD-Nummernanzeigen und CD-Zeichen

1. Wenn eine CD-Nummer leuchtet

Der CD-Wechsler hat noch keine CD erkannt.

2. Wenn eine CD-Nummer und ein CD-Zeichen leuchten

Der CD-Wechsler hat die eingelegte CD erkannt.

3. Wenn CD-Nummer und CD-Zeichen erlöschen

Der CD-Wechsler kann keine CD erkennen.

Содержание PD-D2410

Страница 1: ...OWNER S MANUAL MANUEL DU PROPRIÉTAIRE MANUAL DEL USUARIO BEDIENUNGSANLEITUNG MANUALE DI ISTRUZIONI GEBRUIKSAANWIJZING 9A09454001 PD D2410 Compact Disc Changer Z ...

Страница 2: ...cture programmée 19 Lecture au hasard 23 Lecture de contrôle d introduction 25 Répétition de la lecture 27 Affichage du temps 31 Dépannage 32 Caractéristiques 33 Enhorabuena por la adquisición de un TEAC Lea detenidamente este manual a fin de obtener el mejor rendimiento de esta unidad Previo al empleo 6 Manipulación de discos 7 Unidad de control remoto 9 Conexión 11 Nombre de los controles 13 Rep...

Страница 3: ...ti 62 Specifica 63 Hartelijk dank dat u voor een TEAC product heeft gekozen Lees deze gebruiksaanwijzing zorgvuldig door om optimaal te profiteren van de prestaties van dit apparaat Voor gebruik 35 Compact Disc 37 Afstandsbediening 39 Aansluitingen 41 Beschrijving van de bedieningselementen 43 Weergave 45 Geprogrammeerde weergave 49 Shuffle weergave 53 Intro Check 55 Weergave herhalen 57 Tijdsaand...

Страница 4: ... stabilize at the temperature of its surroundings Maintenance If the surface of the unit gets dirty wipe with a soft cloth or use diluted neutral cleaning liquid Be sure to remove any fluid completely Do not use thinner benzine or alcohol as they may damage the surface of the unit IMPORTANT for U K Customers DO NOT cut off the mains plug from this equipment If the plug fitted is not suitable for t...

Страница 5: ... lugares expuestos a vibraciones y muy polvorientos calurosos fríos o húmedos No coloque el PD D2410 sobre el amplificador receptor No abra el gabinete ya que esto podría producir daños en los circuitos o electrochoques Si entrara algún objeto en el interior del aparato póngase en contacto con su concesionario Al desenchufar el cordón del tomacorriente tire siempre de la clavija nunca del cordón P...

Страница 6: ...extended periods Long exposure to high temperatures will warp the disc CD R and CD RW discs are more sensitive to the effects of heat and ultraviolet rays than ordinary CDs It is important that they are not stored in a location where direct sunlight will fall on them and which is away from sources of heat such as radiators or heat generating electrical devices Printable CD R and CD RW discs aren t...

Страница 7: ...ec le disque ou contacter directement le fabricant du disque D C B A Disques compatibles avec cet appareil Compact Disc CD audio conventionnel CD R et CD RW qui ont été convenablement finalisés Note Les disques CD R et CD RW peuvent être joués par l appareil sous réserve qu ils aient été convenablement finalisés Discos que pueden utilizarse con esta unidad Discos compactos de audio convencionales ...

Страница 8: ...to be used for a long time more than a month remove the batteries from the remote control unit to prevent them from leaking If they leak wipe away the liquid inside the battery compartment and replace the batteries with new ones Do not heat or disassemble batteries and never dispose of old batteries by throwing them in a fire 3 2 1 The provided Remote Control Unit allows the unit to be operated fr...

Страница 9: ...sinage d autres appareils générant des rayons infrarouges ou si d autres télécommandes utilisant des rayons infrarouges sont utilisées près du lecteur le lecteur peut de ne pas bien fonctionner Dans la situation inverse les autres apaareils peuvent ne pas bien fonctionner Instalación de las pilas Abra la tapa del compartimiento de las pilas Coloque dos pilas AA R6 SUM 3 Asegúrese de que las pilas ...

Страница 10: ... plug w white jack L left red plug w red jack R right Be sure to insert each plug securely To prevent hum and noise do not bundle the connection cords with the power cord or speaker cord DIGITAL OUT terminals Connect the component with coaxial cables or optical cables DIGITAL OUT w DIGITAL IN MD etc When using DIGITAL OPTICAL OUT terminals remove the caps from the terminals When you do not use the...

Страница 11: ...s sur ces bornes En cas de non utilisation les laisser en place Cordon d alimentation CA Branchez ce cordon d alimentation CA sur une prise de courant CA murale C D B A Apague todos los equipos antes de realizar las conexiones Lea las instrucciones de todos los componentes que prevé utilizar junto con la pletina para PD D2410 Tomas LINE OUT Conecte las tomas LINE OUT al amplificador con los cables...

Страница 12: ...tton OPEN CLOSE button L Disc tray TRACK NO buttons 1 9 0 PROGRAM button SEARCH buttons m SHUFFLE button TIME button REPEAT button INTRO CHECK button PROGRAM CHECK button CLEAR button T S R Q P O N M L K J I H G F E D C B A J K A C D H G F B E I B L F M H R Q P O I G N E S T The equipment draws nominal non operating power from the AC outlet with its POWER switch in the OFF position ...

Страница 13: ...AT Touche de contrôle d introduction INTRO CHECK Touche PROGRAM CHECK Touche d annulation CLEAR T S R Q P O N M L K J I H G F E D C B A Botón POWER Botones DISC NO 1 5 Receptor de señales infrarrojas del control remoto REMOTE SENSOR Visor indicador de funciones múltiples Botones MUSIC SKIP Botón STOP H Botón PAUSE J Botón PLAY y Botón DISC SKIP Botón OPEN CLOSE L Bandeja portadisco Botones TRACK N...

Страница 14: ...nism Press the OPEN CLOSE L button again Press the DISC NO 1 5 button which corresponds to the tray number of the disc to be played Press the PLAY y button 6 5 4 3 2 1 The music calendar lights to show the available unplayed tracks If there are more than 14 tracks on a disc the track number 1 14 and OVER indicator will light elapsed time track number music calendar disc mark selected disc Disc num...

Страница 15: ...de la etiqueta hacia arriba Pulse el botón DISC SKIP para cargar los cinco discos Cada vez que se pulsa el botón DISC SKIP la bandeja gira en sentido de las agujas del reloj hasta la siguiente posición Precaucion No toque la plataforma rotativa mientras esta girando No coloque nada que no sea un disco compacto en la bandeja Los objetos extraños pueden dañar el mecanismo Presione nuevamente la tecl...

Страница 16: ...rse direction This unit features 2 speed search The search speed will increase after the button is held down for approximately three seconds Search is possible during PAUSE mode but no sound is heard The CD changer will not search beyond the beginning or the end of a disc Music skip Press and release the button to advance to the beginning of the next track Press and hold down the button to advance...

Страница 17: ...sélectionner les numéros de disque et de plage puis appuyer sur la touche PLAY y dans les 10 secondes La lecture commencera avec la plage sélectionnée F E D C B A Para suspender provisoriamente la reproducción Presione el botón PAUSE J Se detiene la reproducción en la posición actual y destella el indicador J Para reanudar la reproducción desde la misma posición presione el botón PLAY y o PAUSE J ...

Страница 18: ...utton The TRACK number display shows A The first program selection is now stored in the program memory Repeat steps to to store more tracks a maximum of 32 tracks can be stored If you try to enter more than 32 selections the display shows FULL for about 1 second When the selection of track numbers has been finished press the PLAY button y to start program playback Programmed play starts from the b...

Страница 19: ... disque et de plage ne peuvent pas être sélectionnés pendant la lecture programmée La touche DISC SKIP ne peut pas être utilisée pendant la lecture programmée 4 3 1 3 2 1 Es posible seleccionar 32 pistas de los discos y reproducirse en cualquier orden deseado Un programa no puede ser introducido durante el modo de reproducción En el modo de parada presione el botón DISC NO 1 5 para seleccionar el ...

Страница 20: ...M CHECK button 2 Enter a new program selection B Notes Track numbers which exceed the highest track on a disc can be programmed but during play these tracks will be deleted The time shown in the display may differ slightly from the time listed in the literature from the compact disc Checking the programmed contents The programmed contents can be checked easily using the PROGRAM CHECK button 1 Pres...

Страница 21: ...tions à un programme après programmation appuyer d abord sur la touche STOP H 2 Puis sélectionner le numéro DISC TRACK 3 Appuyer sur la touche PROGRAM C Fin de la reproducción programada 1 Pulse el botón STOP H para finalizar la reproducción del programa 2 Pulse el botón CLEAR para borrar la memoria del programa El indicador PROGRAM se apagará Durante la reproducción programada si el botón CLEAR s...

Страница 22: ...mal or programmed disc play will continue from that point Press the STOP button H to end shuffle play If tracks have been programmed the programmed tracks will be played at random When all of the shuffle programmed tracks have been played the CD changer will stop Pressing the or button during the shuffle programmed play changes track numbers in the programmed order If a new track number or disc nu...

Страница 23: ...et que la touche PLAY y est enfoncée le changeur CD lira la nouvelle plage et la lecture aléatoire continuera 2 1 Pulse el botón SHUFFLE El indicador SHUFFLE se ilumina Pulse el botón PLAY y El indicador y se ilumina y da comienzo la reproducción al azar El microprocesador interno del cambiador de CD seleccionará y reproducirá la pistas en un orden aleatorio Pulse de nuevo el botón SHUFFLE para de...

Страница 24: ... with the next track If you perform the same action while a track has played for less than 10 seconds the intro check disc play starts from that track Checking the contents of programmed tracks 1 Program the tracks The PROGRAM indicator lights 2 Press the INTRO CHECK button The INTRO indicator lights 3 Press the PLAY button y Upon finishing the entire programmed intro check disc play the mode disp...

Страница 25: ...uméro de plage sur le disque appuyer tout d abord sur la touche de numéro de disque puis appuyer sur la touche de numéro de plage 4 Appuyer sur la touche PLAY y 3 2 1 Revisión del contenido de todos los discos Pulse el botón INTRO CHECK El indicador INTRO se ilumina Seleccione el número de disco usando los botones DISC NO 1 5 Para designar un número de canción de un disco presione primero el botón...

Страница 26: ...de Press the REPEAT button and then select the track number by pressing the DISC NO button and TRACK NO button Every time the REPEAT button is pressed the mode is changed as follows A Repeat All the Discs REPEAT ALL All the tracks of the 5 discs will be played repeatedly During program playback only the programmed tracks will be played in order repeatedly Notes The REPEAT function can be released ...

Страница 27: ...u programme Remarques N importe quelle fonction de répétition peut être relâchée en appuyant sur la touche REPEAT jusqu à ce que les indicateurs REPEAT s éteignent Si ceci est effectué pendant la lecture le lecteur continuera en lecture normale Repetición de una pista REPEAT ONE Presione el botón REPEAT y seleccione REPEAT ONE durante la reproducción La pista se reproducirá repetidamente Si usted ...

Страница 28: ...layed repeatedly in the programmed order Repeat play Intro check disc play 1 Press the INTRO CHECK button 2 Press the PLAY y button 3 Press the REPEAT button Intro play is repeated for the tracks on all discs If the REPEAT button is pressed again intro play is repeated for the tracks currently playing and the REPEAT ONE indicator lights Repeat play Intro check disc play of shuffle programmed track...

Страница 29: ...ntroduction programmée aléatoire est répétée jusqu à ce que la touche STOP H soit pressée Reproducción repetida Canciones programadas aleatoriamente 1 Programe las pistas deseadas 2 Presione el botón SHUFFLE 3 Presione el botón REPEAT 4 Pulse el botón PLAY y Las canciones programadas se repro ducen aleatoriamente y repetidamente hasta que no se presione el botón STOP H Las canciones programadas al...

Страница 30: ... button is pressed the display is changed as follows Elapsed time of the track being played Remaining time of the track being played The total play time and the number of tracks of the selected disc Total remaining play time of all remaining tracks D C B A B C D ...

Страница 31: ...re total et nombre de pistes du disque sélectionné Temps de lecture restant de toutes les pistes restantes D C B A En modo de reproducción Cada vez que se pulsa el botón TIME el modo cambia tal como sigue Tiempo de reproducción de la pista transcurrido Tiempo de reproducción de la pista restante El número total de reproducción y el número de pistas del disco seleccionado Tiempo de reproducción res...

Страница 32: ...kHz S N ratio More than 100 dB Wow and flutter Below measurable limit Channel separation More than 85 dB 1 kHz Output voltage max 2 1 Vrms General Power requirements 230 V AC 50 Hz Power consumption 12 W Dimensions W x H x D 435 x 115 x 390 mm Weight 6 2 kg Standard Accessories Wireless remote control RC 722 x 1 Pin plug cord x 1 En cas de problème commencer par chercher dans ce tableau pour voir ...

Страница 33: ... diese Bedienungsanleitung auf um bei eventuell später auftauchenden Fragen darin nachschlagen zu können DAS GERÄT BEIM ABSPIELEN NICHT BEWEGEN Beim Abspielen dreht sich die Disc mit Hochgeschwindigkeit Das Gerät beim Abspielen NICHT hochheben oder bewegen Ansonsten kann die Disc beschädigt werden ZUM BEWEGEN DIESES GERÄTS Wird der Einbauort des Geräts gewechselt oder das Gerät für einen Umzug ver...

Страница 34: ...izzarsi alla nuova temperatura ambiente Manutenzione Se la superficie dell apparecchio dovesse sporcarsi pulirla strofinandola con uno straccio morbido oppure usare una soluzione blanda di detergente Pulire a fondo Non usare diluenti benzina o alcool in quanto potrrebbero rovinare la superficie del mobile Lees dit voor gebruik Het apparaat kan warm worden tijdens normaal functioneren Zorg altijd v...

Страница 35: ...Staub die den Laser Pickup aus seiner Bahn werfen könnten sollten CDs nach Gebrauch stets in die jeweilige CD Hülle zurückgelegt werden Setzen Sie Ihre CDs nicht über längere Zeit direkter Sonneneinstrahlung anderen Wärmequellen sowie extrem hoher Luftfeuchtigkeit aus da dies zu Verformungen führen kann CD R und CD RW Discs sind empfindlicher gegenüber Hitze und ultravioletter Lichteinstrahlung al...

Страница 36: ...eccetera perché possono danneggiare il registratore In caso di dubbi sul modo di conservare e maneggiare un disco CD R e CD RW attenersi alle istruzioni allegate al disco stesso oppure rivolgersi direttamente al fabbricante D C B A Uw PD D2410 kan de volgende CD s afspelen Alle voorbespeelde audio CD s Alle gefinaliseerde audio CD R en audio CD RW discs Opmerking CD R CD RW discs kunnen op de PD D...

Страница 37: ...e Batteriefach Abdeckung entfernen Zwei Batterien AA R6 SUM 3 unter Beachtung der Polarität _ einlegen Die Abdeckung wieder anbringen Batteriewechsel Sollte es erforderlich werden den Abstand zwischen Gerät und Fernbedienung zur Funktionsauslösung zu verringern wird ein Batteriewechsel notwendig Stets zwei neue Batterien einlegen Batterie Vorsichtsmaßnahmen Die Batterien unter Beachtung der korrek...

Страница 38: ...delle perdite pulire il vano batterie e sostituire le batterie con altre di nuove Non riscaldare o disassemblare le batterie e non gettarle nel fuoco 3 2 1 Met de meegeleverde afstandsbediening kunt u het apparaat op afstand bedienen Richt de afstandsbediening op de Remote Sensor aan de voorzijde van het apparaat Als zich obstakels tussen de afstandsbediening en het apparaat bevinden functioneert ...

Страница 39: ...en Sie sicher daß alle Stecker fest eingesteckt sind Um Brummen und Geräusche zu verhindern dürfen die Anschlußkabel nicht mit dem Strom oder Lautsprecherkabel gebündelt werden DIGITAL OUT Buchsen Schließen Sie an den jeweiligen Eingängen des Gerät entweder koaxiale oder optische Kabel an DIGITAL OUT w DIGITAL IN MD usw Sofern Sie die DIGITAL OPTICAL OUT Anschlüsse verwenden entfernen Sie bitte zu...

Страница 40: ...tivi copriterminale quando invece questi terminali non servono i copriterminale possono rimanere al loro posto Uscita potenza Inserire questo cavo in una presa di rete oppure nella presa AC OUTLETS C D B A Zet alle apparatuur uit voordat u de aansluitingen maakt Lees de gebruiksaanwijzing van elk apparaat dat u in combinatie met de PD D2410 wilt gebruiken LINE OUT aansluitingen Verbind de LINE OUT...

Страница 41: ...n Schließen Taste OPEN CLOSEL CD Lade Titelnummertaste TRACK NO 1 9 0 Programmiertaste PROGRAM Suchlauftasten SEARCH m Zufallswiedergabetaste SHUFFLE Zeitmodustaste TIME Wiederholtaste REPEAT Anspielsuchlauftaste INTRO CHECK Programmprüftaste PROGRAM CHECK Löschtaste CLEAR T S R Q P O N M L K J I H G F E D C B A Dieses Gerät steht unter wenig nicht operativer Spannung wenn es mit dem POWER Schalte...

Страница 42: ...PEAT Tasto INTRO CHECK Tasto PROGRAM CHECK Tasto CLEAR T S R Q P O N M L K J I H G F E D C B A Questo apparecchio consuma una piccola non operante corrente elettrica anche se l interruttore POWER si trova rilassato POWER toets DISC NO toetsen 1 5 REMOTE SENSOR Multifunctionele display MUSIC SKIP toetsen STOP toets H PAUSE toets J PLAY toets G DISC SKIP toets OPEN CLOSE toets L Disclade TRACK NO to...

Страница 43: ...iese den Mechanismus beschädigen können Die OPEN CLOSE Taste L erneut betätigen Die Taste DISC NO 1 5 für den CD Halter mit der zuerst abzuspielenden CD drücken Die PLAY Taste y drücken 6 5 4 3 2 1 Der Musikkalender leuchtet um die verfügbaren nicht gespielten Titel anzuzeigen Hat eine Disc mehr als 14 Titel leuchten Titelnummer 1 14 und Anzeige OVER Verstrichene Zeit Titelnummer Der Musikkalender...

Страница 44: ...co contiene più di 14 brani i numeri di brano 1 14 e l indicatore OVER si illuminano tempo trascorso numero del brano calendario dei brani indicazione di disco disco selezionato Zet het apparaat aan ON met de POWER toets De disclade draait automatisch in de richting van de wijzers van de klok Druk op de OPEN CLOSE toets L voor het openen van de disclade Leg voorzichtig een disc in de disclade s me...

Страница 45: ...Suchlaufwieder gabe die Suchlauftaste m oder gedrückt halten Der Suchlauf dieses Geräts arbeitet mit zwei Geschwindigkeitsstufen Wenn eine der beiden Tasten länger als 3 Sekunden gedrückt gehalten wird schaltet der CD Wechsler auf die schnellere Suchlaufgeschwindigkeit Der Suchlauf arbeitet auch im Pause Betriebszustand wobei dann jedoch kein Ton zu hören ist Der Suchlauf reicht nur bis zum Anfang...

Страница 46: ...ro di brano non contenuto in un CD viene riprodotto l ultimo brano del CD stesso In modalità di riproduzione PLAY selezionare i numeri del disco e del brano desiderato e premere poi il tasto PLAY y entro 10 secondi La riproduzione ha inizio dal brano selezionato F E D C B A Om de weergave tijdelijk te onderbreken Druk op de PAUSE toets J De weergave stopt op de huidige positie en het PAUSE J indic...

Страница 47: ...cken Auf den Anzeigen TRACK erscheint in diesem Fall A Der erste Programmtitel ist nun gespeichert Die Schritte bis wie erforderlich zur Programmierung weiterer Titel wiederholen bis zu 32 Titel können vorgemerkt werden Versucht man mehr als 32 Titel einzugeben wird FULL etwa 1 Sekunde lang angezeigt Wenn Sie mit der Wahl der Titelnummern fertig sind drücken Sie die Taste PLAY y um die programmges...

Страница 48: ...elezionare numeri di disco o di brano Mentre è in corso la riproduzione programmata è impossibile utilizzare il tasto DISC SKIP 4 3 1 3 2 1 Tot 32 nummers van elke disc kunnen in de gewenste volgorde geprogrammeerd en weergegeven worden De volgorde kan niet gedurende de weergave worden geprogrammeerd Druk in de stopstand op de DISC NO 1 5 toets om een discnummer te selecteren Druk op de TRACK NO t...

Страница 49: ...ingeben B Anmerkung Wenn eine Titelnummer programmiert wird die auf der betreffenden CD nicht verzeichnet ist wird diese bei der Wiedergabe übersprungen Die im Display angezeigte Zeit kann sich geringfügig von der in der CD Begleitliteratur angegebenen unterscheiden Überprüfen des Programm inhalts Mit der PROGRAM CHECK Taste kann der Programmierungsinhalt auf einfache Weise überprüft werden 1 Die ...

Страница 50: ...oduzione normale continua da tale posizione La memoria del programma viene cancellata anche quando l alimentazione del cambiatore di CD viene disattivata D Controleren van de geprogrammeerde volgorde De geprogrammeerde volgorde kan makkelijk worden gecontroleerd door middel van de CHECK of de PROGRAM CHECK toets 1 Druk op de STOP toets H 2 Druk op de PROGRAM CHECK toets Iedere keer dat de PROGRAM ...

Страница 51: ...igt erfolgt erneut normale programmierte Wiedergabe Die Taste STOP H drücken um die Zufallswiedergabe zu beenden Wurden Titel programmiert werden diese bei Zufallsauswahl abgespielt Nach Abspielen aller Programmtitel schaltet der CD Wechsler auf Stop Bei Zufallswiedergabe programmierter Titel werden diese beim Betätigen der Tasten und in der Reihenfolge ihrer Eingabe durchlaufen Wird bei normaler ...

Страница 52: ...vo numero di brano o di disco e si preme poi il tasto PLAY y lo scambiadischi riproduce il nuovo brano e la riproduzione casuale poi continua 2 1 Druk op de SHUFFLE toets Het SHUFFLE indicatielampje brandt Druk op de PLAY G toets Het G indicatielampje brandt en de shuffle weergave begint De in de CD wisselaar ingebouwde microcomputer selecteert de tracks en geeft de discs nu willekeurig weer Druk ...

Страница 53: ...TRO CHECK Taste während der normalen Wiedergabe gedrückt wird nachdem der aktuelle Titel bereits mehr als 10 Sekunden gespielt wurde wird der nächste Titel angespielt Wenn seit Wiedergabebeginn des Titels jedoch weniger als 10 Sekunden verstrichen sind setzt die Anspiel wiedergabe beim aktuellen Titel ein Kurzanspielung aller programmierten CD Titel 1 Die gewünschten Titel programmieren Die Anzeig...

Страница 54: ...remere un tasto DISC NO 1 5 Premere il tasto TRACK NO 1 9 0 ed il tasto DISC NO 1 5 per designare il brano da cui iniziare la riproduzione INTRO 4 Premere il tasto PLAY y 3 2 1 De inhoud van alle disc s controleren Druk op de INTRO CHECK toets Het INTRO indicatielampje brandt Selecteer een disc door middel van de DISC NO toetsen 1 5 Om een gewenste track op een CD te selecteren drukt u eerst op de...

Страница 55: ...gewählt werden Drücken Sie die Taste REPEAT und wählen Sie dann die gewünschte Titelnummer mit der Taste DISC NO und TRACK NO Mit jedem Druck auf die Taste REPEAT ändert sich die Betriebsart folgendermaßen A Wiederholung aller Discs REPEAT ALL Alle Titel der 5 Discs werden wiederholt abgespielt Bei programmgesteuerter Wiedergabe werden die programmierten Titel wiederholt abgespielt Anmerkung Jede ...

Страница 56: ...sto REPEAT fino a quando si spegne l indicazione REPEAT Facendo questo mentre la riproduzione è in corso questa continuerà nel modo normale Telkens wanneer op de REPEAT toets wordt gedrukt verandert de stand als volgt A Herhaling van alle discs REPEAT ALL Alle nummers van de 5 discs worden herhaald Tijdens de weergave van een geprogrammeerde volgorde worden de geprogrammeerde nummers herhaald afge...

Страница 57: ...derholte programmierte Wiedergabe um Wiederholte Anspiel wiedergabe 1 Die INTRO CHECK Taste drüken 2 Die PLAY y Taste drücken 3 Die REPEAT Taste drücken Die Titel aller CDs werden nun wiederholt der Reihe nach angespielt Wenn die REPEAT Taste ein zweites Mal betätigt wird spielt der CD Wechsler den aktuellen Titel wiederholt an wobei die Anzeige REPEAT ONE aufleuchtet Wiederholte Anspielwiedergabe...

Страница 58: ...re il tasto SHUFFLE 4 Premere il tasto PLAY y 5 Premere il tasto REPEAT La riproduzione INTRO dei brani programmati viene eseguita ripetutamente secondo un ordine casuale fino a che il tasto STOP H non viene premuto Weergave herhalen Shuffle geprogrammeerde tracks 1 Programmeer de tracks 2 Druk op de SHUFFLE toets 3 Druk op de REPEAT toets 4 Druk op de PLAY G toets Geprogrammeerde tracks worden wi...

Страница 59: ...der Taste TIME ändert sich die Betriebsart folgendermaßen Abgelaufene Zeit des gerade spielenden Titels A Restzeit des gerade spielenden Titels Gesamtwiedergabezeit und Anzahl der Titel der gewählten Disc Insgesamt verbliebene Spielzeit aller restlichen Titel D C B ...

Страница 60: ...oduzione Tempo totale di riproduzione e numero di brani del disco selezionato Tempo totale residuo di riproduzione di tutti i brani rimanenti D C B In de play mode Telkens wanneer u op de TIME toets drukt verandert de aanduiding als volgt Verstreken speelduur van het huidige nummer A Resterende speelduur van het huidige nummer De totale speelduur en het aantal nummers van de geselecteerde disc Tot...

Страница 61: ...men werden Die Abbildungen können leicht vom hergestellten Modell abweichen System CD Wechsler Abnehmer 3 Strahl Laser Fehlerkorrektur CIRC Sampling Rate 44 1 kHz DA Wandler Dual 1 Bit linear Digitalfilter 4 fach Oversampling Frequenzgang 20 20 000 Hz Klirrfaktor Kleiner 0 02 1 kHz Signal Rausch Abstand Größer 100 dB Gleichlaufschwankungen Nicht meßbar Kanaltrennung Größer 85 dB 1 kHz Ausgangsspan...

Страница 62: ... uit elkaar of schakel ze uit De afstandsbediening functioneert niet eVervang alle batterijen in de afstandsbediening door nieuwe Waarschijnlijk zijn deze te zwak eRicht de afstandsbediening op de voorzijde 5m 15ft van het de PD D2410 eZorg dat er geen obstakels zijn tussen de afstandsbediening en de PD D2410 eAls er een sterke lamp dichtbij het apparaat staat schakel deze dan uit Het apparaat spe...

Страница 63: ...unciona el mando a distancia e Si se ha agotado las pilas sustitúyalas eUtilice el mando a distancia dentro del radio de acción 5 m 15 ft y apunte al panel frontal e Retire todos los obstáculos existentes entre el mando a distancia y la unidad principal eSi una potente luz está cerca de la luz apáguela No se puede reproducir eInserte un disco con la cara de la etiqueta hacia arriba e Si el disco e...

Страница 64: ...e Street Mississauga Ontario L4Z 1Z8 Canada Phone 905 890 8008 TEAC MEXICO S A De C V Campesinos N 184 Colonia Granjas Esmeralda Delegacion Iztapalapa CP 09810 México DF Phone 525 581 5500 TEAC UK LIMITED 5 Marlin House Croxley Business Park Watford Hertfordshire WD18 8TE U K Phone 01923 819699 TEAC EUROPE GmbH Bahnstrasse 12 65205 Wiesbaden Erbenheim Germany Phone 0611 71580 TEAC ITALIANA S p A V...

Отзывы: