


Basic operation
Menu system
instruction
Digital Media Player
T
roubleshooting
Picture defects and
the reason
Menu operation
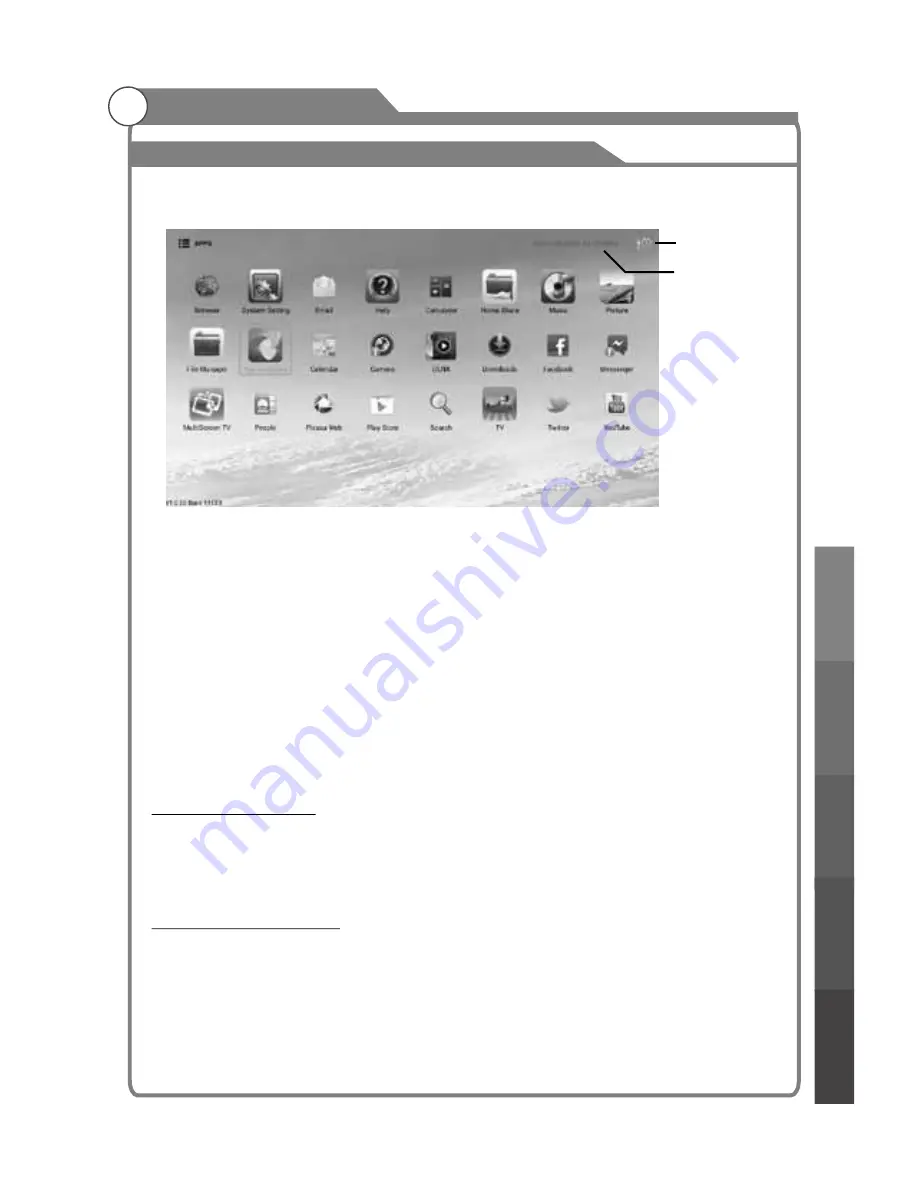
Applications Folder
Application menu shows all applications installed on the TV. Access this folder by clicking on
theall Apps icon on the homepage on the App Assistent.
This TV comes with some useful apps pre installed. For example:
1. Browser: Browse internet web pages.
2. System Setting: Access system settings menu.
3. Email: Set up email access.
4. Home Share / DLNA: Access DLNA functions.
5. Music: Launch the file browser for music files.
6. Picture: Launch the file browser for picture files.
7. TV: View video input in full screen (for DTV, HDMI, AV etc.)
8. Multiscreen TV: Screen mirroring from to smart devices and also provides remote control
capabilities from smart devices.
9. Play Store: Find and install new apps.
10. App Assistant: View and uninstall current apps, on install new apps straight from an
apk(app installation) file located on USD.
11. Search: Go to Google search.
General app controls:
Menu key: Toggle the app’s menu/toggle a contextual menu from the home page App foldes.
Exit key: Exit menus, or exit the app to return to the home page.
Arrow keys: Navigation using the selection frame or the on-screen pointer.
OK key: Confirm selection.
App storage and SD card
The internal srorage status for apps can be viewed in settings
"
Storage
"
Flash.
To add more storage, insert an SD card into the SD card slot on the TV.( 64GB max)
SD card information and options are in settings
"
Storage
"
SD Card.
Apps can be set to install to internal or SD card storage in Settings
"
Storage
"
App Install Position
Note: 1.Do Not remove the SD card while apps are running.
2.Installing too many apps may slow down system performance. If this happens,
please uninstall unused apps and check the system memory.
Basic Operation
25
Internal data storage
information
Latest apps
(recently used)
Содержание LES6572F3D
Страница 1: ...LES6572F3D...
Страница 2: ......
Страница 3: ...support teac com au...
Страница 4: ......
Страница 48: ...39048598...


