


42
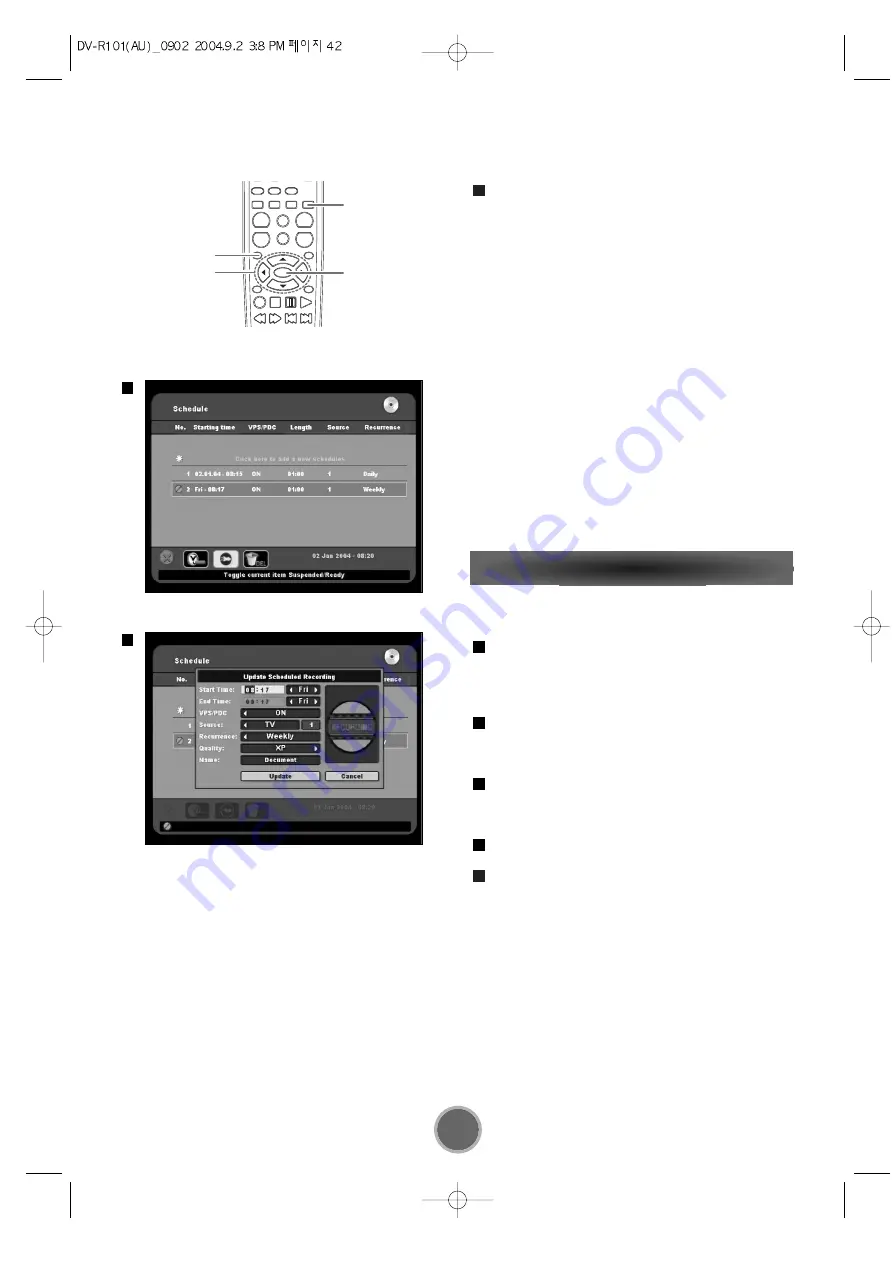
Updating a Scheduled Recording
You can update any of the details of any of scheduled
recordings.
From the Timer Screen, use the
5
5
,
b
b
to more to
desired scheduled recording.
The Action bar is highlighted with update automati-
cally selected.
Press the ENTER
The New Timer Recording window opens with the
details of the scheduled recording displayed.
See Scheduling a New Recording, to make any nec-
essary changes to start time, date, end time and date
and recurrence, etc.
Use the
b
b
to select update to save the changes.
Press RETURN to close the Timer Screen.
5
4
3
2
1
Use the
b
b
to select Add and press Enter.
The new recording details are added to the list of
scheduled recordings in the Timer screen and the
New Timer Recording window closes.
Note:
When you want to cancel the scheduled recording tem-
porarily, press the T-REC button once. To re-enable the
timer recordings, press the T-REC button again.
In order for the Timer Recording, you should push the
button, T-Rec, after making the Timer Recording
Schedule. In case of the power off of the unit, you can
see “ Timer Icon “ on the front of the unit if the Timer
Recording is on.
The unit should wake up 15minutes before the record-
ing, then the unit will be on the stand-by mode for the
recording. 3 minutes after the recording finish, the unit
will go back to the power off mode.
8
1
3
DIRECTION
T-REC
ENTER
RETURN


