
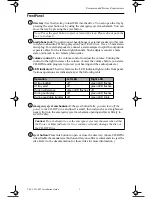

Recommended System Requirements
TEAC CD-RW Installation Guide
2
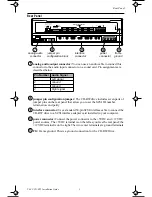
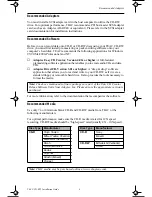
Front Panel
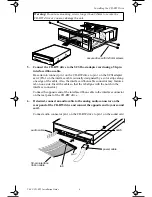
disc tray:
Use the disc tray to load CDs into the drive. You can open the tray by
pressing the eject button or by using the emergency eject mechanism. You can
close the tray by pressing the eject button.
headphone jack:
You can connect headphones or external speakers to this jack
to listen to an audio CD being played on your TEAC drive. Use a 3.5 mm stereo
mini-plug. For external speakers, connect a stereo adapter to split the output into
separate cables for the left and right channels. Such adapters convert a male
stereo mini-jack to two female phono jacks.
volume control:
Use the volume control to adjust the volume. Turning the
control to the right increases the volume. (Lower the volume before you start a
CD-ROM audio program to protect your hearing and the audio speakers.)
LED indicators:
The drive features two LED indicator lights on the front panel.
Various operations are indicated as per the following table:
emergency eject mechanism:
If the eject button fails, you can
turn off the
power to the CD-RW drive
and insert a small, thin rod (such as a straightened
paper clip) into the emergency eject mechanism opening and press firmly to
eject the disc.
eject button:
Press this button to open or close the disc tray. (Some CD-ROM
titles disable the manual eject button and rely on software commands to eject the
disc. Refer to the documentation for these titles for more information.)
Note: Press the eject button to eject or retract the tray. Please do not push the
tray in to close it.
Operation
Left LED
Right LED
At tray loading
off
green LED flashes
At tray eject
off
green LED flashes
During write/erase
green LED flashes
off
During audio play
off
green LED flashes
During seek/data transfer
off
green LED lights
Caution: Do not attempt to use the emergency eject mechanism when either
the Power or Busy indicator is lit or you may seriously damage the disc or
the CD-RW Drive.
CD-W512Sshort.fm Page 2 Thursday, December 14, 2000 10:30 AM