2.36 [.093]
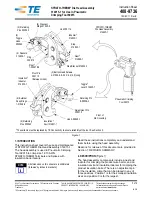
Radius (Typ)
2.31 [.091]
“GO” Dimension
6.35 [.25] Minimum (Typ)
2.46 [.097]
“NO-GO” Dimension
25.4 [1.00]
Minimum (Typ)
Die Opening
(Ref)
Die Closure
Suggested Plug Gage Design
(Wire Barrel Crimp Area)
408-9736
4 of 4
Rev B
Figure 6
Worn, cracked, pitted, or chipped die surfaces, or
other obvious wear or damage to the head
assembly requires removal from service. Return the
entire assembly for evaluation and repair. See
Section 6, REPLACEMENT AND REPAIR.
B. Gaging the Die Closure (Figure 6)
The die head assembly is inspected and tested for
correct closure dimensions before being shipped.
However, we recommend periodic die closure
measurement to ensure uniform performance over the
life of the head assembly.
Figure 6 shows dimensions for manufacture of a plug
gage for inspecting the closure of the wire barrel dies.
If the wire barrel dies close properly, and the
adjustment pin is set properly for the size wire
insulation you are using, the insulation barrel dies
should also close properly. So, there is no need for a
plug gage to measure the insulation barrel die closure.
Perform the inspection as follows:
1. Remove head assembly from tool as described
in the disassembly paragraph in Section 3,
INSTALLING THE HEAD ASSEMBLY. Then wipe
oil, film, and debris from the crimping area and
plug gage.
2. Hold the dies in the closed position, but DO NOT
apply pressure beyond initial contact.
3. Align the plug gage GO element with the die
opening. Push the element straight into the
opening, but without forcing it. The GO element
must pass completely through the opening.
4. Align the NO-GO element and try to insert it
straight into the die opening. The NO-GO element
may begin entry, but must not pass through the
opening.
If die closure gaging shows that dies conform to
dimensions, lubricate them with a thin coat of any
good SAE 20 motor oil. If not, replace the dies.
For additional information regarding the use of plug
gages, see instruction sheet 408-7424.
6. REPLACEMENT AND REPAIR
Customer-replaceable parts are shown in Figure 1. A
complete inventory should be stocked and controlled
to prevent lost time when replacement of parts is
necessary. Order replacement parts through your field
representative, or call 1-800-526-5142, or send a
facsimile of your purchase order to 717-986-7605 or
write to:
CUSTOMER SERVICE (038-035)
TYCO ELECTRONICS CORPORATION
PO BOX 3608
HARRISBURG PA 17105-3608
For customer repair service, call 1-800-526-5136.
7. REVISION SUMMARY
Since the previous version of this document, the
following changes were made:
•
Removed references to obsolete tool 314937-1.
•
Updated document to corporate requirements.


