background image

10

3

4

5

11

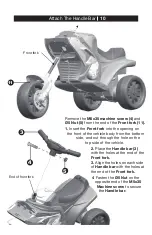
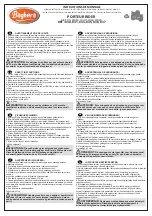
End of front fork

Front fork

Remove the M5x35 machine screw (4) and 

Ø5 Nut (5) from the end of the Front fork (11).
1.
 Insert the Front fork into the opening on 

the front of the vehicle body from the bottom 

side, and out through the hole on the 

top side of the vehicle.

2. Place the Handle bar (3) 

with the holes at the end of the 

Front fork.

3. Align the holes on each side 

of Handle bar with the holes at 

the end of the Front fork.

4 Fasten the Ø5 Nut on the 

opposite end of the M5x35 

Machine screw to secure 

the Handle bar.

Attach The Handle Bar

Содержание BMW S1000 RR

Страница 1: ...he Ride on Car must be assembled by an adult who has read and understands the instructions in this manual Keep the packaging and bags away from children and dispose of all packaging properly before us...

Страница 2: ......

Страница 3: ...e or answer any of your questions regarding the purchase of this product Please contact us at our Toll Free customer service number 1 800 599 8898 for any assistance and replacement parts Thank You Di...

Страница 4: ......

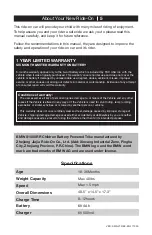
Страница 5: ...rs normal use and does not cover the vehicle or battery if damaged by unreasonable use neglect abuse accident misuse improper service or other causes not arising out defects in material or workmanship...

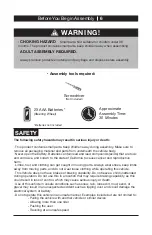
Страница 6: ...that may require braking capability as this could result in loss of control which may cause serious injury or death Use of this vehicle in unsafe conditions such as snow rain loose dirt mud sand or gr...

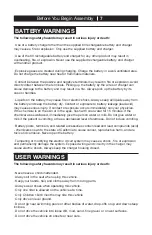
Страница 7: ...the chemical is on the skin or in the eyes flush with cool water for 15 minutes If the chemical was swallowed immediately give the person water or milk Do not give water or milk if the patient is vomi...

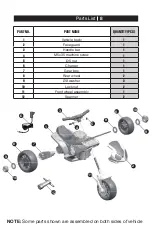
Страница 8: ...ace guard 1 3 Handle bar 1 4 M5x35 machine screw 1 5 5 nut 1 6 Charger 1 7 Gear box 1 8 Rear wheel 2 9 8 washer 3 10 Lock nut 2 11 Front wheel assembly 1 12 Spanner 2 1 7 8 9 9 9 10 2 11 3 6 4 5 8 12...

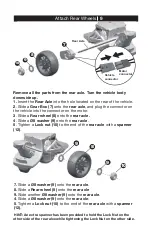
Страница 9: ...otor 3 Slide a Rear wheel 8 onto the rear axle 4 Slide a 8 washer 9 onto the rear axle 5 Tighten a Lock nut 10 to the end of the rear axle with a spanner 12 7 Slide a 8 washer 9 onto the rear axle 8 S...

Страница 10: ...nt of the vehicle body from the bottom side and out through the hole on the top side of the vehicle 2 Place the Handle bar 3 with the holes at the end of the Front fork 3 Align the holes on each side...

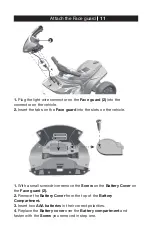
Страница 11: ...e top of the Battery Compartment 3 Insert two AAA batteries in their correct polarities 4 Replace the Battery cover over the Battery compartment and fasten with the Screw you removed in step one 1 Plu...

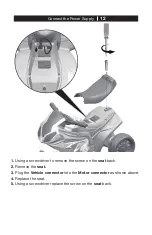
Страница 12: ...ly 1 Using a screwdriver to remove the screw on the seat back 2 Remove the seat 3 Plug the Vehicle connector into the Motor connector as shown above 4 Replace the seat 5 Using a screwdriver replace th...

Страница 13: ...months due to its maximum speed Maximum user weight is 40 lbs This toy has no brake Keep Children within Safe Riding Areas Never use in roadway near motor vehicles on lawn space on or near steep incli...

Страница 14: ...14 2 1 Using your Trike 1 Sounds Buttons Press to play sounds 2 Foot Pedal Applies power speed to the vehicle...

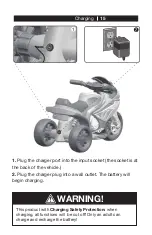
Страница 15: ...e socket is at the back of the vehicle 2 Plug the charger plug into a wall outlet The battery will begin charging WARNING This product with Charging Safety Protection when charging all functions will...

Страница 16: ...ifornia to cause cancer and reproductive harm Wash hands after handling Do not open the battery Battery contains lead acid and other materials that are toxic and corrosive Do not open the charger Expo...

Страница 17: ...slopes Do not drive into fixed objects which may cause the wheels to spin causing the motor to overheat Do not drive in very hot weather components may overheat Do not allow water or other liquids to...

Страница 18: ...ase call us at 1 800 599 8898 Vehicle runs sluggishly Vehicle is overloaded Reduce weight on vehicle Do not overload the vehicle Only one rider at a time Maximum user weight is 60lbs or beeping occurs...

Страница 19: ...astic may melt Recharge the battery after each use Only an adult can handle the battery Recharge the battery at least once a month when the vehicle is not being used Do not wash the vehicle with a hos...

Страница 20: ...2018 All Rights Reserved Made in China Item 60775 Questions and Comments 1 800 599 8898 9 am 5 pm EST www tdcusainc com This products meets ASTM F963 and CPSIA requirements for electric vehicles BMW S...

Отзывы: