Setting Clock & Schedule
The SZ1064 clock and schedule may be set through the keypad and
display, or with a PC. For more information on programming through
the PC, consult your TCS software manual.
Setting CloCk & SChedUle
thRoUgh the keyPAd
To access the clock and schedule screens in step #2 select yes. To
make changes, use the warmer and cooler keys. For screens that
have more than one field to set, use the override key to move to the
next field. An access code may be required.
Operation
UnoCCUPied SetBACk
The SZ1063 and SZ1064 operates, in either an occupied or unoc-
cupied mode. During the occupied mode, the occupied heating and
cooling setpoints will be maintained, and the fan will operate accord-
ing to its occupied setting. During the unoccupied mode, the unoc-
cupied heating and cooling setpoints will be maintained, and the fan
will operate according to its unoccupied setting. The occupied LED
will be lit when the unit is operating in the occupied mode.
The occupied schedule may be set utilizing the internal time clock
(SZ1064 only) or DI3 may be used with an external time clock,
whereas when DI3 is closed, the unit is in the occupied mode. The
Smart Recovery function is disabled when DI3 is used for external
time clock.
oveRRide
A timed override is available using the button on the face of the ther-
mostat or through momentary contacts wired into the OVR terminal.
The amount of time the unit will be overridden is set from 0 to 255
minutes in the programming screen. This override behaves different-
ly depending on the mode the thermostat is operating in (occupied or
unoccupied) and the options that have been enabled within the soft-
ware. In standard mode, the override only activates in unoccupied
mode and takes the thermostat into occupied mode. If "Override for
Occupied Period" is enabled, the override also activates in occupied
mode and takes the thermostat into unoccupied mode. In either
case, you are able to view the time remaining in the override period
both within the software and by using the service button to scroll
through the status screens. If the occupant desires to return the ther-
mostat to unoccupied or occupied operation (depending on how the
override was used) before the time interval is up, they may press the
override again. If "Continuous Occupied Override" or "Continuous
Unoccupied Override" is enabled, then pressing the override once
and then pressing and holding it for 5 seconds puts the thermostat
into a "hold” mode (the override LED on the thermostat will flash
quickly). In this mode, the override setpoints are used until the next
occupied period is reached, or until the thermostat is manually taken
out of the "Continuous Override" mode by pressing the override
again.
Continuous override is available through the DI3 contact or the
software. If DI3 is set to external override, the unit will be in the
occupied mode whenever the DI3 contact is closed. When using this
option, the timed override may still be activated.
2800 LAURA LANE • MIDDLETON, WI 53562 • (800) 288-9383 • FAX (608) 836-9044 • www.tcsbasys.com
6
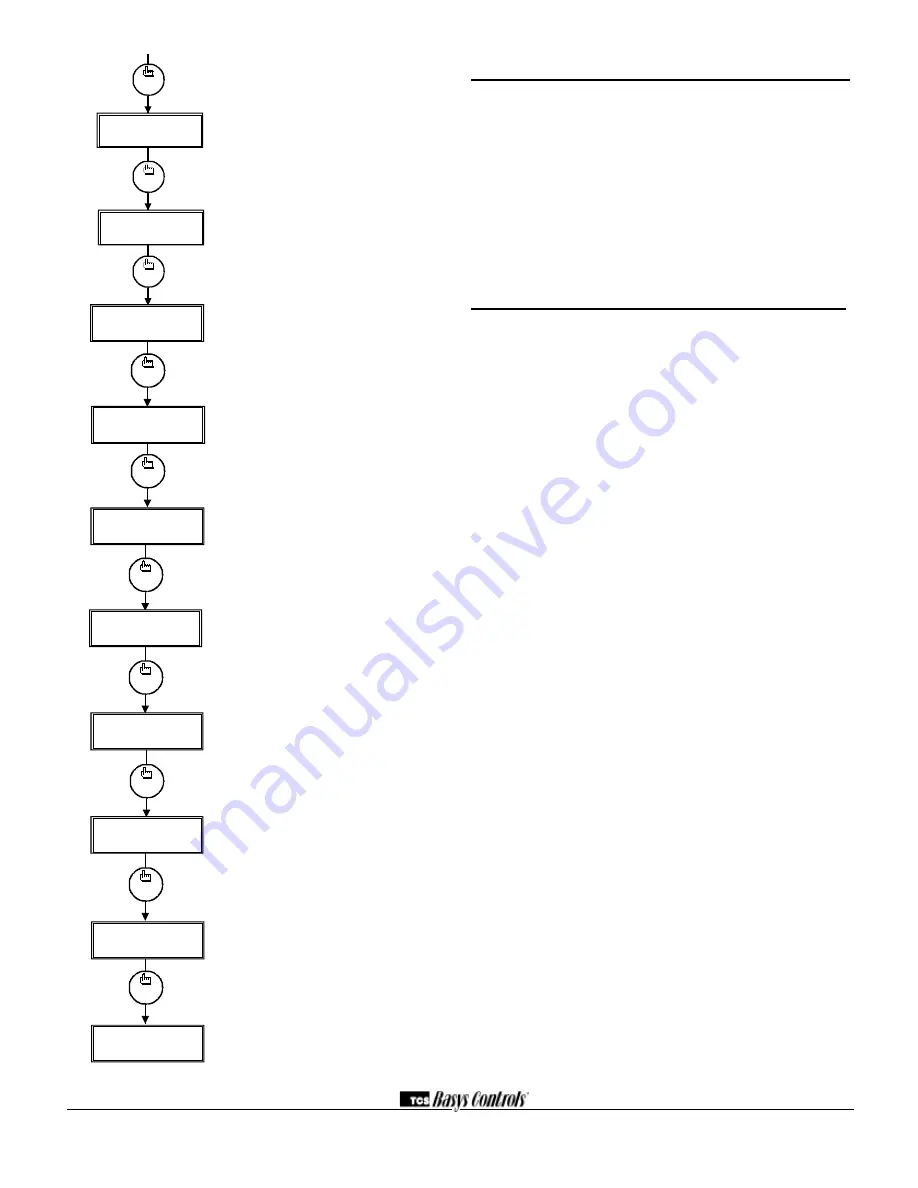
modulating output 2 Range Screen.
Choose
whether the modulating output 2 range will be 0-20
mA or 4-20 mA.
modulating output 1 Unoccupied Action
Screen.
Choose whether the modulating output 1
unoccupied action will be 0mA or 4mA, 20mA or
MODulating.
modulating output 2 Unoccupied Action
Screen.
Choose whether the modulating output
2 unoccupied action will be 0mA or 4mA, 20mA or
MODulating.
di2 Shift Screen.
Enter the setpoint shift value.
This screen will only appear if DI2 is set to
MONITOR.
di3 Choice Screen.
Choose FILTER SERVICE,
EXTernal OVERRIDE, or EXTernal TIME CLOCK.
Select EXTernal OVERRIDE if unused. (EXTernal
OVERRIDE on SZ1064 only)
delay on Powerup Screen.
Enter a value in
seconds, such that when the unit is powered up
or on occupied startup, control is delayed for this
amount of time.
Smart Recovery Screen.
Choose whether or not
smart recovery will be used. Note: Smart Recovery
is not available when DI3 is used as EXTernal
TIME CLOCK. (SZ1064 only)
Programming Access Screen.
Choose whether
or not a code will be required to enter program-
ming setup.
Access Code Screen.
Enter an access (0 to 255)
code that will be used to enter the programming
setup if access code has been required in the last
two step. The default is 248.
main monitoring Screen.
program
setup
program
setup
program
setup
program
setup
program
setup
program
setup
M O D O UT 1 UNO CC
50.
ACTIO N: 0 or 4 m A
M O D O UT 2
0-20m A
49.
47.
M O D O UT 2
ACTIO N:
M O D O UT 1
ACTIO N: DIRECT
46.
M O 1 SETPO INT
44.
O FFSET: 00F
M O 2 SETPO INT
BAND: 05F
43.
BAND: 05F
M O 1 PRO PO RTIO NAL
42.
41.
CHANG EO VER
SETPO INT: 090F
program
setup
program
setup
M O2 SETPO INT
O FFSET:
45.
program
setup
48.
M O D O UT 1
program
setup
00F
DIRECT
RANG E: 0-20m A
RANG E:
program
setup
program
setup
program
setup
program
setup
57.
SET ACCESS
CO DE:
REQ UIRE CO DE FO R
PRO G RAM M ING?YES
56.
DELAY O N PO W ERUP
54.
010 SECO NDS
DI3 USED FO R:
M O NITO R
53.
SHIFT: 00F
SET DI2 SETPO INT
52.
51.
M O D O UT 2 UNO CC
ACTIO N: 0 or 4 m A
program
setup
program
setup
ENABLE SM ART
RECO VERY?
55.
58.
W ED FAN:M ED
program
setup
YES
248
3:27PM 82F


