T
TIIM
ME
E E
ED
DIIT
TO
OR
R
D
De
ecca
ay
yss
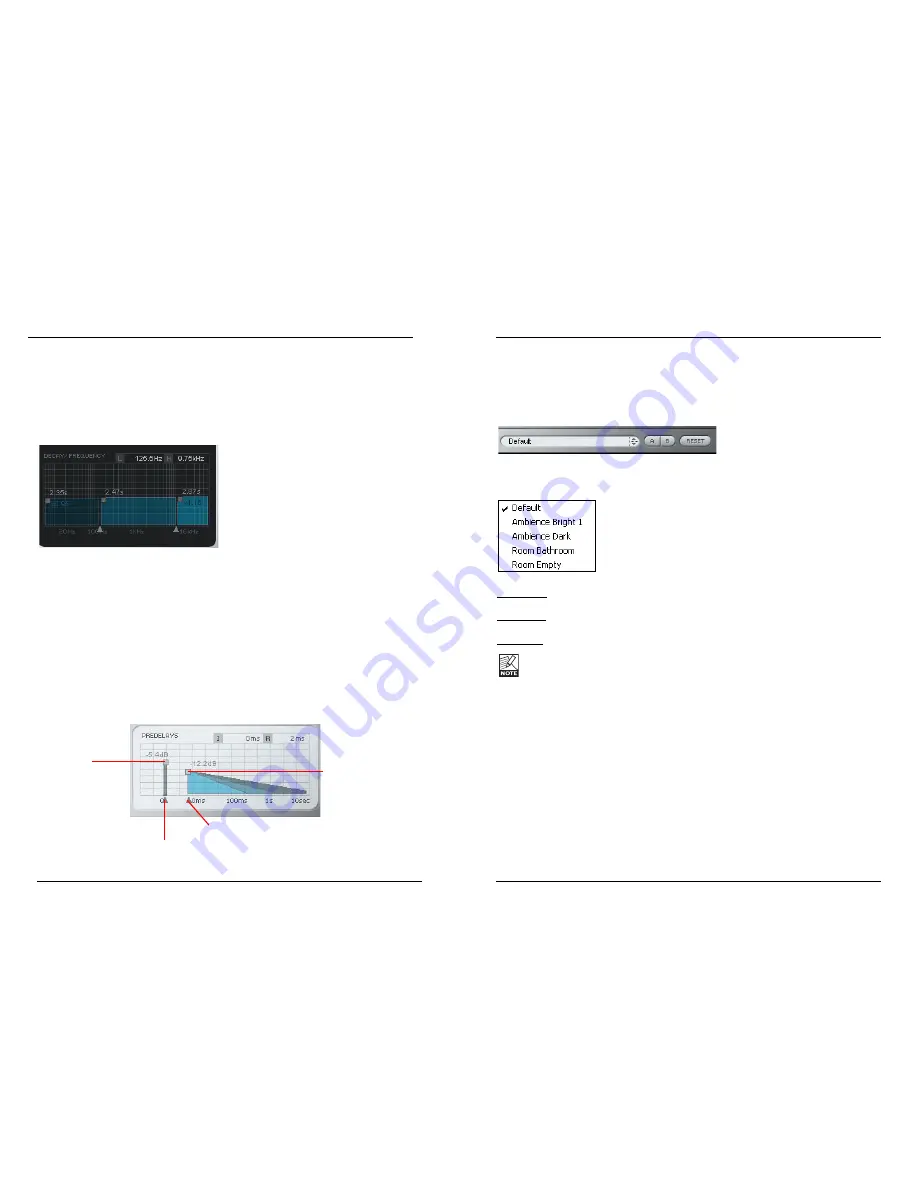
The reverb decay is a long tail of reverberation that happens after the initial burst.
The Decay block receives its input from the early reflection.The decay time can be edited
distinctly in 3 frequency ranges.The frequency-ranges can also be modified.
Sets the 2 crossover-points between
the 3 frequency-ranges.
When designing your reverb, keep in mind that room acoustics lose their high frequency
energy more easily over time. Setting the High Decay to a large amount of time will
usually make the room sound more artificial.
P
Prre
e D
De
ella
ay
yss
The predelays determine the starting point for the actual reverb effect will begin.
Low and High band also display
the difference factor in relation
to the Center band.
For each band you can set the
decay time between 0.25 and 64
seconds. Use the Shift key to
ungroup the decay times.
MEGAREVERB
11
10
Sets the level of
the early
reflections.
Delays the early reflection
starting point.The maximum
delay is 160 ms.
Sets the level of the
reverb’s decay curve.
Delays the reverb’s decay curve starting point.
Use this parameter to make the reverb more
impressive. This can be set no later than 100 ms
from the first predelay.
IIn
nttrro
od
du
uccttiio
on
n
We recommend using the dedicated PowerCore file handling system that, apart from
recall; store and compare facilities, allows for easy exchange of entire preset folders with
other users, between Windows/Mac platforms and also between different host
applications.
F
Fiille
e
Click “File” to open the File menu.
Load Preset: Select to load presets from the default preset location.
Save Preset: Select to save the preset in My Presets folder.
My Presets: Via “My Presets” you are able to load you own presets.
If you chose to store presets in other locations than the “My Preset” folder, these
presets will not appear in the “My Preset” drop down menu. However, you can still
navigate to, and load these presets via the Load Preset function.
P
Prre
es
se
ett n
na
am
me
e
This is the name of the preset.
U
Up
p//d
do
ow
wn
n
The [Up]/[Down] arrow keys can be used to browse through all presets.
A
A//B
B
With the A/B compare function you can easily compare different parameter settings when
working with the plug-in.
When you start working with your preset, the A/B button is grayed out. This state
indicates that the settings in both memory locations A and B are identical - so there is
actually nothing to compare.
PRESET HANDLING


