


22
neTwOrK basICs
Shared folders PC - basics
When sharing a folder on Windows XP/VISTA/WIN7 you
have to make sure that the user of the TC Icon Remote
CPU MKII has rights to access read/write in the share
folder.
The default user on your hardware ICON is already setup:
User name :
ICON
Password :
Administrator
(Notice the capital letters, as these are case sensitive)
This user has to be added on the computer holding your
shared folder for software updates and preset handling:
- Press start in the lower left corner of your desktop
- Right click “My Computer” and click “Manage”
Computer Management now appears and you click “Local
Users and Groups”
Then “Users“ and “Groups” appear and you double click on
“Users”
You typically have 3 accounts on your system,
Administrator, Guest, and the default account you created
while installing windows. You now have to add a new
account!
You right click the blank space underneath the 3 accounts
and click “New User”
Type in user name :
ICON
And Password
:
Administrator
Leave Full name and Description blank unless you need
these information. All check boxes should be left as is.
Click “Create” and the “Close” and the user now has rights
to access the computer.
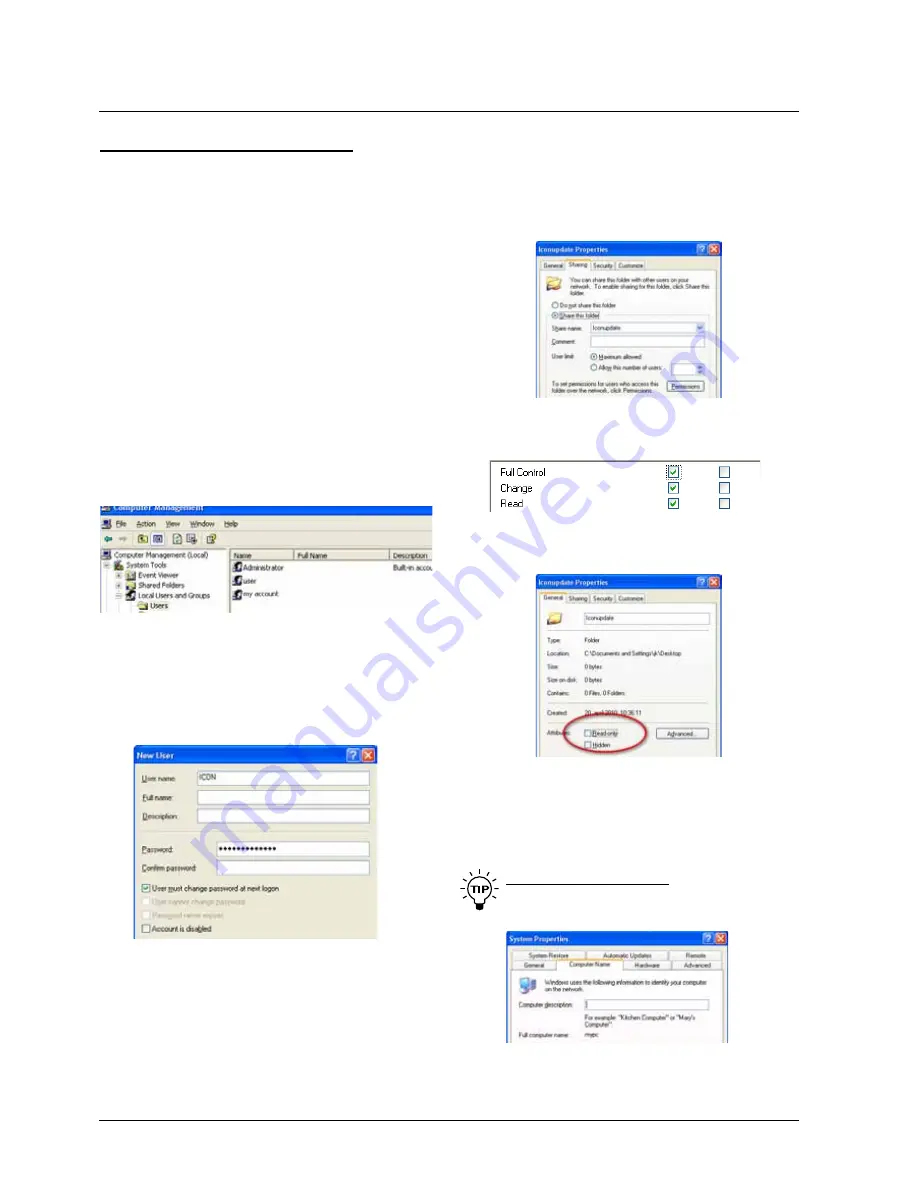
Now go to the folder you want to share
• Right-click on the folder and select properties
• Select Sharing
• Mark “Share this folder”
• Type in the name ”iconupdate” as share name
• Mark “Maximum allowed” in User Limit
• Then press “Permissions” and allow: Full Control, Change
and Read.
• On the “General” page make sure that “Read only” is
NOT marked. This allows the update software to write
a Result file describing the update success/failure to be
written.
• Press Apply and OK
• The path to the folder is now
\\xxxx\iconupdate
and it is
available on the network.
“xxxx” is the name of the computer.
To find the computers name:
Press, START and right-click on My Computer and
select properties. Select the tab “Computer Name”:
- in this case the name is “mypc”


