Weekly Cleaning
(continued)
©McDonald’s Corporation · Planned Maintenance Manual · January 2011
Page 2 of 7
Tay
lor
C
om
pany
B
lende
d I
ce M
ac
hin
e M
od
el C
02
9
W
eek
ly
BE
2 W
1
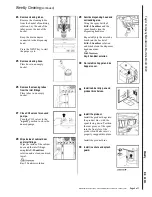
Reinstall the ice hopper
cover.
Press the ICE key until all
remaining ice has dispensed
into the blender pitcher.
8
Remove the blender pitcher
and discard the ice.
Remove the blender pitcher
and discard the ice into the
back sink.
9
Remove the ice hopper, ice
hopper cover, splash guard,
and ice chute for cleaning.
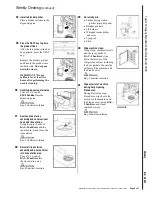
10
Remove additional parts for
cleaning.
•
Blender pitchers
•
Skirt
•
Syrup rail
•
Rinse station assembly
(grate, actuator, strainer)
•
Pitcher drying station
(pitcher grate, drip pan)
•
Lid holders
•
Whipped cream holder
and cover
11
Remove the product bins for
cleaning.
Remove the product bags
from the product bins and
place them in the walk-in
cooler.
12
Remove the product bin
shelves and the bottom
cabinet drip pan for cleaning.
13
Wash, rinse and sanitize all
parts.
Wash, rinse and sanitize all
parts in the 3-compartment
sink.
DO NOT PLACE IN
POWER SOAKER SINK OR
DISHWASHER.
Important:
Make sure the
water is fresh and clean.
APSC & Solid Sense
Sanitizer
14
Additional pitcher cleaning.
To remove film build-up on
the inside of the blender
pitchers, place the pitchers in
the 3-compartment sink. Add
KAY beverage equipment
cleaner tablet
into one
pitcher . Fill the pitcher with
hot
water and allow it to
soak. After 5 minutes, wear
protective gloves and remove
residual soil with a no-scratch
pad.
Note: Use caution when
cleaning the blender blade.
Kay Beverage Equipment
Cleaner
Transfer the solution into the
second pitcher and repeat the
procedure. Once this is
completed, discard the
solution. Rinse and sanitize
the pitchers in the 3-
compartment sink. Allow the
pitchers to air dry.


