background image

11-2  

LIMITED WARRANTY ON PARTS

Model 632

Limited Warranty on Parts 

11 

LIMITED WARRANTY EXCEPTIONS

This limited warranty does 

not 

cover:

1. Labor or other costs incurred for diagnosing, repairing, removing, installing, shipping, servicing, or handling of 

defective Parts, replacement Parts, or new Parts.

2. Normal maintenance, cleaning and lubrication as outlined in the Taylor Operator’s Manual, including cleaning of 

condensers or carbon and grease buildup.

3. Required service, whether cleaning or general repairs, to return the cooking surface assemblies, including the 

upper platen and lower plate, to an operational condition to achieve proper cooking or allow proper assembly of 
release sheets and clips as a result of grease build-up on the cooking surfaces, including but not limited to the 
platen and plate, sides of the shroud or top of the shroud.

4. Replacement of cooking surfaces, including the upper platen and lower plate, due to pitting or corrosion (or in the 

case of the upper platen, due to loss of plating) as a result of damage due to the impact of spatulas or other small 
wares used during the cooking process or as a result of the use of cleaners, cleaning materials or cleaning 
processes not approved for use by Taylor.

5. Replacement of wear items designated as Class “000” Parts in the Taylor Operator’s Manual, as well as any 

release sheets and clips for the Product’s upper platen assembly.

6. External hoses, electrical power supplies, and machine grounding. 

7. Parts not supplied or designated by Taylor, or damages resulting from their use.

8. Return trips or waiting time required because a service technician is prevented from beginning warranty service 

work promptly upon arrival.

9. Failure, damage or repairs due to faulty installation, misapplication, abuse, no or improper servicing, unauthorized 

alteration or improper operation or use as indicated in the Taylor Operator’s Manual, including but not limited to the 
failure to use proper assembly and cleaning techniques, tools, or approved cleaning supplies.

10. Failure, damage, or repairs due to theft, vandalism, wind, rain, flood, high water, water, lightning, earthquake or any 

other natural disaster, fire, corrosive environments, insect or rodent infestation, or other casualty, accident or 
condition beyond the reasonable control of Taylor; operation above or below the gas, electrical or water supply 
specification of the unit in which a part is installed; or Parts or the units in which they are installed repaired or 
altered in any way so as, in the judgment of Taylor, to adversely affect performance, or normal wear or 
deterioration.

11. Any Part purchased over the Internet.

12. Failure to start due to voltage conditions, blown fuses, open circuit breakers, or damages due to the inadequacy or 

interruption of electrical service.

13. Electricity, gas or other fuel costs, or increases in electricity or fuel costs from any reason whatsoever. 

14. Damages resulting from the use of any refrigerant other than that specified for the unit in which the Part is installed 

will void this limited warranty.

15. Any cost to replace, refill or dispose of refrigerant, including the cost of refrigerant.

16.

ANY SPECIAL, INDIRECT OR CONSEQUENTIAL PROPERTY OR COMMERCIAL DAMAGE OF ANY NATURE 
WHATSOEVER. 

Some jurisdictions do not allow the exclusion of incidental or consequential damages, so this 

limitation may not apply to you.

This limited warranty gives you specific legal rights, and you may also have other rights which vary from jurisdiction to 
jurisdiction.

All manuals and user guides at all-guides.com

all-guides.com

Содержание 632

Страница 1: ...OPERATOR S MANUAL Model 632 Combo Freezer 03 2000 Original Publication Updated 6 28 2018 Original Operating Instructions 030049 M All manuals and user guides at all guides com a l l g u i d e s c o m...

Страница 2: ...__________________________________ Maximum Fuse Size ______________________________________________________ A Minimum Wire Ampacity ___________________________________________________ A Note Continuin...

Страница 3: ...ection 3 Safety Section 4 Operator Parts Identification Model 632 4 1 Soft Serve Door Assembly 4 3 Shake Door Assembly 4 5 Accessories 4 6 Section 5 User Interface POWER SWITCH 5 1 Indicator Light MIX...

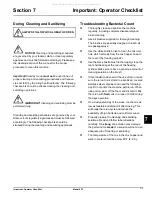
Страница 4: ...duct from the Freezing Cylinder 6 10 Rinsing 6 10 Cleaning 6 10 Disassembly 6 11 Brush Cleaning 6 11 Section 7 Important Operator Checklist During Cleaning and Sanitizing 7 1 Troubleshooting Bacterial...

Страница 5: ...jewelry rings and watches before working on electrical equipment DANGER The main power supply s to the machine must be disconnected prior to performing any repairs Failure to follow this instruction...

Страница 6: ...ead and double head machines Do not install a hand shut off valve on the water out line Water should always flow in this order first through the automatic water valve second through the condenser and...

Страница 7: ...upply cords used with this machine shall be oil resistant sheathed flexible cable not lighter than ordinary polychloroprene or other equivalent synthetic elastomer sheathed cord code designation 60245...

Страница 8: ...xpose users and operators to unexpected safety hazards WARNING Refrigerant liquid sprayed onto the skin may cause serious damage to tissue Keep eyes and skin protected If refrigerant burns should occu...

Страница 9: ...ylor warranty is valid only if the parts are authorized Taylor parts purchased from the local authorized Taylor distributor and only if all required service work is provided by an authorized Taylor se...

Страница 10: ...echnician he employs It should also be noted that Taylor does not warrant the refrigerant used in its equipment For example if the refrigerant is lost during the course of ordinary service to this mac...

Страница 11: ...5021 of IEC 60417 1 on the removable panel and the frame WARNING Avoid injury DO NOT operate the machine unless it is properly grounded DO NOT operate the machine with larger fuses than specified on...

Страница 12: ...removing the beater assembly The scraper blades are very sharp CAUTION SHARP EDGES Two people are required to handle the cup cone dispenser Protective gloves must be worn and the mounting holes must N...

Страница 13: ...to operate indoors under normal ambient temperatures of 70 F to 75 F 21 C to 24 C The machine has successfully performed in high ambient temperatures of up to 104 F 40 C at reduced capacities DO NOT r...

Страница 14: ...3 4 SAFETY Model 632 Safety 3 Notes All manuals and user guides at all guides com...

Страница 15: ...ction 4 4 1 Model 632 Operator Parts Identification 4 Operator Parts Identification Model 632 Figure 4 1 2 4 1 16 5 6 7 8 11 9 10 13 12 15 14 19 18 20 3 17 All manuals and user guides at all guides co...

Страница 16: ...72 7 Panel Rear 053782 8 Panel Side Right 067577 9 Adaptor A Caster X18915 10 Caster SWV 5 8 Stem 4 in Wheel 018794 Item Description Part No 11 Screw 1 4 20X3 8 RHM SS 011694 12 Caster 4 SWV 5 8 Stem...

Страница 17: ...ATOR PARTS IDENTIFICATION 4 3 Model 632 Operator Parts Identification 4 Soft Serve Door Assembly Figure 4 2 1 2 18 3 9a 5 9 13 7 17 4 19 6 8 10 11 12 14 16 15 All manuals and user guides at all guides...

Страница 18: ...5 16 OD X 070 W Bag of 50 016272 8 Pin A Pivot X22820 9 Door A 1 Spout X51531 10 9a Baffle A Long 4 in w RAD X50882 Item Description Part No 10 Valve A Draw X18303 11 O ring 7 8 OD X 103 W Bag of 100...

Страница 19: ...2 Gasket Door 5 177ID 016672 3 Bearing Front 013116 4 Beater A 7QT 1 Pin X46233 5 Shaft Beater 032790 6 Seal Drive Shaft 032560 7 Blade Scraper Plastic 084950 Item Description Part No 8 Door A 1 SPT...

Страница 20: ...5492 100 packs or Kay 5 part no 041082 125 packs 6 1 5 4 2 3 7 ITEM DESCRIPTION PART NO 1 Brush Rear BRG 1 D X 2 LG X 14 013071 2 Brush DBL End Pump and Feed Tube 013072 3 Brush Draw Valve 1 1 2 OD X...

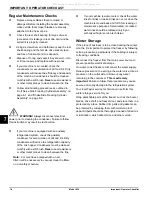
Страница 21: ...in the hopper If you neglect to add mix a freeze up may occur Insufficient mix will cause eventual damage to the beater blades drive shaft and freezer door POWER SWITCH ON OFF R O C K T O N R M A N U...

Страница 22: ...ASH Key When the WASH key is pressed the light comes on This indicates beater motor operation The Standby or Auto modes must be cancelled first to activate the Wash mode AUTO Key When the AUTO key is...

Страница 23: ...nstall the air tube with the hole 1 in the down position This is the auto position that allows mix and air to travel to the freezing cylinder while product is being dispensed Figure 5 3 During long pe...

Страница 24: ...5 4 USER INTERFACE Model 632 User Interface 5 Notes All manuals and user guides at all guides com...

Страница 25: ...e checked at least once daily 3 Prepare a pail of approved 100 PPM sanitizing solution examples 2 1 2 gal 9 5 L of Kay 5 or 2 gal 7 6 L of Stera Sheen Use warm water and follow the manufacturer s spec...

Страница 26: ...re 6 4 5 Slide the beater the remainder of the way into the freezing cylinder and over the end of the drive shaft The beater should fit snugly but not so tightly that the beater cannot be turned sligh...

Страница 27: ...ing cylinder With the door seated on the freezer studs install the handscrews Tighten them equally in a crisscross pattern to insure the door is snug Figure 6 8 12 Install the draw valve Slide the two...

Страница 28: ...e Slide two O rings onto the other end of the air tube Figure 6 14 18 Slide the small O ring into the groove of the air orifice Do not lubricate the O ring Figure 6 15 Note Make the air orifice is cle...

Страница 29: ...into place Do not lubricate the hex end of the drive shaft Fill the inside portion of the seal with 1 4 in 6 3 mm more lubricant and lubricate the flat side of the seal that fits onto the rear shell b...

Страница 30: ...ncluding the inside of the draw valve bore Replace any damaged parts 6 Slide the two O rings into the grooves on the draw valve and lubricate the bottom 1 2 of the valve Figure 6 21 7 Lubricate the in...

Страница 31: ...1 Prepare a pail of approved 100PPM sanitizing solution examples 2 1 2 gal 9 5 liters of Kay 5 or 2 gal 7 6 liters of Stera Sheen Use warm water and follow the manufacturer s specifications 2 Pour th...

Страница 32: ...igure 6 32 8 Once the sanitizer stops flowing from the door spout close the draw handle and press the WASH key cancelling the beater motor operation Important The machine must not be placed in Auto mo...

Страница 33: ...o the freezing cylinder Figure 6 35 3 Lubricate the O rings on the air tube on the end with the small hole on the side soft serve only 4 Install the air tube the end with the hole with the air orifice...

Страница 34: ...ovided scrub the mix hopper mix inlet hole and mix level sensing probe 2 With a pail beneath the door spout raise the prime plug soft serve only and press the WASH key 3 When a steady stream of rinse...

Страница 35: ...ign cap s draw valve s prime plug Remove all O rings Note To remove O rings use a single service towel to grasp the O ring Apply pressure in an upward direction until the O ring pops out of its groove...

Страница 36: ...6 12 OPERATING PROCEDURES Model 632 Operating Procedures 6 Notes All manuals and user guides at all guides com a l l g u i d e s c o m...

Страница 37: ...specially designed to reach all mix passageways Use the white bristle brush to clean the mix inlet hole which extends from the mix hopper down to the rear of the freezing cylinder Use the black bristl...

Страница 38: ...mix hopper Condensers must be cleaned monthly with a soft brush Never use screwdrivers or other metal probes to clean between the fins Note For machines equipped with an air filter it will be necessar...

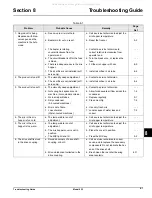
Страница 39: ...s adjustment a Contact a service technician b Not enough air space around machine Air cooled machines b Allow for adequate air flow across the condenser 1 2 c Worn scraper blades c Replace regularly 9...

Страница 40: ...r worn draw valve O ring a Install or replace regularly 6 3 9 1 b Inadequate lubrication of draw valve O ring b Lubricate properly 6 3 c Wrong type of lubricant is being used example petroleum based l...

Страница 41: ...Gasket X Front Bearing X Draw Valve O ring X Pivot Pin O ring X Prime Plug O ring X Air Tube O ring X Air Orifice O ring X White Bristle Brush 3 x 7 Inspect and replace if necessary Minimum White Bri...

Страница 42: ...9 2 PARTS REPLACEMENT SCHEDULE Model 632 Parts Replacement Schedule 9 Notes All manuals and user guides at all guides com...

Страница 43: ...by the Product serial number Proof of purchase may be required at time of service 2 This limited warranty is valid only if the Product is installed and all required service work on the Product is perf...

Страница 44: ...tsoever 12 Damages resulting from the use of any refrigerant other than that specified on the Product s data label will void this limited warranty 13 Any cost to replace refill or dispose of refrigera...

Страница 45: ...required at time of service 2 This limited warranty is valid only if the Part is installed and all required service work in connection with the Part is performed by an authorized Taylor distributor o...

Страница 46: ...arrival 9 Failure damage or repairs due to faulty installation misapplication abuse no or improper servicing unauthorized alteration or improper operation or use as indicated in the Taylor Operator s...

Страница 47: ...DING CLAIMS FOR LOST SALES LOST PROFITS PRODUCT LOSS PROPERTY DAMAGES OR SERVICE EXPENSES ARE EXPRESSLY EXCLUDED THE EXPRESS WARRANTIES MADE IN THIS LIMITED WARRANTY MAY NOT BE ALTERED ENLARGED OR CHA...

Страница 48: ...11 4 LIMITED WARRANTY ON PARTS Model 632 Limited Warranty on Parts 11 Notes All manuals and user guides at all guides com...

Отзывы: