User Manual (English version)_V2.0
26
5.8 LoRa Mode Setting & Functions
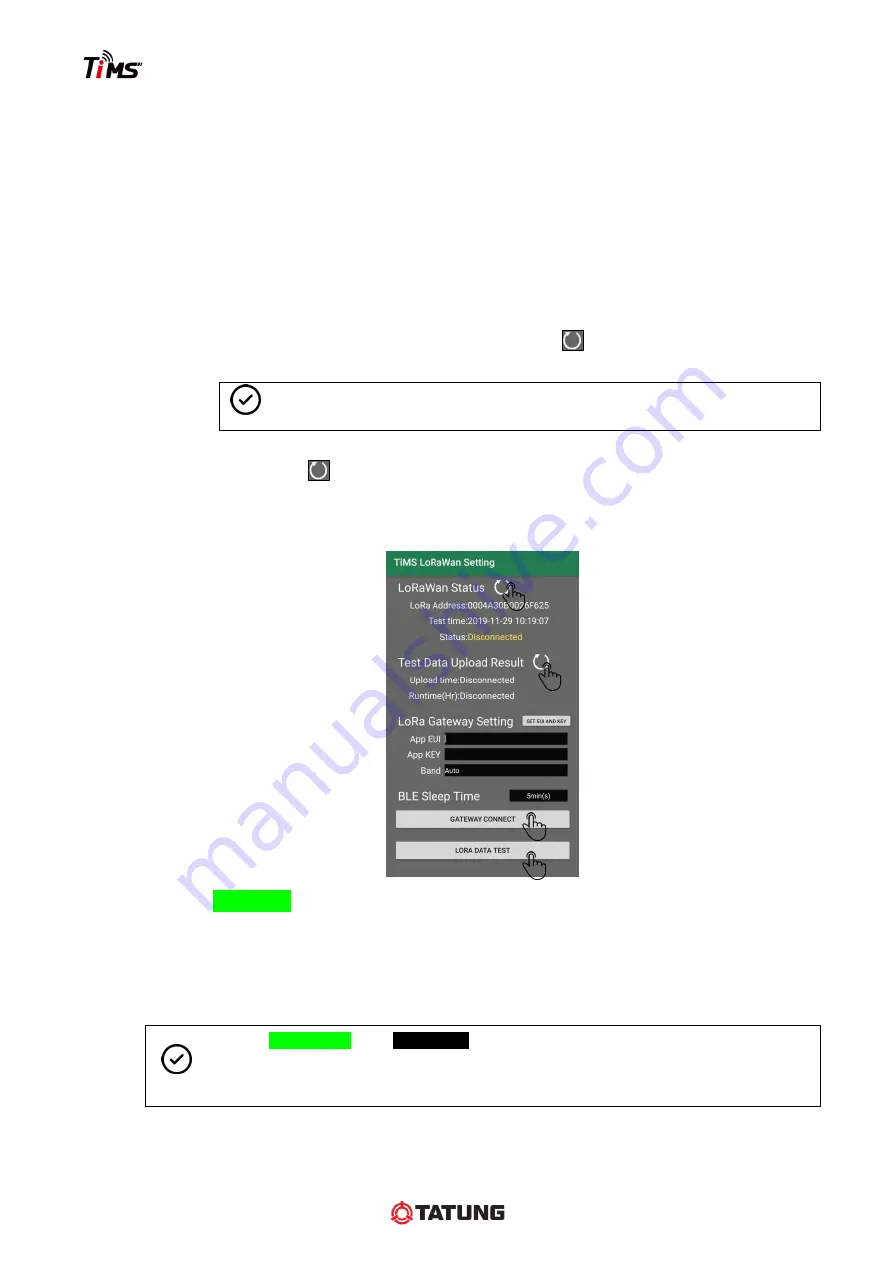
After the parameter setting, user must continue the LoRa setting to finish the setting process.
Step 1.
Turn to the [
LoRa Setting
] page to connect the LoRaWan with LoRa gateway.
Step 2.
Key in the gateway App EUI & App KEY. The EUI & KEY must be the same as the LoRa
gateway. User can click [
GET EUI AND KEY
] icon to download the monitoring system
website recommend value from the cloud automatically.
Step 3.
Click the [
GATAWAY CONNECT
] and wait for connecting.
Step 4.
When the gateway connecting is successful, user can click [
LORA DATA TEST
] to send
the test data to the gateway.
Step 5.
Wait a second to click the [
LoRaWan Status
] icon
to refresh the status. It only
shows the gateway status.
NOTE
Step4 & 5 can be used to test the LoRa connection distance between sensor
and gateway.
Step 6.
If user wants to know the cloud upload result, please click [
Test Data Upload Result
]
refresh icon
. When the
“upload time” is uploaded, it means the data is uploaded to
the cloud successfully.
(According to the user’s internet connection status, the data
uploaded to the cloud may delay several minutes.)
On LoRa mode, after the sensor auto-scan, the sensor will transmit the data to the gateway
and upload them to the cloud immediately.
If the motor in warning or danger status, the sensor will execute a vibration analysis and store
this information in alert memory and the cloud will send alert notification to users.
NOTE
1. On LoRa mode and
OFF mode
, the Bluetooth signal of the sensor will disable
automatically after using the App.
2. When the sensor Bluetooth signal is OFF, user still can enable Bluetooth signal by
using magnet and connect the sensor to trigger instant real-time functions.


