background image

36

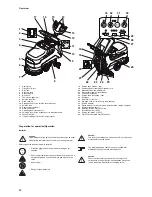
Overview

1

Dosing cup

2

Filling level (max.)

3

Dirt sieve

4

Recovery tank

5

Recessed grip

6

Brush unit

7

Tool (brush, pads, etc.)

8

Solution tank filter

9

Drain opening

10

Drainage hose for the solution tank (blue cap)

11

Solution tank

12

Hour counter (optional)

13

Machine handle

14

Operating lever (brush drive)

15

Adjusting lever for the inclination of the machine handle

16

Vacuum air filter

17

Float (overfilling protection for recovery tank)

18

Suction hose (turbine - cap)

19

Cable support for charging unit power cord

20

Manual solution flow adjustment

21

Disconnector charger jack (coded)

22

Foot pedal squeegee

23

Suction hose (squeegee - cap)

24

Squeegee

25

Foot lever for the tool

26

Drainage hose for the recovery tank (red cap)

27

Service indicator

28

Status indicator for the charger unit (malfunctions, charge, charged)

29

Battery status indicator

30

Cleaning solution ON/OFF button

31

Eco mode button (~60%)

32

Suction unit button (~100%)

33

ON/OFF button (main ON/OFF switch)

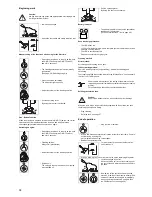
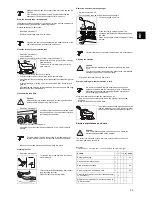
Preparation for operation/Operation

Batteries

Safety measures when working with batteries:

1
2

3

4

5

6

7

8

9

10

11

12

13

14

max.60

°

C

max.140

°

F

15

16

17

18

19

21

22

23 24

25

26

27

28

29

30

31

32

33

20

Caution:

Only maintenence-free gel traction block batteries may be used!
Please follow the instructions of use for your battery charger!

• Protective goggles must be worn when working on the 

batteries.

• Do not subject batteries to an open flame or heat as there is a 

danger of explosion from the electolytic gas present in the 
cells!

• No smoking!

• Danger of chemical burns!

Caution:

The battery must always be clean and dry. Do not place any 
metallic objects on the battery.

The integrated battery charger unit is only suitable for 
maintenance-free gel traction block batteries.

Caution:

Check that the charging curve set for the charger unit 
corresponds to the gel traction block batteries being used.

(check the battery manufacturer's charging curve)

Содержание swingo 455B

Страница 1: ...swingo 455B V003 12089 84 1223 I25 I24 I23 I22 I21 I20 I19 tr sv sl ro pt pl no nl it hu fr fi es en de da cz cn 12089 84...

Страница 2: ...r knowledge may not operate this machine without supervision or instruction by a person responsible for their safety Children should be supervised to ensure that they do not play with the appliance Do...

Страница 3: ...always corre spond to the requirements of the latest EU Regulations and the standards that are currently in use Download Link for the original EU Declaration of Conformity http www espares diversey c...

Страница 4: ...ing solution ON OFF button 31 Eco mode button 60 32 Suction unit button 100 33 ON OFF button main ON OFF switch Preparation for operation Operation Batteries Safety measures when working with batterie...

Страница 5: ...a connection between the battery and the machine by plugging in the battery disconnection plug Disconnect the battery from the machine using the battery disconnection socket Connect the battery discon...

Страница 6: ...he ON OFF button main ON OFF switch down for 3 seconds Cleaning solution Always ON preselected Adjust the volume of the cleaning solution Suction unit The setting is the same as when the machine was s...

Страница 7: ...lution and thereby lead to damage to the floor surface Switch the machine off Once the solution tank has been drained screw the yellow cap from the solution tank filter and pull it away from its holde...

Страница 8: ...body and remove the blades 3 You can now turn or replace the blade Reinsert the blade body back into the squeegee body and screw the star grip in place again Switch the machine off The yellow suction...

Страница 9: ...ght for operation 120 120 kg Solution tank nominal 22 22 l Recovery tank 25 25 l Tools 1 x 43 1 x 43 cm Brush rpm 130 130 min 1 Brush pressure 32 32 kg Dimensions max L x W x H 139x69x110 139x69x110 c...

Отзывы: