


10
TASCAM DR-70D
2 – Names and Functions of Parts
7
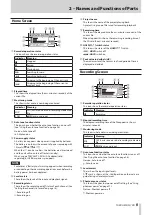
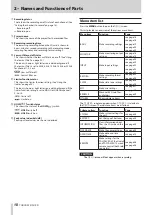
Recording status
These show the recording on/off status of each channel. (See
“Setting the channels to record” on page 18.)
: Recording off
: Recording on
8
Project name
This shows the name of the project for the recorded files.
9
Remaining recording time
The remaining recording time on the SD card is shown in
hours: minutes: seconds according to the recording mode,
sampling frequency and recording format settings.
0
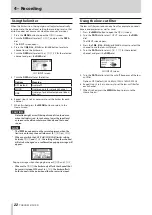
Low cut filter on/off status
This shows whether the low cut filter is on or off. (See “Using
the low-cut filter” on page 22.)
This icon is shown as light letters on a dark background if
the low-cut filter is set to 40Hz, 80Hz, 120Hz, 180Hz or 220Hz
for channel 1, 2, 3 or 4.
: Low cut filter off
: Low cut filter on
q
Limiter function status
This shows the limiter function setting. (See “Using the
limiter” on page 22.)
This icon is shown as light letters on a dark background if the
limiter function setting is set to MONO or LINK for channel 1,
2, 3 or 4.
: limiter off
: Limiter on
w
HOLD/
switch status
This shows the status of the HOLD/
switch.
: HOLD switch off
: HOLD switch on
e
Peak value in decibels (dB)
Peak input level values are shown in decibels.
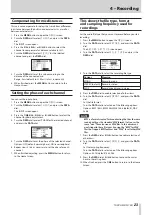
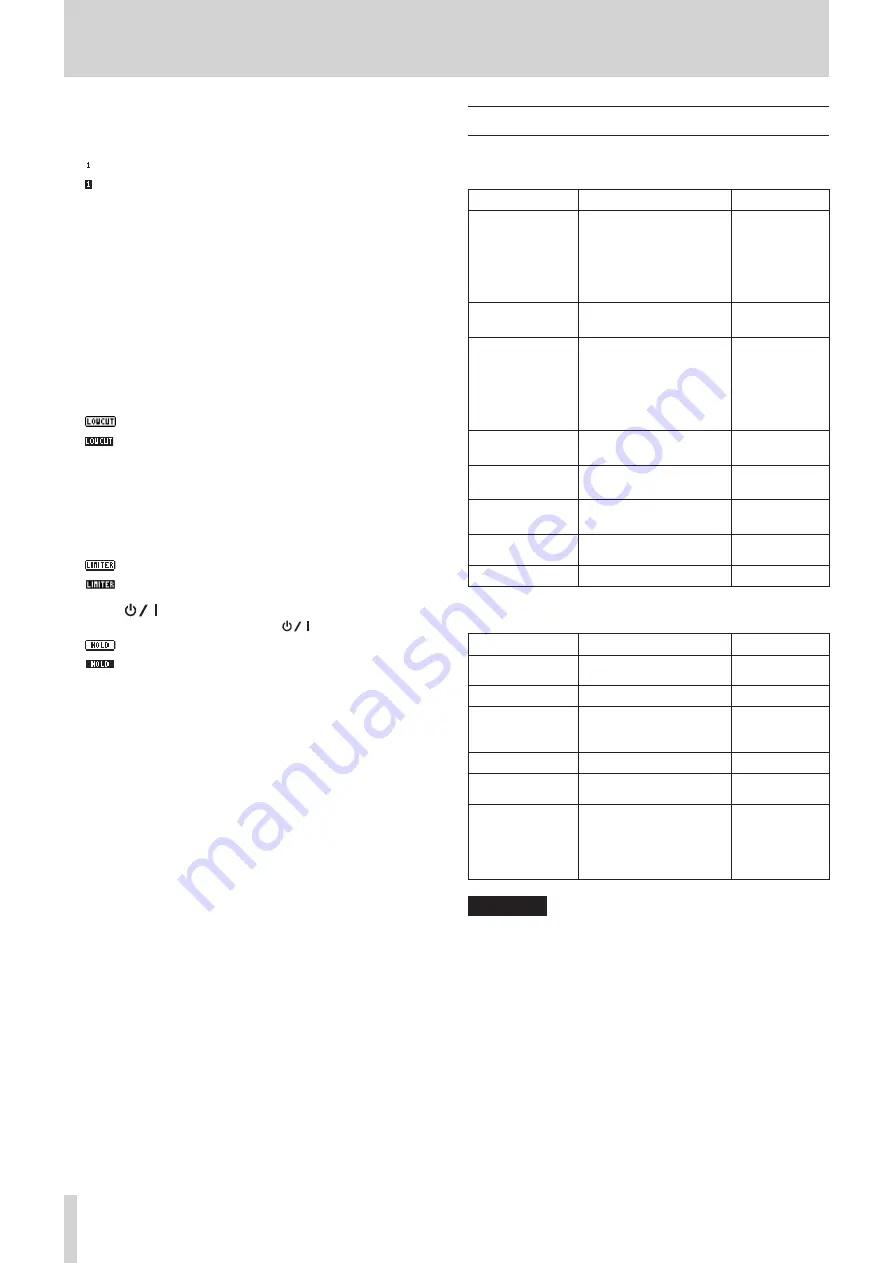
Menu item list
Press the MENU button to open the
MENU
screen.
This list provides an overview of the various menu items.
Menu item
Function
Page
BASIC
Make recording settings
see page 18
see page 18
see page 19
see page 20
see page 20
MONITOR
Make monitoring output
settings
INPUT
Make input settings
see page 20
see page 22
see page 22
see page 23
see page 23
RECORD
Make recording format
settings
SLATE
Make slate tone settings
MIC
Make mic settings
BROWSE
Work with SD card files
and folders
OTHERS
Show submenu items
The
OTHERS
submenu appears when
OTHERS
is selected in
the
MENU
screen. The submenu items are as follows.
Submenu item
Function
Page
SYSTEM
Make system settings for
the unit
BATTERY
Set the type of batteries
INFORMATION
View information about
files, the SD card and the
system
FILE NAME
Make file name settings
DATE/TIME
Make date and time
settings
REMOTE
Make settings for the
TASCAM RC-3F footswitch
and TASCAM RC-10 wired
remote control (both sold
separately)
CAUTION
The
MENU
screen will not appear when recording.


