background image

34


TASCAM  DR-680

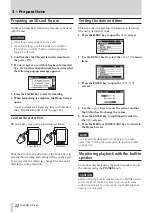
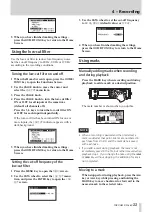
You can use these marks to index places where you 
might want to resume playback. 

NOTE

You cannot move to a mark in a different take. 

Erasing marks

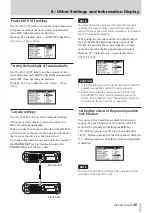
  Press the 

STOP

 key while pressing and holding 

the 

MARK

 to erase the nearest mark before the 

current position. 

NOTE

If you erase a mark during playback, the mark is not 
immediately erased, but rather is erased when playback 
stops. If you change the take using the 

Â

 or 

¯

 key 

without stopping, the erasure of marks is not completed.

Pre-recording

When the unit is in recording standby, the unit can 
record up to two seconds before the start of recording 
and include it in the recording.

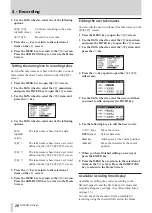
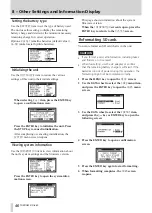
1   When the Home Screen is open, press the 

HOME/

FUNC

 key to open the Functions Screen.

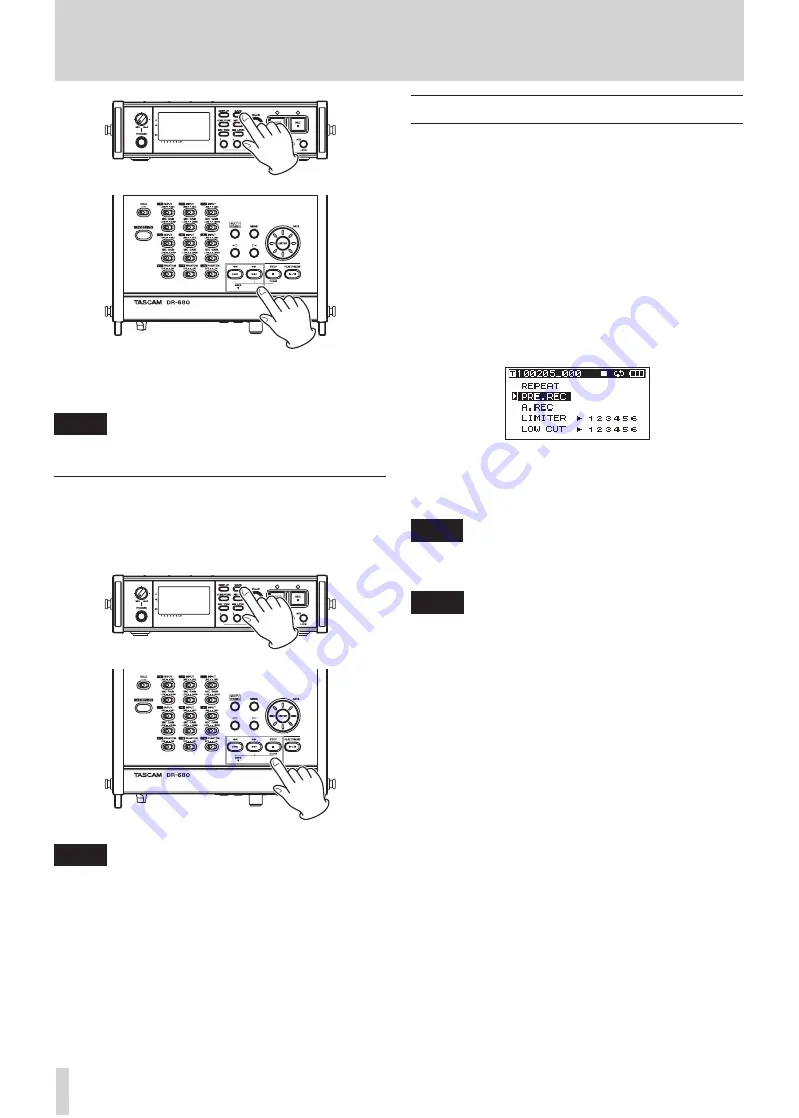
2   Use the 

VALUE

 knob to move the cursor and 

select the 

PRE.REC

 menu item.

3   Press the 

VALUE

 knob to turn pre-recording ON 

or OFF. 

If pre-recording has been turned ON, the 

PRE.REC


indicator appears with a dark background.


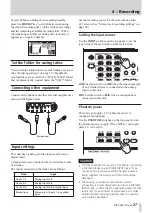
4   When you have finished making the settings, 

press the 

HOME/FUNC

 key to return to the Home 

Screen. 

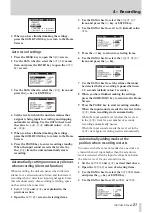
TIP

Used in combination with the auto-record function, you 
can capture recordings without losing the initial sound. 

NOTE

If the unit has been in recording standby for less than 
two seconds, only the amount of time that the unit has 
been in standby can be recorded.

4 – Recording

Содержание DR-680

Страница 1: ...D01098520A DR 680 Portable Multitrack Recorder OWNER S MANUAL...

Страница 2: ...B digital device pursuant to Part 15 of the FCC Rules These limits are designed to provide reasonable protection against harmful interference in a residential installation This equipment generates us...

Страница 3: ...his apparatus during lightning storms or when unused for long periods of time 14 Refer all servicing to qualified service personnel Servicing is required when the apparatus has been damaged in any way...

Страница 4: ...iffer ent types of batteries together The batteries could rupture or leak causing fire injury or stains around them Do not carry or store batteries together with small metal objects The batteries coul...

Страница 5: ...akes 27 Connecting other equipment 27 Input settings 27 Setting the input sources 27 Phantom power 27 Selecting the inputs for recording to tracks 5 and 6 28 Adjusting the input levels 28 Recording a...
Страница 6: ...s 45 Setting the extent of the panel operation lock function 45 Setting the battery type 46 Initializing the unit 46 Viewing system information 46 Reformatting SD cards 46 Viewing card information 47...

Страница 7: ...units to be controlled by a single master unit Pre record function allows up to 2 seconds of input before the start of recording to be captured Auto record function allows the unit to start recording...

Страница 8: ...e like An independent license for such use is required For details please visit http mp3licensing com Other company names product names and logos in this document are the trademarks or registered trad...

Страница 9: ...e them in extremely humid places Do not let them get wet Do not put things on top of them or twist them Do not hit them Beware of condensation If the unit is moved from a cold to a warm place or used...

Страница 10: ...s to switch the unit power between ON and STANDBY 6 PHANTOM switches Use these to turn phantom power ON or OFF for input pairs 1 2 3 4 and 5 6 7 MULTI STEREO Press to select whether the stereo track o...

Страница 11: ...Press to end recording standby Press this key while pressing the MARK key on the front panel to erase the current mark t PLAY PAUSE key Press when stopped or paused to start playback Press during play...

Страница 12: ...g a new take without pause g REC TRIM key Press to open the input TR I Msettings screen When the input TR I Msettings screen is open press to close it and open the Home Screen h MIX LEVEL key Press to...

Страница 13: ...evel device to a MIC LINE INPUTS jack If you connect a line level device while phantom power is being supplied that device and this unit could be damaged When using a condenser microphone before conne...

Страница 14: ...hese units using the cascade function connect the DIGITAL SYNC OUT jack of the other DR 680 to this jack c DIGITAL SYNC OUT jack The stereo signal mixed by the internal mixer is output from this jack...

Страница 15: ...ulder strap here Stand Use this stand to raise the front of the unit when operating it on a flat surface Battery compartment cover Battery compartment Install batteries 8 AA for powering the unit in t...

Страница 16: ...5 Level meters These show the levels of tracks 1 6 and the stereo track When recording if stereo track recording is ON and the stereo track recording source is set to DIGITAL IN the stereo track mete...

Страница 17: ...ator appears w STEREO indicator When a stereo track is being played the indicator appears During stereo track playback the meters for tracks 1 and 2 function as the L and R meters e SOLO indicator Whe...

Страница 18: ...ady open When the MENUscreen is open press the MENU key to go back one level in the menu DATA wheel Use to select items and to change values ENTER key Press to confirm the selection of a setting item...

Страница 19: ...or OFF for all inputs at the same time Press the 1 6 keys to turn the limiter ON or OFF for each input independently If the limiter has been turned ON for one or more inputs the L I M I TERindicator a...

Страница 20: ...ly available battery recharger to recharge NiMH batteries NOTE A great amount of power is required to provide phantom power to a condenser microphone If you use a condenser microphone while running th...

Страница 21: ...ng the PS 1225L AC adaptor all recording data and settings for example are lost and such data cannot be recovered Inserting and removing SD cards This unit can use SD cards with capacities of 2 GB or...

Страница 22: ...ting of files on the card To record erase or otherwise change files on a card disable the write protection Setting the date and time This unit adds date and time information to recorded files using it...

Страница 23: ...ises to occur which might damage your hearing or equipment To monitor with an external monitoring system powered monitor speakers or an amplifier and speakers connect it to the LINE OUTPUTS jack Power...

Страница 24: ...ordings BWF which is the broadcast wave format has the same sound quality as the standard wave WAV format MP3 format allows greater recording time than WAV format With MP3 formats higher bit rates rec...

Страница 25: ...the selection of items on the RECscreen 6 Press the MENU key to return to the MENUscreen Press the HOME FUNC key to return to the Home Screen Stereo track recording settings You can set what is recor...

Страница 26: ...rn to the selection of items on the RECscreen 6 Press the MENU key to return to the MENUscreen Press the HOME FUNC key to return to the Home Screen Editing the user take names You can edit the user wo...

Страница 27: ...eo mix of inputs 1 6 or digital input Set the recording source for the stereo track on the RECscreen See Stereo track recording settings on page 25 Setting the input sources Use the INPUT switches on...

Страница 28: ...ALOG Adjusting the input levels 1 Press the PAUSE key to enable recording standby The PAUSE and REC indicators light PAUSE indicator REC indicator 2 Use the 1 6 and MIX keys to turn the record functio...

Страница 29: ...om the sources of the sound The orientation and distance of a microphone also changes the sound quality You can use the limiter function to prevent distortion when recording even when loud sounds are...

Страница 30: ...channels so that the mix is balanced as desired You can check the balance with the MIX meters at the far right 7 When you have finished making the settings press the HOME FUNC key to return to the Ho...

Страница 31: ...the AUTORECscreen of selecting items 3 Use the DATA wheel to select the S I LENTCUT item and press the key or ENTER key 4 Use the DATA wheel to set it to ON default value OFF 5 Press the key to retur...

Страница 32: ...ted If the total number of takes would exceed 1000 a new take cannot be created A new take cannot be created if the recording time is less than 4 seconds If the newly created take would have the same...

Страница 33: ...requency of the low cut filter 1 Press the MENU key to open the MENUscreen 2 Use the DATA wheel to select the LOWCUTmenu item and press the ENTER key to open the LOW CUTscreen 3 Use the DATA wheel to...

Страница 34: ...d up to two seconds before the start of recording and include it in the recording 1 When the Home Screen is open press the HOME FUNC key to open the Functions Screen 2 Use the VALUE knob to move the c...

Страница 35: ...inutes 57 minutes 1 hour 55 minutes 3 hours 51 minutes 7 hours 42 minutes 16 bit 96kHz 8 tracks 21 minutes 43 minutes 1 hour26 minutes 2 hours 53 minutes 5 hours 47 minutes 24 bit 96kHz 6 tracks 19 mi...

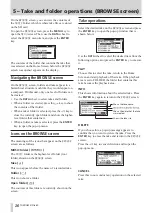
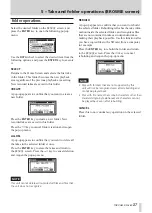
Страница 36: ...een are as follows MUSIC folder The MUS I Cfolder is the highest level folder root folder shown on the BROWSEscreen Take This icon appears before the name of a recorded take Folder This icon shows a f...

Страница 37: ...the BROWSEscreen Press the key to cancel deletion and reopen the pop up menu NOTE This unit cannot delete write protected files and files that the unit does not recognize REBUILD A pop up appears to...

Страница 38: ...ey during playback to stop playing a take and return to its beginning Pausing playback On the Home Screen press the PLAY PAUSE key during playback to pause playback at the current position in the take...

Страница 39: ...etween 0 and 100 default value is 100 4 Press the MIX PAN key to open the PANscreen 5 Use the pan controls on this screen to adjust the stereo position of each channel Use the 1 6 keys to select the c...

Страница 40: ...n the MENUscreen 2 Use the DATA wheel to select the BROWSEmenu item and press the ENTER key to open the BROWSEscreen 3 Use the DATA wheel to select the folder that contains the take that you want to p...

Страница 41: ...he REPEATmenu item 3 Press the VALUE knob to turn the repeat playback ON or OFF If the pre recording has been turned ON the REPEATindicator appears with a dark background 4 When you have finished maki...

Страница 42: ...ould appear on the desktop or in the Finder sidebar depending on the system settings Click on the DR 680 drive to show the MUS I C and UT I L I TY folders Copying files to a computer Open the MUS I C...

Страница 43: ...could be convenient Names given to subfolders and files are shown on the unit s Home Screen and the BROWSE screen This unit can only read files and folders with names that contain only single byte al...

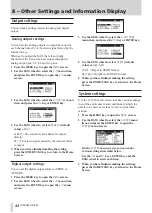
Страница 44: ...u can set the digital output format to SPDIF or AES EBU 1 Press the MENU key to open the MENUscreen 2 Use the DATA wheel to select the I Omenu item and press the ENTER key to open the I Omenu screen 3...

Страница 45: ...rt controls The input settings internal mixer settings record functions take and folder operations for example are still controlled separately When using the cascade function the digital output jack o...

Страница 46: ...on Press the ENTER key to open the system infor mation screen This page shows information about the system firmware version When the I NFORMAT I ONscreen is open press the ENTER key to return to the S...

Страница 47: ...item and press the ENTER key to open the CARDmenu screen 3 Use the DATA wheel to select the I NFORMAT I ON item and press the or ENTER key 4 Press the ENTER key to open the following screen TOTAL Sho...

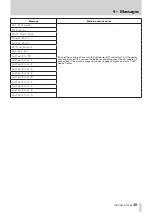
Страница 48: ...protect switch restart the power and format the card Wr i te T i meout Writing to the card timed out Backup files on the card to your computer and format the card If this problem still occurs even aft...

Страница 49: ...and disconnect the AC adaptor if connected If the error message continues to appear please contact a TEAC Repair Center F i l e Error Can t Save Data P l ayer Error Dev i ce Error Wr i t i ng F a i l...

Страница 50: ...hones minimized No sound is output from the headphones Is the volume level of the headphones minimized No sound is output from the monitoring system Are headphones connected Confirm that the monitorin...

Страница 51: ...N LOW 20 dBu 0 11 V GAIN HIGH 44 dBu 6 91 mV Maximum input level GAIN LOW 3 dBu 1 55 V GAIN HIGH 21 dBu 0 098 V Minimum input level GAIN LOW 51 5 dBu 2 0 mV GAIN HIGH 75 5 dBu 0 1 mV INPUT switch set...

Страница 52: ...MB or more memory USB port USB2 0 recommended Intel USB host controller recommended Supported Operating Systems Windows XP Windows Vista Windows 7 Mac OS X 10 2 or newer Other specifications Power sup...

Страница 53: ...ons 202 mm 54 mm 56 mm 188 4 mm 216 4 mm Illustrations in this manual might differ from the actual product In order to improve the product specifications and appearance could be changed without prior...

Страница 54: ...54 TASCAM DR 680 Block diagrams Recording Play 11 Specifications...
Страница 55: ...TASCAM DR 680 55 I O Input Type A Input Type B Typical Output 11 Specifications...

Страница 56: ...com 5939 Wallace Street Mississauga Ontario L4Z 1Z8 Canada TEAC MEXICO S A de C V Phone 52 55 5010 6000 www teacmexico net R o Churubusco 364 Colonia Del Carmen Delegaci n Coyoac n CP 04100 M xico DF...

Отзывы: