background image


4 - Recording operations


18


  TASCAM CD-RW5000


• Automatically, when the signal level drops below 

–36 dB and stays below that level for 20 seconds or 
more.

• Manually, using the CD-RW-5000’s 


STOP


 key.


SYNC ALL


• Automatically, when the signal level drops below 

–36 dB and stays below that level for 20 seconds or 
more.

• Manually, using the CD-RW-5000’s 


STOP


 key.


NOTE


If you are recording from a SPDIF source, you 
should 


not


 pause the source to cut the signal; 

you should stop it. This will avoid the writing of 


spurious tracks. 


NOTE


Manual track division (4.4, "Manual track divi-


sion") is not available in sync start mode.


4.3 Automatic track division


When material is recorded from an SPDIF audio 
source, the CD-RW5000 can recognize track divi-
sions in the digital audio data, and will automatically 
increment track numbers as the track divisions are 
received. The track divisions may be either PQ code 
or the START ID on a DAT recorder.

If recording is being carried out from an AES/EBU 
or an analog source, a track division will be entered 
automatically after each continuous period of relative 
silence (–36 dB) of three seconds or more in length.

This mode is always selected automatically when the 


SYNC ALL 


or 


SYNC-1


 mode is selected.

If neither of these modes is selected, it is possible to 
change between automatic and manual track division 
modes as recording takes place.


NOTE


Certain styles of music may include passages 
of relative silence which will be interpreted by 
the CD-RW5000 as track divisions. If you are 
recording such material, we recommend that 
you do not use the automatic setting. Unlike a 
DAT recorder, track divisions cannot be edited 


and erased once they have been recorded.


1


Locate the audio source to a little before the 
start of the material you are recording, and 
insert a disc into the CD-RW5000.


• If you are recording a CD using a digital connec-

tion , you should not pause the CD player, but leave 
it stopped.

• If you are using the automatic synchronization 

facility, press the 


SYNC START


 key 


[18]


 or 


[37]


twice so that the display shows 


SYNC


 ALL (see 

4.2.1, "Recording with synchronized start"), and 
you should ignore the following two steps, as these 
are performed automatically when the 
CD-RW5000 enters sync start mode.


2


Press the 


AUTO/MANUAL


 key 


[7]


 or 


[38]


 so 

that the display shows 


TRACK INCR 

AUTO


.


3


Press the 


RECORD


 key 


[17]


 or 


[45]


 to place 

the CD-RW5000 in record pause mode. The 
word 


RECORD


 will flash on the display and 

the 


RECORD


 and 


PAUSE


 key indicators 

will also light.


4


Start playing back the source material. 


5


If the automatic synchronization facility is 
not in use, press the 


PLAY


 key 


[15]


 or 


[43]


 to 

start recording.


• If the automatic synchronization


facility is in use, 

recording will start automatically.

To stop recording, press the 


STOP


 key 


[14]


 or 


[42]


.

Recording will also stop if the signal level drops 
below –36 dB for 20 continuous seconds or more. 


NOTE


If you are recording from a SPDIF source, you 
should 


not


 pause the source to cut the signal; 

you should stop it. This will avoid the writing of 


spurious tracks. 


4.4 Manual track division


When recording a longer piece without track divi-
sions (for instance, when recording a CD backup of a 
DAT recording of a live concert where track divisions 
have not been inserted), it is necessary to enter the 
track divisions manually.

Содержание CD-RW5000

Страница 1: ...erature accompanying the appliance The lightning flash with arrowhead symbol within an equilateral triangle is intended to alert the user to the presence of uninsulated dangerous voltage within the pr...

Страница 2: ...SULT A COMPETENT ELECTRICIAN TO THE USER This equipment has been tested and found to comply with the limits for a Class A digital device pursuant to Part 15 of the FCC Rules These limits are designed...

Страница 3: ...ng structure grounding of the lead in wire to an antenna discharge unit size of grounding conductors location of antenna discharge unit con nection to grounding electrodes and requirements for the gro...

Страница 4: ...of 1968 and is classified as class 1 laser product There is not hazardous invisible laser radiation during oper ation because invisible laser radiation emitted inside of this product is completely co...

Страница 5: ...gital OUTPUT 12 28 CONTROL I O 12 29 REMOTE IN connector 12 2 3 RC RW5000 remote control unit 12 30 OPEN CLOSE key 13 31 Number keys 13 32 REPEAT key 13 33 PGM key 13 34 DISPLAY key 13 35 FINALIZE key...

Страница 6: ...d works to which you own the copyright or where you have obtained permission from the copyright owner or the rightful licensor Unless you own the copy right or have obtained the appropriate per missio...

Страница 7: ...lf the remote control unit with its attached cable a rack mounting screw kit 1 3 1Rack mounting the CD RW5000 Use the rack mounting screw kit to mount the CD RW5000 in a standard 19 inch rack as shown...

Страница 8: ...important that they are not stored in a location where direct sunlight will fall on them and which is away from sources of heat such as radiators or heat generating electrical devices Always store CD...

Страница 9: ...TASCAM CD RW5000 9 2 Parts of the CD RW5000...

Страница 10: ...nt track numbers manually by pressing either the RECORD key 17 or 45 or the TRACK INCR 39 key while recording is taking place 8 SOURCE key Use this key to choose between digital and analog sources whe...

Страница 11: ...ck and will continue until the data signifying the start of the next track is received When the SYNC ALL setting is selected the CD RW5000 will start recording as soon as digi tal audio data is receiv...

Страница 12: ...open collector with a maximum current of 40 mA Input signals are active when low ground for 30 ms 29 REMOTE IN connector This connector is used for the RC RW5000 remote control unit supplied with the...

Страница 13: ...epeating the whole disc REPEAT ALL and no repeat 33 PGM key Use this key in conjunction with the number keys for programmed playback as described in 3 3 1 Pro grammed playback 34 DISPLAY key See 6 35...

Страница 14: ...repeat one track press the REPEAT key 32 on the remote control unit once to show REPEAT 1 on the display The current track will continue to be repeated until stopped 2 To repeat the whole disc press t...

Страница 15: ...tures keys to allow pre cise searching and positioning within the CD 1 Press and hold the backward or forward key to search backward or forward at twice nor mal speed 2 Press the FAST key followed in...

Страница 16: ...GITAL indicator on the display will flash to indicate that the connection is not ready To go manually from record pause mode into record mode press the PLAY key Press the STOP key to stop recording 4...

Страница 17: ...e audio If there is not such a gap you should use a manual start 1 If the audio source is not a CD connected dig itally to the CD RW5000 locate the audio source to a little before the start of the tra...

Страница 18: ...that you do not use the automatic setting Unlike a DAT recorder track divisions cannot be edited and erased once they have been recorded 1 Locate the audio source to a little before the start of the m...

Страница 19: ...take care that the signal level is low enough to avoid distortion on the finished CD The INPUT level controls 10 should be used to adjust the level of the input signal with reference to the meters The...

Страница 20: ...or further playback or recording 4 7 1Erasing a finalized disc The whole contents audio material and subcode will all be erased This allows you to use a single CD RW disc many times as a pre master di...

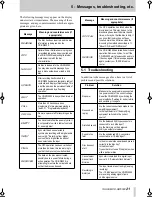
Страница 21: ...ER The data on the disc was corrupted possibly due to a power failure during a write operation The CD RW5000 is attempting to restore the corrupted data so that the disc can be used OPC FAIL The OPC o...

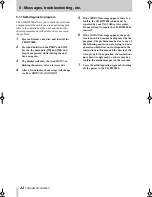
Страница 22: ...ters after a few seconds 4 After a few minutes the message will change to either ERROR or PASSED 5 If the ERROR message appears there is a fault in the CD RW5000 which must be repaired by your TASCAM...

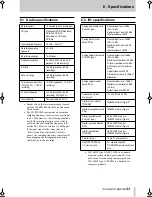
Страница 23: ...ack 86 dB recording 1kHz FS Wow and flutter Unmeasurable 0 001 Analog inputs balanced XLR 3 31 type Nominal input level 4dBu FS 16 dB Maximum input level 20 dBu Input impedance 10 k Analog inputs unba...

Страница 24: ...da 120 VAC 60 Hz Europe UK 230 VAC 50 Hz Australia 240 VAC 50 Hz Power consumption 24W Weight 5 6 kg 12 35 lbs Dimensions w x h x d 482 x 104 5 x 310 mm 19 x 4 1 x 12 2 in Operating temperature 5 C to...

Страница 25: ...ironmental considerations 7 Erasing a finalized disc 20 Erasing a track on a non finalized disc 20 Erasing material CD RW only 20 F FAST keys 13 Fast searching 15 Finalization 7 16 19 21 Finalized dis...

Страница 26: ...a 14 Self diagnostic program 22 SKIP keys 13 SOURCE key 10 Specifications audio 23 I O 23 physical 23 Switch POWER 10 SYNC START key 11 13 Synchronized start recording 17 T Table of Contents TOC 7 10...

Страница 27: ...Croxley Centre Watford Herts WD1 8YA U K TEAC DEUTSCHLAND GmbH Phone 0611 71580 Bahnstrasse 12 65205 Wiesbaden Erbenheim Germany TEAC FRANCE S A Phone 01 42 37 01 02 17 Rue Alexis de Tocqueville CE 00...

Отзывы: