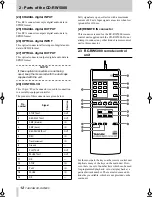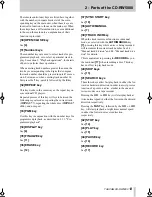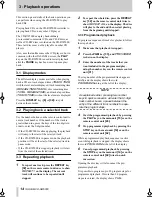
2 - Parts of the CD-RW5000
10
TASCAM CD-RW5000
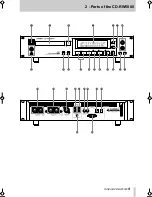
Most parts and controls of the CD-RW5000 are
self-explanatory. However, we suggest that you look
through this section in order to gain an overview of
the functions of the CD-RW5000.
2.1 Front panel
[1] POWER switch
Press this switch to turn the power on and off to the
CD-RW5000.
PLAUGGABLE EQUIPMENT, that the socket-
outlet shall be installed near the equipment and shall
be easily accessible.
[2] PHONES jack and level control
Use this jack to connect a standard pair of stereo
headphones and the level control to control the level
of the signal output from them.
[3] Disc tray
When inserting discs into the tray for recording or
playback, make sure that the label side of the disc is
uppermost.
Always make sure that the disc is centered in the
recess in the disc tray before closing the tray.
[4] OPEN/CLOSE key
Use this key to open and close the disc tray.
[5] Display
The display provides information regarding the
inserted disc (disc type, time available for recording,
track number, etc.), and metering.
[6] DISPLAY key
Use this key to cycle through the different display
modes available, as described in 3.1, "Display
modes".
[7] AUTO/MANUAL key
When the recording source is digital, this key allows
for the synchronization of the recorded CD with the
digital track divisions recorded on a source CD, a
DAT recorder, etc. See 4.3, "Automatic track divi-
sion" for details.
When the recording source is analog or digital
AES/EBU format, this key allows automatic track
incrementation to be performed when a period of
silence of three seconds or more is detected in the
signal. See 4.2, "Recording from digital sources" for
details.
In both digital and analog input modes, you can
increment track numbers manually by pressing either
the
RECORD
key
[17]
or
[45]
, or the
TRACK
INCR [39]
key while recording is taking place.
[8] SOURCE key
Use this key to choose between digital and analog
sources when recording a disc. If a digital source is
selected, the source will be the one selected with the
DIGITAL
INPUT
key.
There are two choices for the analog inputs: unbal-
anced inputs, which is briefly shown as
UNBAL
on
the large 7-segment characters and
ANALOG
on the
smaller characters of the display, and the balanced
inputs, which are shown as
BAL
on the 7-segment
and
ANALOG BAL
on the smaller display
characters.
[9] DIGITAL INPUT key
Use this key to select the input source when record-
ing a disc. Use this key in conjunction with the
SOURCE
key. The choices available are:
AES/EBU
,
COAXIAL
and
OPTICAL
when the
SOURCE
key is set to
DIGITAL
.
When the
SOURCE
key is set to either of the two
analog sources, pressing this
DIGITAL INPUT
key
briefly will display the last selected input source for
the digital inputs, without actually selecting the
source.
[10] INPUT level controls
These controls affect the level of the analog input
signal.
When these controls are at the two o’clock position,
the signal is at nominal level (neither cut or boosted).
[11] FINALIZE key
This key is used after all tracks on a recordable disc
have been recorded. When this key is pressed, fol-
lowed within 2 seconds by the
RECORD
key, the
final table of contents is written on the disc, which
can then be played on a normal CD player (until this
key is pressed, and the table of contents is written,
CDs cannot be played on a normal CD player).
After the table of contents has been written, the disc
ceases to be a recordable disc. In the case of a CD-R
disc, no further action except playback can be per-
formed on the disc. In the case of a CD-RW disc, the
whole disc can be erased, and reused for recording.
See 4.6, "Finalizing discs" for details.


