background image

SPRAY APPLICATOR

www.tanningessentials.co

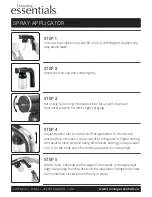
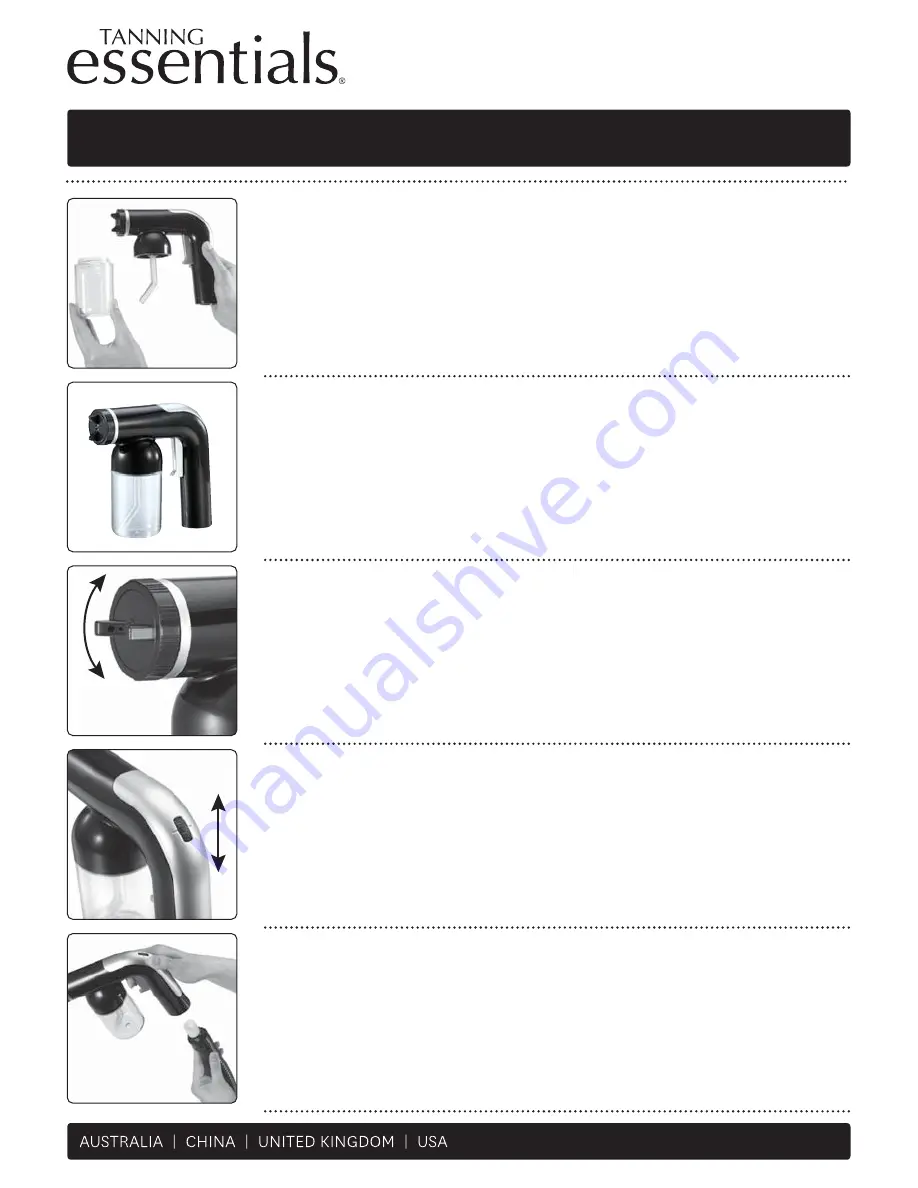
STEP 1

Unscrew the solution cup and fill ¾ full. Overfilling the solution cup
may cause leaks.

STEP 2 

Insert solution cup and screw tightly. 

STEP 3

Set nozzle by turning. Vertical position for up and down and
horizontal position for left to right spraying.

STEP 4

Adjust solution dial on the back of the applicator to choose the
amount/flow of solution you would like to dispense. A higher setting
will result in more solution being distributed. Setting your applicator
on 2-4 for the body and 2 for the face are best recommended.  

STEP 5 

Attach hose- Ensuring the flat edge of the socket  is facing upright.
Align the prongs from the hose into the applicator fittings and screw
the connection clockwise until firmly in place.

Содержание Rapid

Страница 1: ...RAPID TRAINING MANUAL www tanningessentials co SIMPLE TANNING SYSTEMS built purposely for a perfect spray tan ...

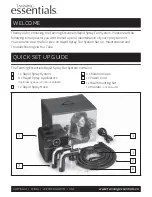
Страница 2: ...so view the full video on Rapid Spray Tan System Set Up Maintenance and Troubleshooting via You Tube QUICK SET UP GUIDE The Tanning Essentials Rapid Spray Tan System contains 1 x Rapid Spray System 2 x Solution Cups 2 x Rapid Spray Applicators 1 x Power Cord Optional 1 gun version also available 1 x Wall Mounting Set 1 x Rapid Spray Hose 1 x Manual not pictured 1 2 3 4 5 6 www tanningessentials co...

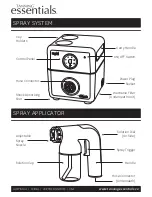
Страница 3: ...ls co Carry Handle ON OFF Switch Power Plug Socket Washable Filter Underneath Unit Cup Holders Control Panel Hose Connector Shock Absorbing Feet Adjustable Spray Nozzle Solution Cup Solution Dial On Side Spray Trigger Handle Hose Connector Underneath ...

Страница 4: ...o right spraying STEP 4 Adjust solution dial on the back of the applicator to choose the amount flow of solution you would like to dispense A higher setting will result in more solution being distributed Setting your applicator on 2 4 for the body and 2 for the face are best recommended STEP 5 Attach hose Ensuring the flat edge of the socket is facing upright Align the prongs from the hose into the ...

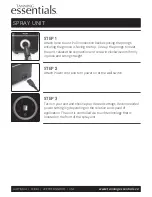
Страница 5: ...release the connection and screw in clockwise until firmly in place and sitting straight STEP 2 Attach Power cord and turn power on at the wall switch STEP 3 Turn on your unit and choose your desired settings Recommended power setting is 3 depending on the solution and speed of application The unit is controlled via touch technology that is located on the front of the spray unit ...

Страница 6: ...ducts for maintaining the gloss finish of your spray unit STEP 2 Clean the filter Remove the filter from the base of the unit and rinse in warm water Wait until filter is completely dry before re fitting Positioning the spray unit behind the spray technician when in use will ensure the unit stays cleaner for longer www tanningessentials co ...

Страница 7: ...p with warm water and screw back into the applicator fix the solution dial to C and spray until the water runs clear Rinse and repeat if required STEP 5 Empty solution cup and re set the solution dial on the back of the gun to the regular spray setting STEP 6 Wipe any excess water from the applicator with a cloth and leave out to dry www tanningessentials co Maintenance on the Applicator must be ru...

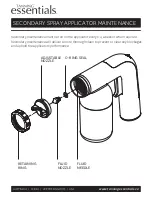
Страница 8: ...maintenance must be run on the applicator every 2 4 weeks or when required Secondary maintenance will deliver a more thorough clean to prevent or clear any blockages and uphold the applicators performance O RING SEAL FLUID NOZZLE ADJUSTABLE NOZZLE RETAINING RING FLUID NEEDLE ...

Страница 9: ...you do not misplace the o ring seal which is located behind the fluid nozzle STEP 5 Once removed visually inspect the fluid nozzle for small particles or blockages rinse thoroughly with hot water STEP 6 Gently wipe the fluid needle to clean and remove any debris the fluid needle should not be removed from the applicator at any time STEP 7 Once visually clear of any debris re attach fluid nozzle ensurin...

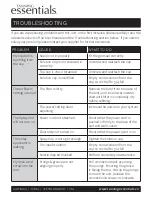
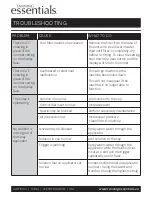
Страница 10: ... The filter is dirty The power setting need adjusting Remove the filter from the base of the unit and rinse in warm water Wait until filter is completely dry before refitting Increase the power on your system Power cord not attached Electricity not turned on Ensure that the power cord is pushed in firmly to the base of the unit and wall socket Ensure that the power point is on The Spray Unit will not t...

Страница 11: ... showing in place of the number setting on the display face Your filter needs to be cleaned Remove the filter from the base of the unit and rinse in warm water Wait until filter is completely dry before re fitting To clear the setting hold down the heat button and the display will return to normal No solution is coming out of the spray applicator Nozzle may be blocked Solution in cup too low Trigger i...

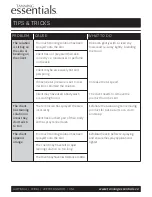
Страница 12: ...ody wash or scrub high in oil The technician has sprayed the area incorrectly Client has touched part of their body with a spray tanned area Too much tanning solution has been sprayed onto the skin The client may have left a rapid tanning solution on too long The client may have low tolerance to DHA Dab area gently with a clean dry towel and re spray lightly blending the tan in Increase the air sp...

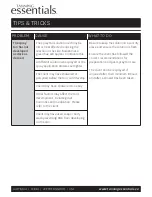
Страница 13: ...red or perspired before the tan could develop Client may have showered too early Other factors may affect the tan s development including diet hormones and medication Please refer to the client Client may have used soap or body wash preventing DHA from developing on the skin Be sure to keep the solution in a cool dry place and ensure the solution is fresh Ensure the client has followed the correct ...

Страница 14: ...rs cost Warranties shall not apply to any defect failure or damage caused by improper use or improper or inadequate maintenance and care The manufacturer shall not be obligated under these warranties a to repair damage resulting from attempts by personnel other than authorised representatives to install repair or service the product b to repair damage malfunction or degradation of performance resu...

Страница 15: ...the details of your model here The Tanning Essentials Rapid Spray Tanning System is made in China WARRANTY CARD www tanningessentials co To submit your warranty online please visit www tanningessentials co and select the warranty link Please include proof of purchase MODEL TYPE SERIAL NUMBER SUPPLIER NAME NAME ADDRESS EMAIL BEAUTY BUSINESS TYPE TANNING HAIR MOBILE HOME DATE OF PURCHASE SUBURB COUN...

Страница 16: ...8900 EMAIL sales tanningessentials co WEB www tanningessentials co www tanningessentials co Tanning Essentials 10 Apex Court Thomastown VIC 3074 Australia AFFIX POSTAGE STAMP HERE www facebook com tanningessentials View our full video on Rapid Spray Tan System Set Up Maintenance and Troubleshooting www com user TanningEssentials ...

Отзывы: