


22
Be
fo
re
U
se
en
*Adjust the printing position by using the arrow keys under "Adjust Printing Position".
You can adjust the printing position within -10.0 mm to +10.0 mm for each arrow direction by 0.1 mm increments.
01/01/2016
01/01/2016
Setting Up the Device
(continued)
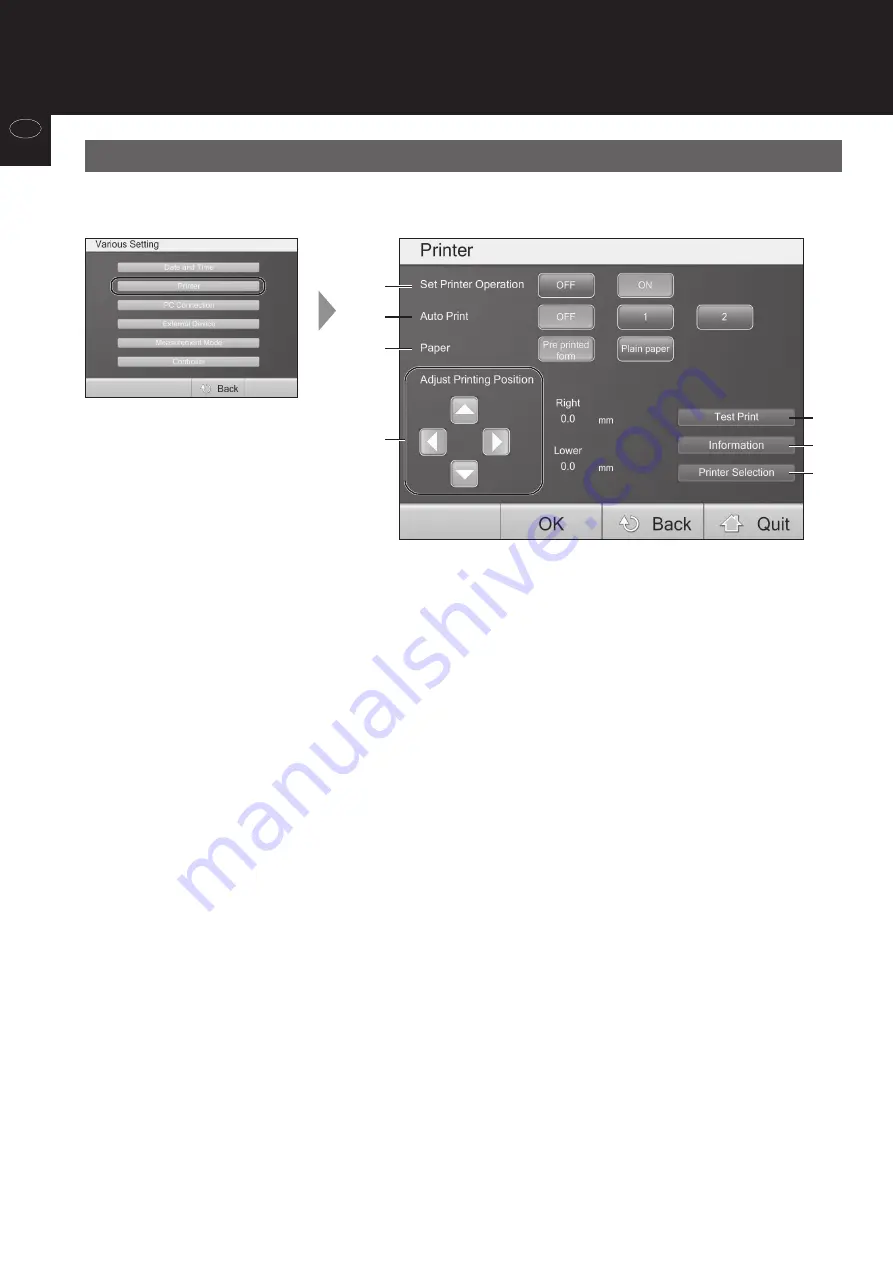
Printer
(1) Set Printer Operation
Select if you will use a printer or not.
OFF: Select this if you will not use a printer.
ON: Select this if you will use a printer.
(2) Auto Print
Set how many sheets will be automatically printed at the end of each measurement. Even if this option is set to OFF,
you can still print by selecting the print button at the bottom of the screen once the printing function is ON.
OFF: No automatic printing.
1: Prints 1 sheet at end of a measurement.
2: Prints 2 sheets at end of a measurement.
(3) Paper
You can select between pre-printed sheets and printing blank sheets (A4 size).
Pre-printed form: Dedicated sheets will be used for reports.
Plain paper: Full color printing to a regular A4 clear sheet.
(1)
(2)
(3)
(4)
(5)
(6)
(7)
This option allows printing contents to be adjusted to fit the dedicated pre-printed sheet.
These parameters should be set before printing.
(4) Adjust Printing Position
(1) Select "Test Print" to check the current printing position.
(2) The printing position can be adjusted by using the arrow keys under "Adjust Printing Position".
(5)Test Print
*You can adjust the printing position within -10.0 mm to +10.0 mm for each arrow direction by 0.1 mm increments.


