


18
●
Recording Interval
…
1
/
2
/
5
/
10
/
15
/
20
/
30 seconds,
1
/
2
/
5
/
10
/
15
/
20
/
30
/
60 minutes
●
Recording Mode
…
One Time / Endless Loop
●
Temperature Unit Displey
…℃(
Celsius
)/ °
F(
Fahrenheit
)
●
Sensor Type
…
Pt100
●
Record Starting Date
…
Programmed / Immediate
There are two ways to begin the recording process.
●
Using the Computer
…
You can set the day and time you want recording to start and can
set or change all recording functions via the software.
●
Using the Buttons on the Main Unit
…
By pushing the REC button you can begin recording
immediately as well as set or change the recording
interval.
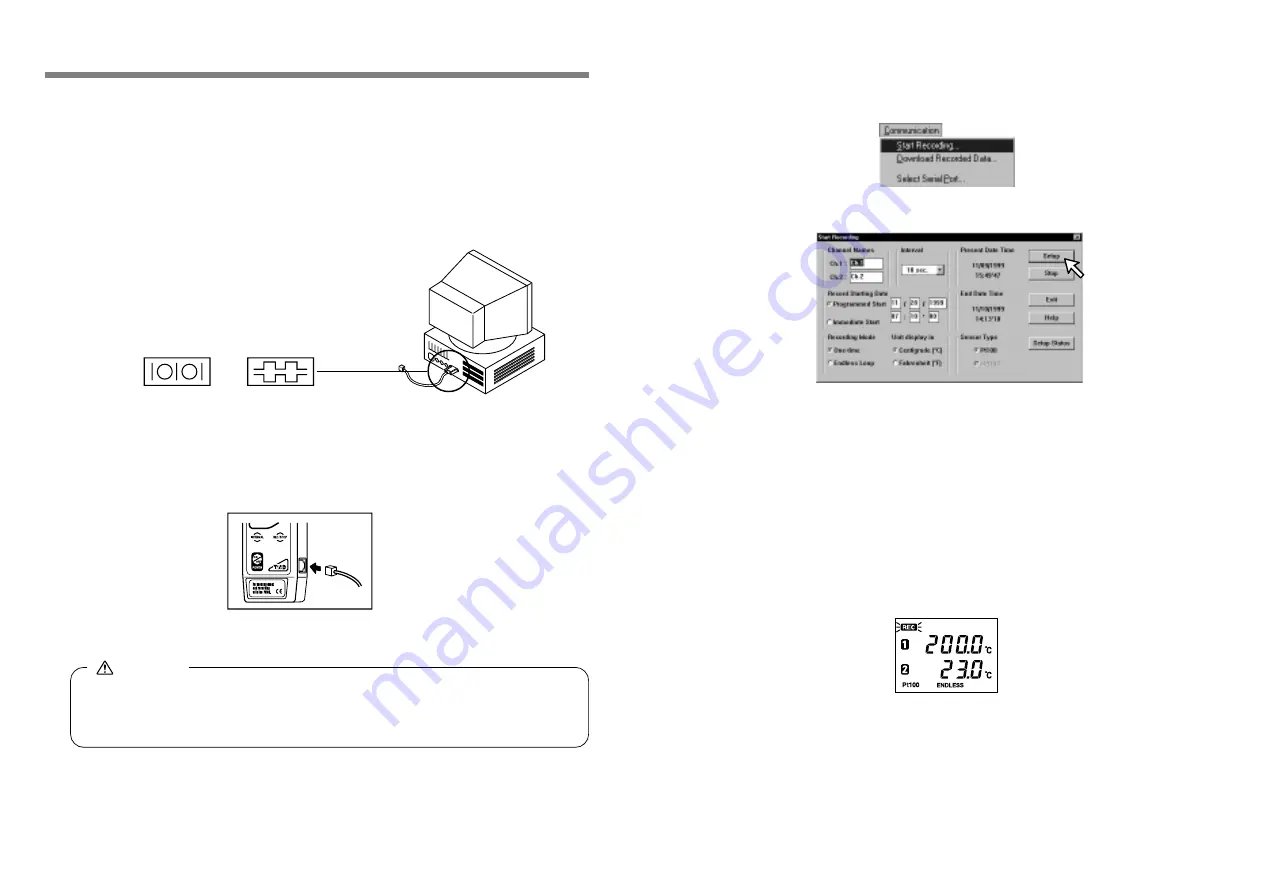
①
Start
「
Hi for Windows
」
②
From the [Communication] Menu choose [Start Recording...]
③
The following screen will be displayed from which all settings can be made.
④
④
④
④
④
Starting to Record
1.
Connect the communication cable provided with the
unit to the serial port on your computer. The con-
nection cable is a D-SUB 9 pin female jack that
should be connected to the place with such a
marking.
2 .
Connect the cable to the Thermo Recorder main unit. Make sure it is con-
nected properly, pushing in until you hear a click.
17
●
If you connect to the wrong place communication will not take place. Also make
sure that the cable is connected properly in the right position.
《
Side view of main unit
Communication cable connection jack
》
1
1
1
1
1 .....
Start Recording via Computer
3.
Set the Recording Conditions.
Make sure that the date and time setting is correct on your computer. If it is not, the
data and time for all data recorded will be wrong. Once a Channel Name, Record-
ing Mode, Temperature Unit Display, and / or Sensor Type has been set those set-
tings will be saved, even if, the batteries loose power.
Caution
④
By clicking [Setup] the settings will become active. The LCD Display on the
main unit will display a blinking REC until the set recording date and time
arrives.
●
When you want to stop the recording function simply click on the [Stop] button in
the [Recording Start] display in the [Communication] pull down menu. You can
cancel a programmed start in this same way.
●
When you want to check the recording settings go to the [Recording Start] dis-
play in the [Communication] pull down menu and click on [Present Settings] and
the present settings will be displayed. YOU CAN NOT CHANGE THE SETTINGS
WHILE RECORDING.


