20
21
Getting Ready
Making Clock Settings Manually
Please note that if the clock settings have already been made
from your computer by using T&D Recorder for Windows, this
operation will not be necessary.
1.
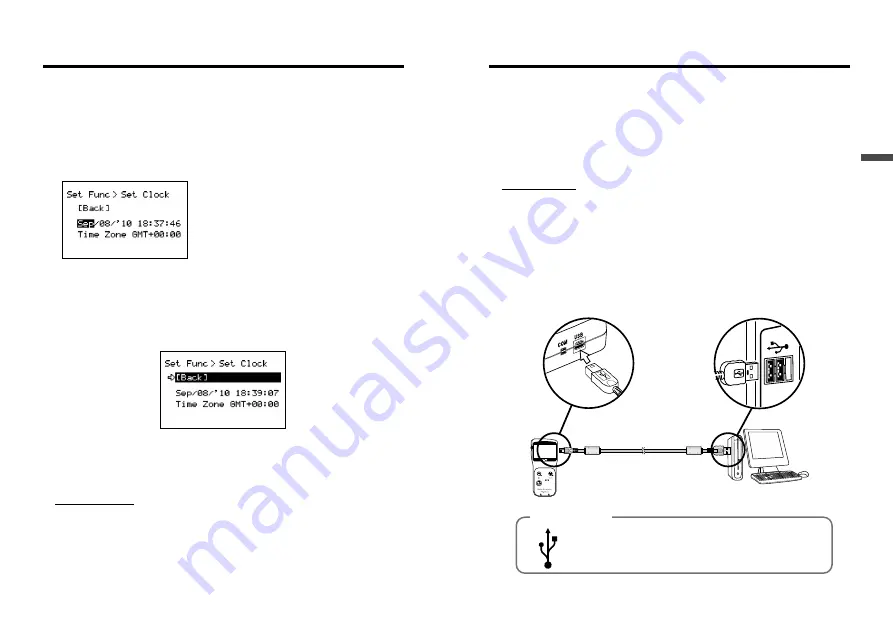
In the Main Menu, go to [Set Functions] and select [Set Clock].
2.
Make clock settings.
(1) Move the Operation Dial up and down to
change the selection item of the display in
the order of month, day, year, hour,
minute, second, and time zone.
(2) By pressing the dial, the value for that
item will flash.
(3) Change the value by moving the dial up and down.
(4) Press the dial again to set the selected value and move to the next settings
item.
3.
After having completed the clock settings, move the arrow to [Back]
and press the dial to return to the Menu Window.
[Time Zone]
By setting the region in which the TR-57DCi will be used the time difference
will be automatically set. Daylight Savings Time settings must be set
manually. (See p.42)
I M P O R TA N T :
- Please make sure that the date and time settings in the TR-57DCi are correct, if they are
not, the recording start time and recording time of downloaded data will be incorrect.
- Clock settings for the TR-57DCi can also be made from your computer by using the
software supplied with the Unit. For more details, see the [Help] Menu in the supplied
software or the User’s Manual that accompanies it.
Communicating with the Computer
To use a PC to download recorded data or make setting changes
for the data logger it is necessary to use a USB communication
cable US-15C (provided) or a serial communication cable (optional)
to connect the TR-57DCi to your computer.
USB Communication
For TR-57DCi <-> PC Communication
I M P O R TA N T :
- Make sure the supplied software "T&D Recorder for Windows” has been installed before
connecting a TR-57DCi Unit to your PC.
- The USB device driver must be installed before trying to carry out USB communication.
After installing the USB device driver, your computer will be able to detect and recognize
any TR-57DCi Unit that is connected with a USB communication cable. Refer to the
“Installing the USB Driver” section in the “T&D Recorder for Windows User’s Manual” for the
installation instructions.
- When connecting a TR-57DCi to a PC, connect only one unit at a time. If you connect
multiple TR-57DCi Units at the same time, they may not be recognized properly.
- Make sure that the communication cable is completely inserted into the correct jack.
USB mini-B plug
To TR-57DCi
USB communication cable
US-15C
USB A plug
To PC
USB Port Mark
The USB communication cable is a USB-A plug <-> USB
mini-B plug. Connect the USB-A plug end of the cable into
a jack with a mark as shown at left.


