background image

2 General Use 


Wake up the system


When all cables are connected as described in chapter 

1.3 Connecting Cables

, the system is 

ready for use.  
 

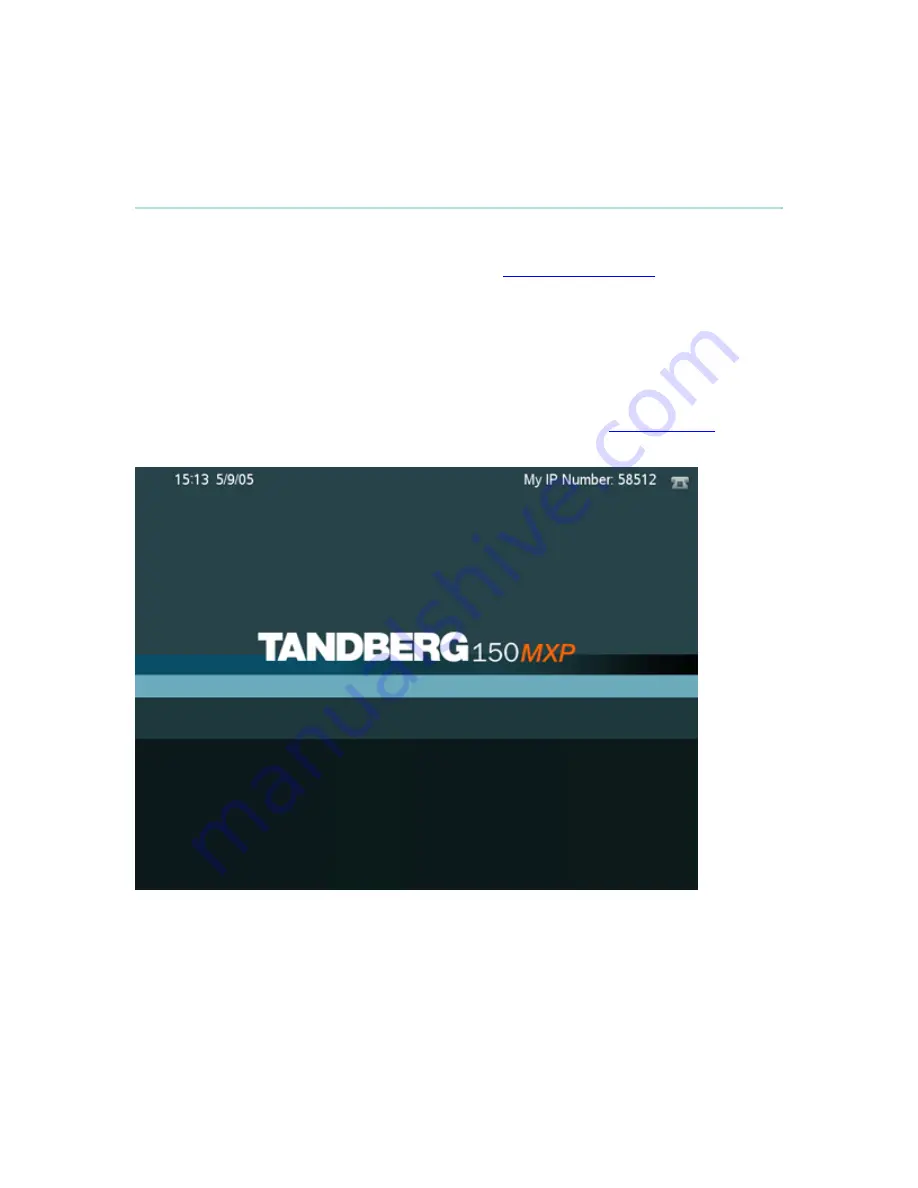
The Welcome Screen 

 
When the system is powered, you will see the welcome screen. Your dial in number is displayed 
in the upper right corner. The on-hook telephone icon tells you that you are currently not in a call. 
Press OK or Cancel to hide the welcome screen. Press OK or Cancel to bring it back.  
 
To check your video image, press Selfview on the keypad (see chapter 

2.1 The Keypad

 for 

further information). Press Selfview again to go back to the welcome screen. 


Содержание T150 MXP

Страница 1: ...User Manual Software version L3 0 D13640 03 This document is not to be reproduced in whole or in part without permission in writing from...

Страница 2: ...for informational purposes only is subject to change without prior notice and should not be construed as a commitment by TANDBERG The information in this document is believed to be accurate and reliab...

Страница 3: ...al electronic waste stations marking recyclable parts so the waste station can disassemble and re use these parts Digital User Manuals TANDBERG is pleased to announce that it has replaced the printed...

Страница 4: ...he equipment under or near water for example near a bathtub kitchen sink or laundry tub in a wet basement or near a swimming pool or in areas with high humidity Cleaning Unplug the apparatus from the...

Страница 5: ...ring lightning storms or when unused for long periods of time Servicing Do not attempt to service the apparatus yourself as opening or removing covers may expose you to dangerous voltages or other haz...

Страница 6: ...erface Use caution when installing or modifying communication lines Avoid using communication equipment other than a cordless type during an electrical storm There may be a remote risk of electrical s...

Страница 7: ...comments or suggestions please see the Online Support service at www tandberg net It is also possible to send a fax or mail to the attention of Product and Sales Support TANDBERG P O Box 92 1325 Lysak...

Страница 8: ...8 2 7 6 Global Contacts 39 2 7 7 Up one Level 40 2 7 8 Search 40 2 7 9 Copy Contact to My Contacts 41 3 Administrator Settings 42 3 1 General Settings 43 3 1 1 Language 44 3 1 2 System Name 45 3 1 3 A...

Страница 9: ...User Manual 3 4 7 System Information 75 3 4 8 Call Status 76 3 4 9 Network Statistics 78 3 4 10 Warnings 79 3 6 Restart 80 4 Appendices 81 4 1 Appendix 1 82 ix...

Страница 10: ...ice Precedence DiffServ Automatic downspeeding Video error concealment using IPLR Built in and automatic Gain control Noise reduction and Echo cancellation Audio and Video mute for privacy 8 4 LCD 4 3...

Страница 11: ...ure Tilt the camera by manually adjusting the tilt angle with the wheel to the right of the lens 2 Microphone located at the top of the product 3 LCD Monitor 4 Handset Handset is not included with the...

Страница 12: ...t to cover the lens when the product is not in use The camera lens cap protects the lens and also assures you from involuntary broadcasting of your video image 7 Keypad The keypad contains all the key...

Страница 13: ...sories box you find LAN cable Power adapter and power cable Handset Handset is not included with the TANDBERG 150 MXP but is an accessory device Contact your TANDBERG representative for more informati...

Страница 14: ...a headset symbol This allows the user to connect a standard telecommunications headset to the system Headsets with the microphone positioned in front of the user s mouth connected to the earphone thro...

Страница 15: ...1 TANDBERG 150 MXP 4 LAN 1 5 LAN 2 15...

Страница 16: ...o change between lower case and upper case letters 4 Auto answer Decide whether you would like the system to let calls through automatically Auto answer On or if you want to answer the call manually A...

Страница 17: ...1 TANDBERG 150 MXP 9 Save changes Remember to save changes by selecting the Save button on the bottom of the menu and pressing OK 17...

Страница 18: ...the welcome screen Your dial in number is displayed in the upper right corner The on hook telephone icon tells you that you are currently not in a call Press OK or Cancel to hide the welcome screen P...

Страница 19: ...our desired letter Press the key as many times as you need to get the right letter Change to lower or upper case letters with the key and space with the 0 key 2 Call key Press the Call key to open the...

Страница 20: ...inistrator Settings Press Administrator Settings to open the settings menu Administrator Settings contain all the settings of the system see chapter 3 Administrator Settings for more information 14 Pr...

Страница 21: ...r to activate the speaker The Speaker key is lit when the speaker is active Press Speaker again to turn the speaker off 20 Cancel Cancel takes you back one step in the menu system Use Cancel also to d...

Страница 22: ...r system when the privacy indicator is displayed Press the Privacy key again to deactivate privacy Volume Off This indicator is shown when the volume is turned off Press Volume to turn the volume back...

Страница 23: ...ow keys The orange selector on screen shows the selected item Press OK to select Back Cancel button In the main menu the Cancel X button will hide the menu In other menus Cancel X takes you one step b...

Страница 24: ...hese actions will result in a dial tone and you can start dialing You can enter a number manually in the input field or select the book icon to select a contact from the phone book The TANDBERG system...

Страница 25: ...the green key on the keypad or move the orange selector down to the Place Video Call icon and press OK to start the video call When dialing manually toggle between ABC abc by pressing the button on t...

Страница 26: ...a telephone How to make a telephone call 1 Press the green key on the keypad or any of the other possibilities mentioned in chapter Make a Call to open the Call menu 2 Dial a telephone number with the...

Страница 27: ...use Call Settings 1 Press the green key on the keypad or any of the other possibilities mentioned in chapter Make a Call to open the Call menu 2 Move the orange selector to the Call Settings field on...

Страница 28: ...a proper bandwidth for your call The typical bandwidth used for IP calls is 384kbps When bandwidth is set to auto the unit will default to 384kbps Net The Net alternatives are H 323 and SIP If a gate...

Страница 29: ...call press the red key or press OK when the Reject button on screen is selected Alternative ways to answer a call are Pressing the headset button if a headset is connected Lifting up the handset if a...

Страница 30: ...D1364003 T150 MXP User Manual 2 6 End Call How to end a call 1 Press the red key on the keypad If you are using the handset you can end the call by hanging up 30...

Страница 31: ...wn in the Phone Book with the arrow keys on the keypad Use the letter keys to search through the contacts beginning with the typed letter The functions in the Phone Book are available when pressing th...

Страница 32: ...D1364003 T150 MXP User Manual Global Contacts Up one Level Search Copy to My Contacts 32...

Страница 33: ...Select a number from the list 2 Press the green Call button on the keypad or press the left arrow key to select the Call Now icon followed by OK The call will be set up as a video call or a telephone...

Страница 34: ...on followed by OK The call will be set up as a video call or a telephone call depending on the settings made when storing the contact Alternatively press the OK button when the contact is selected The...

Страница 35: ...2 General Use The following functions are available from My Contacts Call Now New Contact Edit Contact Delete Contact Close 35...

Страница 36: ...and small letters by pressing the button on the keypad The maximum name length is 30 characters For numbers press the button for one second 3 Enter Number by using the number keys on the keypad Input...

Страница 37: ...dit a contact in the Local Phone Book 1 Select the contact that is to be edited 2 Press the left arrow on the keypad followed by the down arrow until the Edit Contact icon is selected 3 The current se...

Страница 38: ...le from 2 7 2 My Contacts How to delete a contact 1 Select the contact that is to be deleted 2 Press the left arrow on the keypad followed by the down arrow until the Delete Contact icon is selected T...

Страница 39: ...using Global Contacts 1 Find the desired contact using the arrow keys or searching on the first letter with the letter keys or use the search function described in 2 7 8 Search 2 Press the green Call...

Страница 40: ...Up one Level button to return back to the alphabetical list 2 7 8 Search The phone book can contain an unlimited amount of global contacts Using search makes it easier to find the wanted contact How t...

Страница 41: ...re often used to My Contacts Note that the local copy will not be updated if the Global Contacts are updated from the management system How to copy a contact from the Global Phone Book to the Local Ph...

Страница 42: ...ator Settings Settings contain all the settings of the system Making changes to Settings will change the behaviour of the system Administrator Settings contain General Audio Security Network Diagnosti...

Страница 43: ...go through the General Settings menu to ensure that you have the right settings for your system see chapter 1 4 System Configuration General Settings contain Language System Name Autoanswer Max Call L...

Страница 44: ...supports 15 different languages for its on screen menus English German French Norwegian Swedish Italian Spanish Portuguese Chinese Simplified Chinese Traditional Japanese Russian Korean Finnish and Th...

Страница 45: ...3 Administrator Settings 3 1 2 System Name System Name is blank by default System name can be alphanumeric and up to 50 characters long Follow the installation procedure to enter a System Name 45...

Страница 46: ...ally or manually On The system will automatically answer all incoming calls On Mic Off The system will automatically answer all incoming calls and switch the microphone off when the call is connected...

Страница 47: ...1 4 Max Call Length This feature will automatically end both incoming and outgoing calls when the call time exceeds the specified Max Call Length Max Call Length can have the following values 0 999 mi...

Страница 48: ...he Corporate Directory is available in the menu Off The Corporate Directory is hidden from the menu and is unavailable for users IP address Enter the IP address of the management system that provides...

Страница 49: ...th 2 4 3 Call Settings in the call menu If you leave Call Settings unchanged when making a call the system will use the Default Call Settings in the call In addition to the Call Settings Call Type Net...

Страница 50: ...a gatekeeper is present it is possible to place IP calls using telephone style numbers e g an E 164 alias according to the numbering plan implemented in the gatekeeper The gatekeeper will then transla...

Страница 51: ...bsequently be queried every 24th hour for time updates The system will use the time to display Time and Date on the screen and timestamp messages transmitted to Gatekeepers or Border Controllers requi...

Страница 52: ...D1364003 T150 MXP User Manual 3 2 Audio Audio contains the settings TTY Text telephone Alert Tones and Volume 52...

Страница 53: ...listening A TTY is required at both ends of the conversation in order to communicate To use a TTY you connect the TTY device to the 2 5mm jack on the right side of the unit and set TTY to On in the Au...

Страница 54: ...ging tones for video calls and telephone calls Alert Volume You may change the volume level for the selected ringing tone Alert Speaker On The internal speaker will warn you of an incoming call even t...

Страница 55: ...3 Administrator Settings 3 3 Security Security contains the settings Encryption Encryption Mode Administrator Password IP Access Password Access Code 55...

Страница 56: ...oceed without encryption If the far end supports encryption the systems will initiate encryption after the call is connected an open padlock symbol will be displayed When encryption has been establish...

Страница 57: ...port AES encryption DES encryption will be tried AES The system will try to use AES with 128 bits encryption when setting up calls If AES is not supported by the other site s no other type of encrypti...

Страница 58: ...um 5 digits long The Administrator Password dialog box will pop up when pressing the menu button on the keypad This will prevent occasional users from going in to administrator settings With an admini...

Страница 59: ...d This password can be enabled from telnet or data port using the command ippassword ip password The default IP password is TANDBERG To remove this password delete the stars shown in the input field i...

Страница 60: ...ll be charged on their account Access Codes are handy for group systems where there are more users or divisions that share the costs of using the system Access Code can be put to On and Off On When ma...

Страница 61: ...3 Administrator Settings 3 4 Network The network menu contains IP Settings H 323 Settings SIP Settings SNMP Settings IP Services Quality of Service 61...

Страница 62: ...is only used in static mode In DHCP mode the assigned IP address can be found on the Welcome Menu IP subnet mask IP subnet mask defines the type of network This address is only used in static mode Yo...

Страница 63: ...inistrator Settings IP Access Password By setting an IP Access Password on the system all access to the system using IP Telnet FTP and WEB requires a password The default IP Access Password is TANDBER...

Страница 64: ...a message to the gatekeeper containing both the E 164 address and the H 323 ID of the system H 323 ID The H 323 ID of the system may be specified here The System name is used if no H 323 ID is entered...

Страница 65: ...BERG Expressway firewall traversal solution and is placed outside the firewall you should register the IP address of your Border Controller as the Gatekeeper IP address and set H 323 Call Setup to Gat...

Страница 66: ...D1364003 T150 MXP User Manual 3 4 2 2 CallManager Settings CallManager IP This is the CallManager IP address that is used if you specify H 323 Call Setup CallManager 66...

Страница 67: ...45 Auto The system will try to determine if the NAT Address or the real IP address should be used within signalling This is done to make it possible to place calls to endpoints on the LAN as well as e...

Страница 68: ...part of the SIP Address URI is usually a full name or system name Examples Alice Wonderland System 01 SIP Address The SIP Address is the SIP URI used to address the system SIP Address URI text field...

Страница 69: ...is 5060 for TCP and UDP but another one can be provided Server Address text field Examples sipserver example com sipserver example com 5060 10 0 0 2 10 0 0 2 5061 Authentication User Name This is the...

Страница 70: ...NMP Managers a PC program etc SNMP traps are generated by the agent to inform the manager about important events Traps can be sent to multiple SNMP Trap Hosts Enter the IP address of up to three SNMP...

Страница 71: ...ed to synchronize the time of the system to a reference time server The NTP IP setting holds the IP address to a time source where the system can get the exact time The time server will subsequently b...

Страница 72: ...7 for each type of packets Auto will provide the following priority Audio Video Data Signaling 4 4 3 6 IP Type of Service TOS helps a router select a routing path when multiple paths are available Del...

Страница 73: ...priority Audio Video Data and Signaling packets should have in an IP network The priority ranges from 0 to 63 for each type of packets Diffserv Telephony Used to define which priority Audio packets s...

Страница 74: ...D1364003 T150 MXP User Manual 3 5 Diagnostics Diagnostics contain System Information Call Status Detailed Call Status Network Statistics Warnings 74...

Страница 75: ...tion to view system numbers line status software version and other useful information System Information contains System Name My IP Number My IP Address Gatekeeper H323ID SIP Address SIP Server Softwa...

Страница 76: ...MXP User Manual 3 5 2 Call Status Comprehensive information about the call is available through the Call Status window The menu has two columns one for transmitted and one for received audio video in...

Страница 77: ...Detailed Call Status Detailed call information on audio video packet loss and jitter is available through the Detailed Call Status window The menu has two columns one for transmitted and one for recei...

Страница 78: ...D1364003 T150 MXP User Manual 3 5 4 Network Statistics More detailed information about network traffic 78...

Страница 79: ...the IP network This may affect the quality of the call The system is dropping IP packets due to latency in the network This may affect the quality of the call H323 gatekeeper warnings Could not regis...

Страница 80: ...3 T150 MXP User Manual 3 6 Restart Restart the system by pressing the Restart button You are prompted with a dialog box saying Do you want to restart the system Press OK to restart press Cancel X to a...

Страница 81: ...4 Appendices Appendix 1 Declaration of Conformity...

Страница 82: ...D1364003 T150 MXP User Manual 4 1 Appendix 1 Declaration of Conformity Please contact your TANDBERG representative for a Declaration of Conformity 82...

Отзывы: