background image

8-18

User Guide

Offset Catch Tray

Accessories

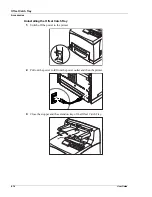
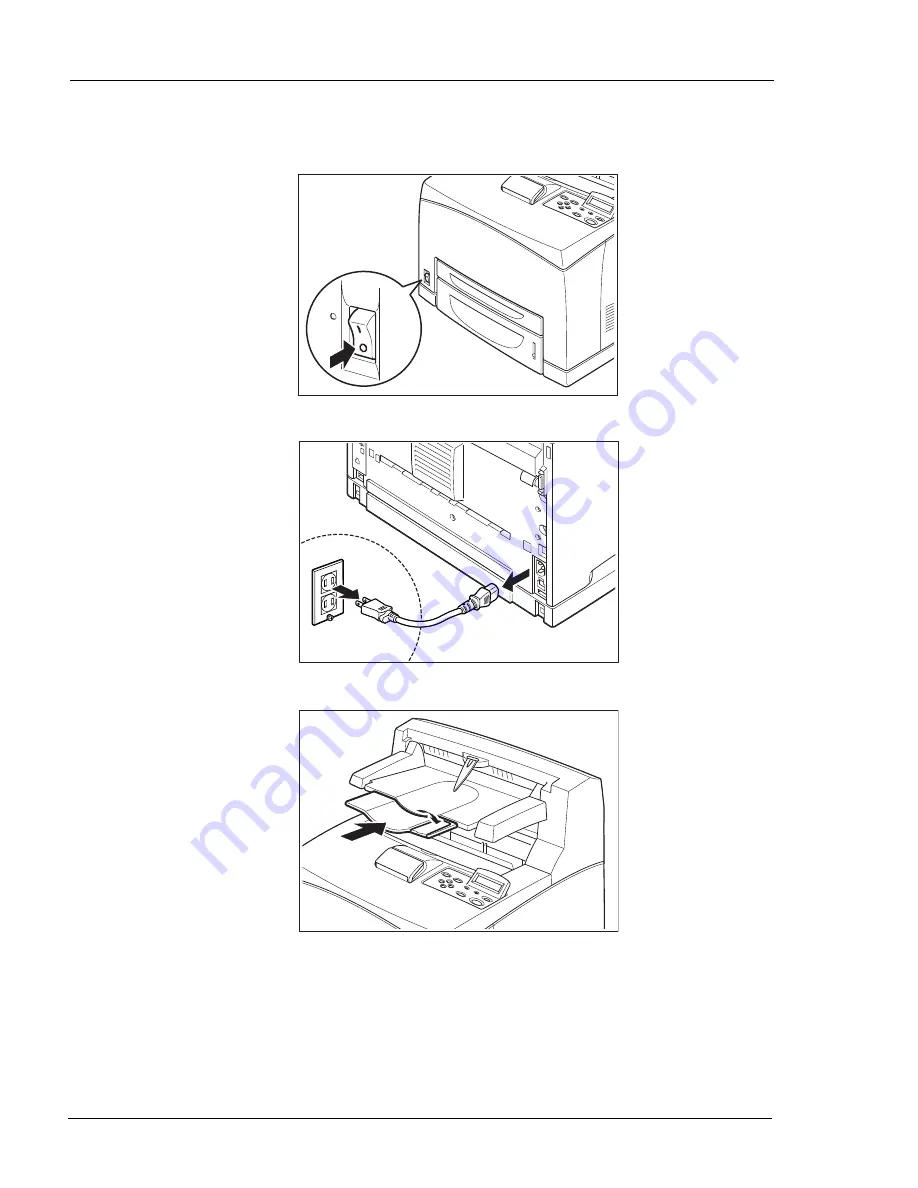
Uninstalling the Offset Catch Tray

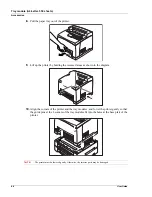
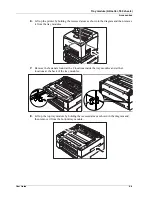
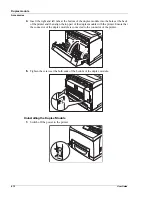
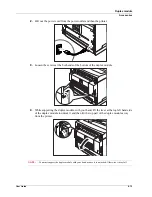
1.

Switch off the power to the printer. 

2.

Pull out the power cord from the power outlet and then the printer. 

3.

Close the stopper and the extension tray of the Offset Catch Tray. 

Содержание 9040

Страница 1: ...9040 9045N Laser Printer User Guide ...

Страница 2: ...dobe Adobe Systems Incorporated Apple EtherTalk Macintosh TrueType Apple Computer Inc Hewlett Packard HP PCL HP GL HP UX LaserJet Hewlett Packard Co IBM PC International Business Machines Corporation Intel Intel Corporation Microsoft Windows Microsoft Corporation Novell and NetWare Novell Inc The ENERGY STAR logo United States Environmental Protection Agency The ENERGY STAR logo emblem does not re...

Страница 3: ...able Paper 2 11 Loading Paper 2 11 Loading Paper Larger Than A4 Letter Size In The Paper Tray 2 14 Replacing the Toner Cartridge 2 15 Power Save Mode 2 17 Understanding Printing Options 2 17 3 Operator Panel 3 1 Operator Panel Features 3 1 LCD Display 3 1 LED Indicators 3 2 Push buttons 3 2 Navigating the Operator Panel Menus 3 3 Sample Navigation 3 3 Printing a Configuration Summary 3 4 Panel Loc...

Страница 4: ...inting Duplex 4 10 Binding Preferences 4 10 Source 4 10 Printing on Special Paper 4 11 Selecting Paper Size 4 11 Custom Size Paper 4 11 Cover Sheet Selection 4 12 Job Offset 4 13 Auto Tray Change 4 13 Media Check 4 13 Skip Blank Pages 4 14 Manual Feed 4 15 Layout Tab 4 15 Scaling 4 15 Page Layout Options 4 15 Poster Print 4 15 Booklets 4 16 Multiple Pages to Single Sheet Nup 4 16 Overlay Options 4...

Страница 5: ...ssories 8 1 Tray module A4 Letter 550 sheets 8 2 Installing Uninstalling the Tray Module 8 2 Checking the contents of the tray module package 8 2 Installing the Tray Module 8 3 Uninstalling the Tray Module 8 7 Paper trays 8 10 Paper tray A4 Letter 550 sheets 8 10 Duplex module 8 10 Installing the Duplex Module 8 11 Uninstalling the Duplex Module 8 12 Offset Catch Tray 8 14 Installing Uninstalling ...

Страница 6: ...e Toner Cartridge 10 6 At the Duplex Module 10 8 Duplex at the paper exit 10 8 Duplex at the interior of the top cover 10 9 At the Offset Catch Tray 10 10 11 Windows Utilities 11 1 Font and Macro Manager Utility 11 1 Status Monitor Utility 11 2 PCL5 Tray Mapping Utility 11 2 Direct PDF Utility 11 4 ...

Страница 7: ...ns The following conventions are used throughout this guide to emphasize certain procedures or information NOTE A note is a tip or extra information that may be helpful in installing or using the printer CAUTION A caution message provides information that may help you avoid equipment damage process failure or inconvenience Read all caution messages carefully WARNING A warning message indicates the...

Страница 8: ... or poorly ventilated environment Prolonged exposure to these adverse conditions can cause fire or electric shock Do not place the machine near heaters or volatile flammable or combustible materials such as curtains that may catch fire Printer Orientation Throughout this guide the four sides of the printer are referred to as front rear right and left LEFT FRONT RIGHT REAR ...

Страница 9: ...Tray Module Capacity is 550 sheets 20 lb 75 gsm paper 8 Paper Gauge 9 Access panel for installation of Memory Hard Disk HDD and Compact Flash 10 Standard Output Tray Capacity is 500 sheets 20 lb 75 gsm paper 11 Offset Catch Tray Optional Capacity is 500 sheets 20 lb 75 gsm paper 12 Toner Cartridge 1 2 3 4 5 6 7 8 9 10 12 11 In this Chapter Components Turning the Printer On and Off Available Printe...

Страница 10: ...rtain paper types Rear View Data I O connector settings can be configured via the Operator Panel s Interface Menu There are settings for each of the I O ports including IEEE 1284 USB2 Serial RS 232 and Ethernet No Name 1 USB 2 2 Serial RS 232 3 Ethernet 10 100 Base Tx 4 IEEE 1284 Parallel 5 Power Receptacle 6 Optional Duplex Module 7 Rear Cover access to Fuser 8 Offset Catch Tray Rear Cover Tray 1...

Страница 11: ...A4 Letter size 2 Toner Cartridge Contains the toner and the photosensitive drum 3 Top Cover Open this when replacing the Toner Cartridge and removing jammed paper 4 Fuser Unit Fixes the toner on the paper Do not touch this when using the printer as it is hot 5 Transfer Roll Cartridge Transfers the toner image on the surface of the photosensitive drum to the paper ...

Страница 12: ... or when the printer will not be used for an extended period of time NOTE When the printer is turned off all print data still in memory will be erased Available Printer Drivers Drivers are available for the following Microsoft Windows operating systems Vista 32 64 XP 32 64 Server 2003 32 64 Server 2008 32 64 NT 4 and 98 Drivers for the following Page Description Languages PDLs are available for ea...

Страница 13: ...ional Offset Catch Tray These sizes are automatically sensed by the printer If you want to use a size that is not auto sensed you must select the size on the Operator Panel See section Paper Menu on page 3 6 Using paper that is not suitable for this printer might lead to paper jams or poor print quality To make full use of the printer features use only paper that is recommended in the recommended ...

Страница 14: ...the Operator Panel use the Paper Media Size Type Menu to set Auto Sense OFF and then set Custom Size for the intended tray Then use your application software printer driver to send data to be printed on the installed custom size paper See section Custom Size Paper on page 4 11 When using the EWS turn Auto Sense OFF and press Submit to gain access to Custom Size settings Paper Types The printer sup...

Страница 15: ...rom a tray before loading transparencies 3 Fan the stack of new transparencies before putting them in the tray 4 Insert the transparencies into the tray Place the transparencies in the input tray with the side to be printed facing up Do not fully load a tray with transparencies The printer supports loading 100 transparencies or less in a tray Handle them by the edges with both hands and avoid gett...

Страница 16: ... wish to use and select the size and orientation of the image to be printed Printing Labels Labels can be printed from any tray Use labels that were designed for use in laser printers See section Available Paper on page 2 9 for recommendations Insert the labels into the tray and adjust the guides to fit the sheets Place the side to be printed facing up and the top of the sheets to be fed into the ...

Страница 17: ...3 Hammermill Tidal MP 75 Letter 16200 8 Boise Cascade 75 Letter P10X9001 Steinbeis Recycled 80 A4 3R91165 Wiggins Teape Conqueror 90 A4 CON90F Xerox RX90 90 A4 3R91854 Envelope COM10 Envelope Action 75 COM10 43687 DL Envelope Autofil 80 DL JB04122 C5 Envelope Autofil 80 C5 JB1933 Labels 30up Paper Label Label Letter 5160 Xerox 24up Paper Label Label A4 3R96178 Xerox 24 cut Label Label A4 3R97408 T...

Страница 18: ...4 3R91798 Classic Crest Super Smooth 216 Letter NEE04631 Shiraoi 156 A4 DK245 Xerox Color Expressions 120 Letter 3R11540 Xerox 4200 DP Bond 75 A4 3R2594 Xerox 4200 DP Bond 75 letter 3R2047 Cardstock Xerox Premier200gsm 200 A4 3R93011 Oxford Index Card 200 3 by 5 40801 Xerox 65lb Cover Stock 176 Letter 3R3041 Springhill 110lb Index 203 Letter 15445 Bond Xerox Color Expressions 120 Letter 3R11540 Xe...

Страница 19: ...s Paper with special coatings that may be melted by hot fusing temperatures Treated colored paper Paper using ink that will run at a temperature of 150 C Heat sensitive paper Carbon paper Paper with staples paper clips ribbons or tape Paper with rough surfaces such as pulp paper or fibrous paper If acid paper is used the characters might appear fuzzy Replace it with alkaline paper Envelopes with w...

Страница 20: ...2 12 User Guide Loading Paper Getting to Know Your Printer 2 Remove the lid 3 If the base plate of the paper tray is raised push it down 4 Squeeze the length guide and slide it to the desired paper size ...

Страница 21: ... with the side to be printed facing up and all 4 corners aligned Make sure the right width guide is correctly aligned with the paper NOTE Do not load paper exceeding the maximum fill line or the maximum capacity allowed Align the right width guide to the paper width If the right width guide is not in place the paper will not be properly fed and may cause a paper jam ...

Страница 22: ... paper tray and firmly close the lid 9 Firmly insert the tray in the printer Loading Paper Larger Than A4 Letter Size In The Paper Tray 1 Place the paper tray on a flat surface 2 Remove the lid of the tray 3 Slide the right and left lock tabs in the paper tray outwards to unlock them ...

Страница 23: ...the paper tray 9 Push the paper tray firmly into the printer Replacing the Toner Cartridge The Toner Cartridge should be replaced when it reaches the end of its print life The Toner Cartridge prints up to 18K DX B350P 21K DX B450P images The printer will produce a warning on the Operator Panel to inform you when the remaining toner amount is low You can press START STOP to continue printing with l...

Страница 24: ...iagram 3 Place the Toner Cartridge on a flat surface and pull the seal out horizontally Note that the seal may offer resistance and a firm pull may be necessary to extract it from the Toner Cartridge NOTE When pulling out the seal pull it out horizontally The tape might break if it is pulled out diagonally After the seal has been pulled out do not shake or bump the Toner Cartridge ...

Страница 25: ...y indicates the printer is in Power Save mode Use of the Operator Panel keys will not exit Power Save mode The printer automatically exits Power Save mode once it receives data You can change the Power Save time setting using the Operator Panel Understanding Printing Options The printer offers three ways to modify printing options The Operator Panel provides an interface at the printer The Embedde...

Страница 26: ...2 18 User Guide Understanding Printing Options Getting to Know Your Printer ...

Страница 27: ...he Operator Panel Printing Preferences or Embedded Web Server and printer settings set via your application the application settings supersede any other settings LCD Display The LCD display shows status and error messages that inform you of the current status of the printer and also displays menus submenus and printer settings when you are in the menu system The display contains two lines of text ...

Страница 28: ...or that requires user intervention such as a paper jam N A START STOP ACTIVE FAULT Button Function Start or stop the printer or exit the menu system The LED on the Start Stop button is solid green when ready to print Enter the menu system Move to the next menu submenu or setting within the same level of the menu structure Select the menu or submenu that is shown on the second line of the display o...

Страница 29: ...lay cycles through the main menus NOTE Additional menus and submenus may appear in the printer menu system when options are installed Sample Navigation The following figure shows the sequence of push buttons and display messages that would allow you to change the number of copies printed This example illustrates the basic relationship between menus and submenus and demonstrates how the NEXT PREVIO...

Страница 30: ...inter To print a Configuration Summary press the INFO button A multi page summary prints Panel Lock The Operator Panel can be disabled or enabled at several levels A series of key combinations control the panel lock Press and hold the key combination as power to the printer is turned on Continue to hold the keys down until a confirmation prompt is displayed that confirms that the requested panel f...

Страница 31: ... print the Job Accounting file or reset job accounting info Job Accounting from the Windows Driver is described in section Job Accounting Tab on page 4 19 Items available in this menu are described below Menu Item Value Default Description Print Directory name job name Print the job stored in the job library Allows you to access existing directories and to select the desired file Requires a passwo...

Страница 32: ...will delete the selected disk file or directory from the E Forms menu Menu Item Value Default Description Copies 1 999 1 Sets number of copies printed Duplex On Off Off Enables two sided printing Duplex Bind Long edge Short edge Long Edge Choose the binding edge during duplex printing Default Source Tray 1 4 Tray 1 Choose a default paper source from a list of all installed trays Manual Feed On Off...

Страница 33: ... 210 x 297 mm Set custom size for the selected tray See Custom Sizes on page 2 6 for more information Auto Sense On Off On Automatically detects the size of the paper in the tray Tray Linking On Off Off Turn the tray linking function on or off See Auto Tray Change on page 4 13 Job Offset On Off On OCT must be installed Turns Job offsetting on or off See Job Offset on page 4 13 This menu is only sh...

Страница 34: ...s for 110V mm for 230V Set the unit of measurement for the Custom Paper Size feature Edge to Edge On Off Off Enables a printing to the physical edge of the paper on all four sides Menu Item Value Default Description Port Enable or disable operations from any I O interface Parallel On Off On Serial On Off On Network Card 1 On Off On USB On Off On Parallel Setup Configure the operation of the parall...

Страница 35: ...When On the feature allows all binary codes to be processed by the PostScript interpreter When Off special binary control codes may be intercepted per the Format item setting Serial Setup Submenu Interpreter Auto Switch PCL PostScript 3 Auto Switch Format Raw Normal Binary Raw Configures how incoming print jobs are scanned for special binary control codes RAW no processing Normal Adobe Standard Pr...

Страница 36: ...arity High Low High Polarity for DTR RTS Polarity High Low High Polarity for RTS Robust XON On Off Off Send Multiple XON codes Delay Out Close On Off Off When ON the printer will wait until the job is completely printed and delivered to the output tray before terminating the connection allowing all reverse channel data to be sent back to the host This will cause a reduction in printer throughput W...

Страница 37: ... each LPR print job DHCP On Off On IPv6 On Off Off Delay Out Close On Off Off When ON the printer will wait until the job is completely printed and delivered to the output tray before terminating the connection allowing all reverse channel data to be sent back to the host This will cause a reduction in printer throughput When OFF reverse channel data generated after the job interpretation is disca...

Страница 38: ...ll setting can be used If connected to a hub use the 100Mbit Half setting Bidirectional On Off On When this setting is on the printer may receive and send information over the network interface When this setting is off the printer will only receive information over the network interface This applies primarily when using printing over a Port 9100 connection This setting normally should be left at i...

Страница 39: ...d Protocol ASP Binary Binary Control Protocol BCP When Interpreter setting is Auto Switch and this setting is Raw the printer will automatically determine the control code method defaulting to Normal if no codes are found Delay Out Close On Off Off When ON the printer will wait until the job is completely printed and delivered to the output tray before terminating the connection allowing all rever...

Страница 40: ...se a default symbol set Lines Per Page 5 128 60 Letter 64 A4 Change the default number of lines per page Default value varies by paper size selected CR Mode CR CR CR CR LF CR CR Define the default action prompted by a carriage return a carriage return equals either a carriage return alone or a carriage return and a line feed together LF Mode LF LF LF CR LF LF LF Define the default action prompted ...

Страница 41: ...utive Letter Legal Statement Legal13 A6 A5 A4 B5 Monarch Envelope Com10 Envelope DL Envelope C5 Envelope Com9 Envelope Varies per size Set the escape sequence for paper size Menu Item Value Default Description Factory Defaults U S Non U S U S for 110V Non U S for 230V Resets the menu to factory defaults You change these defaults by changing the options in the Operator Panel however settings in the...

Страница 42: ...0 setting indicates no timeout This setting applies only to PostScript jobs Jam Recovery On Off On Turn jam recovery on or off Hex Print On Off Off Print a job in hexadecimal for a technician to use in diagnosis of a datastream problem Toner Low Stop Continue Stop Stop printing or Continue printing when the Toner Low message is first displayed When the print cartridge is low on toner the Operator ...

Страница 43: ... incoming user data Parameter Value Default Description Resolution 600 dpi 1200 dpi 600 dpi Set the resolution dpi Toner Saver On Off Off Turns toner saver on or off Print Density 1 7 4 Specifies how dense the toner is to be applied to the page Parameter Value Default Description Print Usage Rep Prints the usage report Reset Printer Reboots the printer All data in not in non volatile memory will b...

Страница 44: ...rint List of files Prints the selected file Delete Deletes the selected file Format device_name SELECT CANCEL Formats user flash All data stored on the device will be erased Flash Summary Print Summary Prints the summary file Menu Item Value Default Description Month January through December current Set the current month Day 1 31 current Set the day of the month Year 2000 2099 current Set the curr...

Страница 45: ...on and images printed Options Info This listing on the Configuration Summary tells you which options are installed on the printer Parameter Value Default Description Interface Setup Host Name data entry Model Name plus last 7 digits of MAC Network address Hostname to use when referring to the printer by name rather than IP address DNS Primary IP data entry 000 000 000 000 IP address of the Domain ...

Страница 46: ...etworking Preferred Zone Allows you to choose from a list of existing zones uses the default zone Netware Setup Print Server Name data entry Model Name plus last 7 digits of MAC Network address NDS Tree Name data entry empty NDS Context data entry empty Job Poll Interval 0 255 0 Print Server SAP Name data entry Model Name plus last 7 digits of MAC Network address Parameter Value Default Descriptio...

Страница 47: ...ile is stored in User Flash that includes information about the printer such as Product Name Serial Number and Date and the Usage Counter values This file is in comma separated value format and can be accessed via the printer s File Management web page The printer can also be configured via the EWS to generate an email that includes Usage Counter information The email will be sent on the first of ...

Страница 48: ...3 22 User Guide Operator Panel Menus Operator Panel ...

Страница 49: ...pt 3 are also provided on the installation CD and can be installed as follows 1 Place the Sharp Installation CD into your CD drive 2 From the Control Panel select Printers and Faxes 3 Right click in the printer list and select Add Printer The Add Printer Wizard appears 4 Click Next The Local or Network Printer screen appears 5 Select Local printer attached to this computer and deselect Automatical...

Страница 50: ... 3 drivers XL is for PCL6 drivers For example the path D Drivers ENUS W2K PS installs the English PostScript 3 drivers for XP 11 Select the driver depending on your model 12 The Name Your Printer screen appears 13 Click Next 14 The Printer Sharing screen appears 15 Click Next 16 The Print Test Page screen appears 17 Click Next The Wizard is complete 18 Click Finish Setting Default Values The Print...

Страница 51: ...er can automatically recognize all the installed options for your printer To get the installed options click the Device Options tab and then the Ask Printer button You can also manually install an option by selecting it from the pulldown and changing its status 3 On the General Tab click Printing Preferences ...

Страница 52: ...4 4 User Guide Setting Default Values Windows Operations The Printing Preferences window appears 4 Any options set in any tab become your default values ...

Страница 53: ...a Print Job at the Printer Press the CANCEL button then press the Start button on the Operator Panel Pages being printed at the moment will continue to be printed Cancelling Print Jobs at the Computer Double click the printer icon at the bottom right of the taskbar in Windows From the displayed window click the document name that you wish to delete and press the Delete key ...

Страница 54: ... application NOTE If there is a conflict between settings in the Operator Panel Printing Preferences or Embedded Web Server and printer settings set via your application the application settings supersede any other setting To access Printer Properties from an application 1 Select the Print option from your application 2 Select the desired printer 3 Click the Printer s Properties button The Printer...

Страница 55: ...r Printer Properties Tab Functions Comments Paper Paper Options Copies 2 sided Printing Output Destination Orientation Saved Settings Demo Test Print Get Printing Defaults Allows you to select number of copies one or two sided printing output destination and page orientation Layout Page Layout Options Scaling Options Overlays Options Watermark Allows you to choose page layout options such as N up ...

Страница 56: ...ter Properties 2 Click the Paper Tab within your Printer Properties 3 Click the Save button that is located beneath the Saved Settings 4 Enter a Name for the saved settings 5 Click OK 6 Click OK To use saved settings 1 Click the Paper Tab within your Printer Properties 2 Select the desired setting_name from the Saved Settings pulldown 3 Click OK Paper Tab Selecting Number of Copies You can select ...

Страница 57: ...e orientation or select to rotate the existing orientation by 180 degrees To select orientation through your Printer Properties 1 Select the Paper tab within your Printer Properties 2 Select the desired orientation You can choose Portrait Landscape or to rotate the page 180 degrees 3 Click OK Output Destination You can choose the output tray where your print job will be placed To select the paper ...

Страница 58: ...ow the printer will orient the page layout when duplexing Depending on your page orientation duplexing on the long edge or short edge of the paper produces different results The diagram below illustrates these results Source You can select the input tray from which paper is used to print the job To select the paper source through your Printer Properties 1 Select the Paper Options button in the Pap...

Страница 59: ...sing the EWS 2 Select the Paper Options button in the Paper tab within your Printer Properties The Paper Options window appears 3 Select the Media Type from the pulldown 4 Ensure that the Source is set to a paper tray that is loaded with the required paper 5 Click OK Selecting Paper Size You can select from a list of standard paper sizes Available sizes are defined in Paper Sizes on page 2 5 To se...

Страница 60: ... to choose a different paper source for the cover page than for the rest of the document You can then use a different stock paper for the first page of the document while sending the document as a single print job The paper must be the same size as the rest of the document To enable cover pages through your Printer Properties 1 Select the Paper Options button in the Paper tab within your Printer P...

Страница 61: ... printer to switch to another available tray that contains the same size and paper type To select auto tray changing through your Printer Properties 1 Select the Paper Options button in the Paper tab within your Printer Properties The Paper Options window appears 2 Select Auto Tray Change 3 Click OK 4 Click OK Media Check When Media Check is enabled default The printer first checks the requested i...

Страница 62: ...g if Auto Tray Change is enabled When both Auto Resize and Media Check are ON the paper size requested via the driver will not be enforced because Auto Resize overrides the paper size aspect of Media Check If you want to enforce a specific paper size then it is necessary to disable Auto Resize via the Operator Panel s Paper Menu To enable media check 1 Select the Paper Options button in the Paper ...

Страница 63: ...most convenient way to enable this feature is by using your Printer Properties You may also enable this feature at the Operator Panel or by using the EWS To scale the print image 1 Select the Layout tab within your Printer Properties 2 Click the Scale to fit checkbox 3 Click OK Page Layout Options Poster Print If you have a large page image that can not be printed on the available paper sizes you ...

Страница 64: ...ab within your Printer Properties 2 Click the Booklet checkbox 3 Click Paper Layout Options The Booklet window appears 4 Enter the desired parameters Select the desired number of signature from the pulldown Signature sets the number of pages printed on a sheet to form a booklet Options are No Limit or a number which is a multiple of 4 Enter a bind margin and the units used to calculate the bind ma...

Страница 65: ...ob is sent To create an overlay 1 Access your printer s properties from your application 2 Select the Layout tab within your Printer Properties 3 Click Overlay Options The Overlay Window appears 4 Check Create Overlay and enter a name for the overlay 5 Click OK to close the Overlay window 6 Click OK to close the printer properties 7 Click Print in the print dialog and the overlay will be created 8...

Страница 66: ...elds for watermark parameters are enabled 4 Enter the position of the text on the page The position anchors the left corner of the text to a specific location regardless of rotation 5 Enter the text to be displayed 6 Enter the font typeface and size of the text 7 Enter the degree of transparency for the text The text should not obscure the actual text on the printed page 8 Click OK 9 Click OK Imag...

Страница 67: ...nabled or disabled via the EWS or Operator Panel In addition job accounting information can be viewed online in the EWS or retrieved as a CSV file from the EWS or Operator Panel Job accounting information can also be reset to create a clean data sheet The CSV file contains the following information Line 1 contains the Job accounting Version number and Model Name The following columns may be seen C...

Страница 68: ...u release it with a PIN number for secure printing Stored Jobs You can assign a name to a print job and store it for later use To store a job 1 Select the Job Options tab within your Printer Properties 2 Click Stored Job 3 Enter the name of the job 4 Click OK Duration How long it took the job to print T N Sheet Number of sheets printed from each tray 600 dpi pages Number of pages printed at this r...

Страница 69: ...Set Time 4 Enter the desired time 5 Click OK 6 Click OK Private Jobs You can assign a PIN number to a job The job will be sent to the printer but not printed until you enter the PIN number at the Operator Panel This helps secure the information printed It will not sit on the printer waiting to be picked up but will be ready to print as soon as you get there To create a private job 1 Select the Job...

Страница 70: ...t 11 Repeat steps 9 10 until all Digits are entered 12 Press Select You are asked for the number of copies to print 13 Use Next to enter the number of copies 14 Press Select The job prints Font Substitution This feature allows you to substitute TrueType fonts with printer fonts You can also set the TrueType font output type To set font substitution 1 Access your printer s properties from your appl...

Страница 71: ...erlays the current print job with the eForm named in the eForm Name box The overlay function is completed after a single pass through the eForm Include eForm Repeatedly overlays the current print job with the eForm named in the eForm Name box The overlay function is repeated For example if the eForm is two pages then the first page of the eForm is overlaid on pages 1 3 5 etc and page 2 of the eFor...

Страница 72: ...4 24 User Guide Job Options Tab Windows Operations ...

Страница 73: ...s installed by installing the PPD for the desired printer The PPD is located on the installation CD PPD installation may vary by Mac operating system To install the PPD 1 Open System Preferences In this Chapter Installing the Driver Accessing the Driver Navigating the Driver ...

Страница 74: ... Guide Installing the Driver Macintosh Operations 2 Select Print Fax from the Hardware menu 3 Click to add the printer 4 Enter a name for the printer 5 Enter the IP address of the printer in the location field ...

Страница 75: ...o select the desired PPD 8 Click Open 9 Click Add The printer is installed Accessing the Driver The Driver can be accessed from your application s Print menu NOTE If there is a conflict between settings in the Operator Panel Driver or Embedded Web Server and printer settings set via your application the application settings supersede any other setting ...

Страница 76: ...presentation may vary by Mac operating system In general the driver provides a group of always there option at the top of the driver window and a pulldown of Printer features available towards the middle of the window The following table provides a general overview of available features and navigation ...

Страница 77: ...the header and page number in the footer Layout Pages per Sheet Prints multiple pages on a single sheet of paper Options are 1 2 4 6 9 16 Layout Direction Border Adds a border around the page image Options are Single Hairline Single Thin Line Double Hairline and Double Thin Line Two Sided Long edge binding Short edge binding Reverse Page Orientation Prints the page image upside down Color Matching...

Страница 78: ...er document Cover Page Type Options are Standard default classified confidential secret topsecret and unclassified Billing Info Empty Scheduler Provides settings to print the document at a later time Print Document Options are Now default At has place to set time and On Hold Priority Options are Medium default Urgent High and Low Printer Features Imaging Resolution Sets the resolution of the print...

Страница 79: ...Guide 5 7 Navigating the Driver Macintosh Operations Tray Switching Checked by default Jam Recovery Checked by default Navigation Level 1 Navigation Level 2 Navigation Level 3 Description and Available Items ...

Страница 80: ...5 8 User Guide Navigating the Driver Macintosh Operations ...

Страница 81: ...ter Properties options within the driver NOTE If there is a conflict between settings in the Operator Panel Printing Preferences or Embedded Web Server and printer settings set via your application the application settings supersede any other setting Accessing the EWS To access the embedded web server you must be on an IP based network and have access to a web browser In your web browser type the ...

Страница 82: ...cess to broad topics and summary information Click on the desired topic to access configuration items NOTE If there is a conflict between settings in the Operator Panel Printing Preferences or Embedded Web Server and printer settings set via your application the application settings supersede any other setting ...

Страница 83: ...access to the following menus Paper Menu Provides access to the printer settings for various paper handling functions Copies Duplex Duplex Bind Default Source Manual Feed Output Tray Media Size Type Tray Linking Job Offset Blank Pages Auto Resize Separator Page Custom Size Unit Interface Menu Provides access to the printer interface settings Port Parallel Network 1 USB Parallel Setup Interpreter F...

Страница 84: ... Source Paper Size System Menu Provides access to the system settings Factory Defaults Display Language Alarm Control Power Saver Wait Timeout Job Timeout Jam Recovery Hex Print Intellifilter Quality Menu Provides access to the printer settings that are related to print quality Resolution Toner Saver Color Menu Contains the settings related to the quality of printed color Screening Mode Rendering ...

Страница 85: ...r Status Displays printer option and consumables status You can view the current settings for the Input options on your printer and the Output options installed Input Displays paper trays and the paper size type and capacity levels of all installed trays and options Output Displays output paper trays and capacity level Consumable Information Displays all four toner cartridges and percentage used A...

Страница 86: ...ll job information such as job name user name port protocol pages date time and duration Reset All Job Accounting Info Deletes all stored Job Accounting information Product Support Direct link to obtain technical support Takes you to the Product Support Website where you can obtain technical support Product Supplies Direct link to order supplies Takes you to the Product Supplies Website where you ...

Страница 87: ...types of files that are appropriate for sending with this feature are Print Data files this includes any file containing Simple printable text PJL PCL5 PCL6 PS print data or PDF Version 1 3 and earlier Firmware Upgrade Files XXX E Forms XXX Main Page of Printer Web Site Submenu 1 of Printer Web Site Submenu 2 of Printer Web Site ...

Страница 88: ...6 8 User Guide Navigating the EWS Embedded Web Server ...

Страница 89: ... server A DHCP server automatically programs an IP address into every terminal and printer on the network that is configured to use DHCP A DHCP server is built into most cable and DSL routers If you use a cable or DSL router see your the device documentation for information on IP addressing TCP IPv4 UDP BOOTP DHCP ARP ICMP DDNS WINS LPR HTTP for Embedded Web Server IPv6 ICMPv6 Address Auto Configu...

Страница 90: ...er to the network by plugging in the network connector 2 Turn on your computer and allow it to power up 3 Print the Configuration Summary by pressing the INFO button The Configuration Summary lists the printer s IP address 4 Access the EWS as described in Accessing the EWS on page 6 1 5 In the left navigation area select Network Settings Protocol Settings and navigate through the options to get th...

Страница 91: ...can be enabled or disabled I O Port Configuration The following I O ports can be enabled or disabled Hub Link Speed Duplex Configuration The network interface configuration includes a menu for setting Hub Link Speed and duplex This menu includes the following settings DHCP mDNS SNMP IPv6 EtherTalk Netware HTTP Port Number Parallel Serial USB Network Interface Auto Negotiate default 10Base T Full 1...

Страница 92: ...nabled and incoming data is from an address that falls within the predefined range it is allowed to print if the Printing or Config checkboxes are checked If the incoming data does not fall into a predefined range it is rejected In cases where IP ranges overlap but have different permissions for example one to print only and another to print and configure permissions for the overlapping addresses ...

Страница 93: ...ter over IPv4 or IPv6 Similarly the EWS or SNMP can be accessed over IPv4 or IPv6 IPv6 and IPv4 coexist independent of each other They can be Enabled Disabled in any combination They are both enabled by default In cases where a particular network is configured to run only one IP version it makes sense to disable the other one for better resource utilization SNMP SNMP can be used to manage any netw...

Страница 94: ... printer can be managed via a standard SNMP management station The printer supports SNMP v1 SNMP v2c MIB II Host Resources MIB and Printer MIB Traps The printer sends generic traps at power up and online and offline traps Traps are sent on all printer status changes such as paper out cover open tray missing and jams The Trap Host ID must be set via the EWS for traps to be enabled Hewlett Packard W...

Страница 95: ... A4 Letter 550 Sheets Tray 3 Tray 4 2 Duplex Module 3 Offset Catch Tray 4 Hard Disk Drive 5 Memory Expansion Module 6 Compact Flash CF Card 1 2 3 4 5 6 In this Chapter Tray module A4 Letter 550 sheets Paper trays Duplex module Offset Catch Tray Memory Expansion Module Hard Disk Drive Compact Flash CF Card ...

Страница 96: ...ing the printer there should be 2 persons 1 in front and 1 behind the printer to firmly grip the recessed areas provided on both sides of the printer Never try to lift the printer by gripping any other areas Lifting the printer by gripping any other areas can cause the printer to fall and result in injuries Checking the contents of the tray module package Before installing the tray module to the p...

Страница 97: ...ule A4 Letter 550 sheets Installing the Tray Module 1 Place the tray module to be installed at the lowest level on a flat location NOTE Proceed to Step 5 if you are installing only one tray module Fasteners four pieces Tray module A4 550 sheets Paper tray A4 550 sheets ...

Страница 98: ...d bottom tray modules and slowly lower the top module so that the guide pins at the 4 corners of the bottom module fit into the holes at the base plate of the top module NOTE The tray module must be lowered gently Otherwise the interior parts may be damaged 4 Insert the fasteners provided into the 2 locations inside of the tray module and 2 locations at the back of the tray module Insert the faste...

Страница 99: ...sheets Accessories 5 Switch off the power to the printer 6 Pull out the power cord from the power outlet and then the printer 7 Remove any paper in the Standard Output Tray 1 and return the Paper Stop to its original position if it s raised 2 ...

Страница 100: ...lding the recessed areas as shown in the diagram 10 Align the corners of the printer and the tray modules and lower the printer gently so that the guide pins at the 4 corners of the tray modules fit into the holes at the base plate of the printer NOTE The printer must be lowered gently Otherwise the interior parts may be damaged ...

Страница 101: ...er Insert the fasteners securely 12 Push the paper tray completely into the printer Uninstalling the Tray Module NOTE This procedure explains the uninstalling of two tray modules as an example You can use the same procedure for uninstalling one tray module 1 Switch off the power to the printer 2 Pull out the power cord from the power outlet and then the printer ...

Страница 102: ...3 Remove any paper in the Standard Output Tray 1 and return the Paper Stop to its original position if it s raised 2 4 Pull the paper tray out of the printer 5 Remove the fasteners found at the 2 locations inside and at the 2 locations at the back of the printer ...

Страница 103: ...hown in the diagram and then remove it from the tray modules 7 Remove the fasteners found at the 2 locations inside the tray modules and at the 2 locations at the back of the tray modules 8 Lift up the top tray module by holding the recessed areas as shown in the diagram and then remove it from the bottom tray module ...

Страница 104: ...s Tray Module is interchangeable with the standard Tray 2 Duplex module Install this module to the printer to enable 2 sided printing CAUTION Be sure to switch off the power and unplug the power cord from the outlet before carrying out the operations If not you might get an electric shock ...

Страница 105: ...le 1 Switch off the power of the printer 2 Pull out the power cord from the power outlet and then the printer 3 Remove the rear cover of the printer after pushing the two tabs as shown in the diagram Next remove the connector cover of the printer as shown in the diagram ...

Страница 106: ...at the back of the printer and then align the top part of the duplex module with the printer Ensure that the connector of the duplex module is connected to the connector of the printer 5 Tighten the screws at the both ends of the bottom of the duplex module Uninstalling the Duplex Module 1 Switch off the power to the printer ...

Страница 107: ...oth ends of the bottom of the duplex module 4 While supporting the duplex module with your hand lift the lever at the top left hand side of the duplex module to unlock it and then tilt the top part of the duplex module away from the printer NOTE You must support the duplex module with your hand as once it is unlocked Otherwise it may fall ...

Страница 108: ...he duplex module from the holes at the back of the printer 6 Push in the cover and connector cover which were removed during installation of the duplex module until it clicks into the back of the printer Offset Catch Tray Install this tray to the printer to enable print jobs to be offset Maximum capacity is 500 sheets ...

Страница 109: ...all an optional Offset Catch Tray to this printer Installing the Offset Catch Tray 1 Switch off the power to the printer 2 Pull out the power cord from the power outlet and then the printer CAUTION Be sure to switch off the power and unplug the power cord from the outlet before carrying out the operations ...

Страница 110: ...t up the second lever from the top left corner of the back of the printer 4 Open the rear cover NOTE Do not touch any parts inside the printer 5 Loosen the right and left thumb screws as shown in the diagram to uninstall the top cover of the paper exit ...

Страница 111: ...ight and left tabs of the Offset Catch Tray into the holes at the top of the printer 1 and put it down to the top of the printer slowly 2 7 Secure the screws at both ends of the bottom of the Offset Catch Tray 8 Pull out the extension tray 9 Close the rear cover ...

Страница 112: ...h Tray Accessories Uninstalling the Offset Catch Tray 1 Switch off the power to the printer 2 Pull out the power cord from the power outlet and then the printer 3 Close the stopper and the extension tray of the Offset Catch Tray ...

Страница 113: ...Remove the screws on both sides of the Offset Catch Tray 1 and while holding up the Offset Catch Tray remove the right and left tabs from the holes at the top of the printer 2 6 Fasten the right and left thumb screws of the top cover of the paper exit which was removed during installation of the Offset Catch Tray into the holes at the top of the printer ...

Страница 114: ... inside panel by removing the screws as shown below 5 Pull the inside panel away from the printer by the top edge 6 Carefully insert a Memory Module into the slot as shown below When properly seated gently push down on the module until the side braces close onto the ends of the Memory Module 7 Reinstall the side covers in reverse order Steps 3 4 and 5 8 Connect the power cord to the wall outlet Tu...

Страница 115: ...e connector of the hard disk is connected to the 44 pin female connector on the controller assembly 5 Be sure to align the Hard Drive as depicted by the alignment drawing on the controller making sure that the two top pins to the left of the connector are free standing and not connected Your Hard Disk comes with a mounting bracket installed This must be in place to help guide the disk into the cor...

Страница 116: ...CF socket as shown below Align the CF Card with the socket and carefully insert the card Carefully align the Compact Flash card to the socket so that the notch on both sides of the Compact Flash are uppermost and insert into the socket 6 Reinstall the side covers in reverse order see Memory Expansion Module on page 8 20 Steps 3 4 and 5 7 Connect the power cord to the wall outlet Turn the printer p...

Страница 117: ... include soft fonts and macro overlay definitions The FLASH Card can store a minimum of approximately 2MB of file storage the hard disk drive storage depends on the size of the drive that is installed in your printer Optional Operator Panel menu selections become available when either of these options are installed and power on files are detected ...

Страница 118: ...8 24 User Guide Power On Files Feature Accessories ...

Страница 119: ... trouble shoot problems It explains what to if the printer is not printing at all is not printing correctly or if error messages are displayed In this Chapter Poor Print Quality No Power Cannot Print Printing is Not Clear Paper Incorrectly Fed Noise Error and Warning Messages ...

Страница 120: ...ctly set Reset the Toner Cartridge correctly Printer may have malfunctioned Contact Technical Support The entire paper is printed black Is the Toner Cartridge defective or damaged Replace it with a new Toner Cartridge Printer may have malfunctioned Contact Technical Support Status Items to check Action Printing is faded and blurred Is the correct type of paper used Load the correct type of paper I...

Страница 121: ... are printed Is the Toner Cartridge defective or damaged Replace it with a new Toner Cartridge Dirt appears at equal intervals The feed route of the paper may be stained Print a few pages to remove the stains Is the Toner Cartridge defective or damaged Replace it with a new Toner Cartridge Hair like streaks are printed inside or outside the black halftone areas Are you using paper that has been le...

Страница 122: ...orrect type of paper used Load the correct type of paper Is the Toner Cartridge defective or damaged Replace it with a new Toner Cartridge Printed image smudges when rubbed with your finger Is the paper damp Replace with paper from a new ream Is the correct type of paper used Load the correct type of paper Printed image appears partially blank Is the paper damp Replace with paper from a new ream I...

Страница 123: ...ridge defective or damaged Replace it with a new Toner Cartridge Paper is wrinkled Is the correct type of paper used Load the correct type of paper Is the paper damp Replace with paper from a new ream Is the paper correctly set Load the paper correctly Envelopes are wrinkled Envelopes may be wrinkled depending on the type used Open the rear cover of the printer and push up the levers at both ends ...

Страница 124: ...tlet with a suitable voltage rating and current rating Power is interrupted frequently Printer may have malfunctioned Switch off the power to the printer remove the plug from the power outlet and contact Technical Support Is the power cord disconnected or not securely connected Switch off the power and connect the cord to the power outlet and printer again Then switch on the power Status Items to ...

Страница 125: ... the envelopes correctly loaded in the paper tray Load the envelopes correctly in the paper tray Status Items to check Action Paper cannot be fed Paper jams occur Multiple sheets of paper are fed Paper is fed at an angle Is the paper correctly set Load the paper correctly For transparencies postcards or envelopes fan them well first to allow air to enter between each sheet before loading Is the pa...

Страница 126: ...letely into the printer Are there foreign objects inside the printer Switch off the power and remove any foreign objects inside the printer If the object cannot be removed unless the printer is disassembled contact Technical Support Warning Message Line 2 of display Possible Cause Action Paper Out Tray 1 There is no paper in Tray 1 Add paper to the tray Paper Out Tray 2 There is no paper in Tray 2...

Страница 127: ...ing Tray 4 is not in the optional feeder Insert the tray Load Paper Tray1 Paper Size Paper Type Tray 1 is empty Load paper into the tray Load Paper Tray2 Paper Size Paper Type Tray 2 is empty Load paper into the tray Load Paper Tray3 Paper Size Paper Type Tray 3 is empty Load paper into the tray Load Paper Tray4 Paper Size Paper Type Tray 4 is empty Load paper into the tray Paper Size Error Paper ...

Страница 128: ...de via the parallel port CF Unformatted Select To Format An unformatted Compact Flash option was installed Press Select to format the CF DISK Error SELECT To Format An unformatted hard disk option was installed Press Select to format the disk File Error 00 through File Error 25 Firmware Upgrade error Check firmware file File Error 26 Firmware Upgrade error Bad header Transmission error check cabli...

Страница 129: ... to acknowledge Net1 Comm Error Press Start Communications error with optional interface Remove the optional interface and restart the printer Call service Net1 Error 1 Press Start Serial interface option overrun error Verify that the handshaking protocol settings match between the printer and the host Net1 Error 2 Press Start Serial interface option parity error Verify that the parity settings ma...

Страница 130: ...g Printer has received a command to reboot None Normal Printer Operation User FLASH Error Select To Format An unformatted user flash option was installed Press Select to format the flash Waiting Partial data received Wait for the remaining data to be received Normal Printer Operation Filter Error Error Detail Problem with Intellifilter See the Intellifilter documentation Error Message Line 1 Error...

Страница 131: ...till need to open and close the top cover Doing this will remove the error message CAUTION Never touch areas labeled as High Voltage Never touch a labeled area found on or near the heat roller If a sheet of paper is wrapped around the heat roller do not try to remove it by yourself to avoid injuries or burns Switch off the machine immediately and contact your service provider At the Toner Cartridg...

Страница 132: ...s pulled out halfway and pushed in again the paper may be damaged NOTE If the paper is jammed inside the printer and behind the first level paper tray pull out both the first and the second level paper trays NOTE If the paper is jammed inside the printer and behind the second level paper tray pull out only the second level paper tray 2 Remove any wrinkled paper in the paper tray ...

Страница 133: ...emove any paper jammed inside the printer NOTE If the printer is installed with the two optional tray modules examine the interior of all the tray modules 4 Push the paper tray completely into the printer 5 Open and close the top cover to clear the Jam message ...

Страница 134: ... from the Standard Output Tray NOTE If the duplex unit is installed open the cover of the Duplex module first See At the Duplex Module on page 10 8 2 Lift the second lever from the top left corner of the back of the printer 3 Open the rear cover NOTE Do not touch any parts inside the printer ...

Страница 135: ...re that the levers at the rear of the printer as shown in the diagram are returned to the positions they were in before clearing the jam The Fuser Unit is hot Be careful not to touch it as you can get burned Make sure that the levers at both ends of the Fuser Unit are returned to the positions they were in before clearing the jam If you let go of the cover of the Fuser Unit it will return to its o...

Страница 136: ... Clearing Paper Jams 6 Open and close the top cover to clear the Jam message At the Toner Cartridge 1 Remove any paper in the Standard Output Tray 2 Open the top cover to clear the Jam message NOTE Do not touch any parts inside the printer ...

Страница 137: ...piece of paper down to place the Toner Cartridge on 4 Remove Tray 1 5 Examine the interior from which the Toner Cartridge has been taken out and remove any jammed paper By rotating the rollers as shown in the diagram the paper will be loosened and can be removed easily If paper is torn check for any remaining torn pieces of paper 6 Hold the Toner Cartridge by the grip and insert it into the slot i...

Страница 138: ... installed 7 Close the top cover securely At the Duplex Module Duplex at the paper exit 1 Examine the paper exit and remove any jammed paper If paper is torn check for any remaining torn pieces of paper NOTE If the paper is difficult to remove carry out the operation in the following section See Duplex at the interior of the top cover on page 10 9 ...

Страница 139: ...Jam message Duplex at the interior of the top cover 1 Lift the lever at the top left hand side of the duplex module to unlock it and open the top cover of the duplex module 2 Examine the interior of the top cover and remove any jammed paper If paper is torn check for any remaining torn pieces of paper ...

Страница 140: ...Catch Tray Clearing Paper Jams 3 Close the top cover of the duplex module to clear the Jam message At the Offset Catch Tray 1 Open the Offset Catch Tray cover by pulling the tab at the top left of the cover 2 Remove any jammed paper ...

Страница 141: ...ft corner of the back of the printer to open the rear cover 5 Remove any jammed paper If paper is torn check for any remaining torn pieces of paper The Fuser Unit is hot Be careful not to touch it as you can get burned Make sure that the levers at both ends of the Fuser Unit are returned to the positions they were in before clearing the jam ...

Страница 142: ...10 12 User Guide At the Offset Catch Tray Clearing Paper Jams 6 Close the rear cover to clear the Jam message ...

Страница 143: ...complish specific tasks Font and Macro Manager Utility The Font and Macro Manager FMM utility supports the downloading of PCL soft fonts and macros to User Flash Compact Flash and Disk PCL font formats 0 5 15 and 20 can be stored on the Flash or Disk device Advanced filter control can be enabled by deselecting Default Filtering in the Tools menu You can view these files on the Hard disk via the EW...

Страница 144: ...onditions are reported using pop ups on the screen PCL5 Tray Mapping Utility This utility allows you to reassign the PCL5 tray ID selection sequences so an existing application can be used to select the desired paper trays The Tray Mapping Utility changes the PCL5 tray IDs to custom values This is useful to programs that generate printer data directly without going through the Windows Printer Driv...

Страница 145: ...Guide 11 3 PCL5 Tray Mapping Utility Windows Utilities To use the program 1 Select the target printer The printer must be installed on a Windows system to be a target printer 2 Enter new tray IDs 3 Click OK ...

Страница 146: ...he printer s Direct PDF Utility allows you to send a Version 1 3 PDF file directly to the printer without the use of Adobe Acrobat on the host computer and without using the printer driver To start Direct PDF Print right click on the PDF document and select Direct PDF Print ...

Страница 147: ...ing 4 5 Cannot print 9 6 Carbon paper 2 11 Cardstock 2 6 CF 3 18 CF Card 8 22 Clarity 9 7 Collate 4 9 Collated 5 5 Color 2 6 Color Matching 5 5 COM10 2 5 COM9 2 5 Compact Flash Card 8 22 Components 2 1 Configuration Summary 3 2 3 4 Contrast 4 18 Conventions 1 1 Copies 3 6 4 8 5 5 Counter Type 3 21 Cover Page 5 6 Cover page 4 12 CR Mode 3 14 Custom 2 5 Custom Size 2 6 3 7 4 11 Custom Size Unit 3 8 ...

Страница 148: ...strative Com patibility 7 6 Hex Print 3 16 Hour 3 18 Hub Link Speed Duplex Configuration 7 3 I I O Port Configuration 7 3 IEEE 1284 2 2 Image Counter 3 21 Image Options 4 18 Indicators 3 2 Info 3 2 Input tray linking 4 13 Install options in windows driver 4 3 Installing uninstalling the duplex module 8 15 Installing uninstalling the offset catch tray 8 15 Installing uninstalling the tray module 8 ...

Страница 149: ...6 O Object Identifiers 7 6 Off 2 4 Offset 4 13 Offset Catch Tray 2 1 5 6 8 14 10 10 Offset Catch Tray Rear Cover 2 2 Offset from GMT 3 18 On 2 4 Operator Panel 2 1 3 1 Operator Panel Menus Defined 3 5 Navigate 3 3 Optional Duplex Module 2 2 Optional Tray Module 2 1 Options 8 1 Order reverse 4 9 Orientation 1 2 3 14 4 9 5 5 Output Destination 4 9 Output Linking 3 7 Output Tray 3 6 Overlays 4 17 P P...

Страница 150: ...2 17 Printing Preferences 4 3 Private Jobs 4 21 Properties 4 2 Protocols 7 1 PS Menu 3 13 pulp paper 2 11 Q Quality 4 19 Quality Menu 3 17 R Rear Cover 2 2 Rear view 2 2 Reset Printer 3 17 Resolution 3 17 4 19 5 6 return 3 2 Reverse 4 9 ribbons 2 11 Right width guide 2 13 S Safety 1 2 Saved Settings 4 8 Scale to fit 4 15 Scheduler 5 6 Second 3 18 Select 3 2 Sensed 2 5 Separator Page 3 8 Serial RS ...

Страница 151: ... 7 6 Tray 1 2 1 Tray 2 2 1 8 10 Tray 3 2 1 Tray 4 2 1 Tray Linking 3 7 Tray Module 2 1 8 2 Tray Settings 4 10 Treated colored paper 2 11 Troubleshooting 9 1 TrueType fonts 4 22 Turn off 2 4 Turn on 2 4 Two sided 5 5 U Unusable paper 2 11 Usage Count 3 21 USB 2 2 USB Setup 3 13 Utilities 11 1 V view front 2 1 internal 2 3 rear 2 2 Vista 32 64 2 4 W Wait Timeout 3 16 Warning messages 9 8 Watermark 4...

Страница 152: ...I 6 User Guide ...

Отзывы: