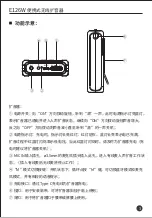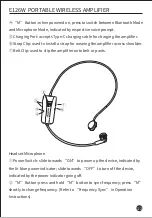
③ Volume Control: press “+” once to increase microphone volume, or “−”
once to decrease.
④ Sync/Power Indicator: when powered up, this indicator is off when the
headset microphone is out of battery; flashes blue when microphone is low
on battery. It also flashes blue during frequency sync after you press and hold
“M”, or during frequency change after you press “M” once.
⑤ Charging Indicator: illuminates red during charge, goes off when fully
charged.
⑥ Charging Port: accepts Micro USB charging cable for charging the
microphone.
Operation Instructions
I. Frequency Sync
1. Sync Frequency
The product is synced by default before shipping out the factory, and will
automatically connect to each other without extra sync operation. In case of
signal interference, you can re-sync or change the frequency following the
below steps.
① First, turn on the headset microphone. When the blue mic LED is lit, press
and hold the “M” button on mic for 3s until the blue LED blinks. Then
immediately turn on the amplifier, wait till the mic LED stops blinking and
stays lit, and speak to the microphone. If synced successfully, you should
hear your voice from the amplifier.
② If you cannot hear your voice from the amplifier when speaking to the
microphone, please retry the above syncing step.
12
PORTABLE WIRELESS AMPLIFIER
E126W
Содержание E126W
Страница 1: ...PORTABLE WIRELESS AMPLIFIER E126W...
Страница 2: ...MINI UHF 40 8W 8 Type C E126W 400 6828 333 E126W 1 1 1 Type C Micro USB 1 1 1 E126W 1...
Страница 4: ...ON ON OFF MIC IN 3 5mm M M Type C 3 E126W...
Страница 5: ...ON OFF M M M M M Micro USB E126W 4...
Страница 6: ...1 M 3 2 M 3 3 1 M 2 2 M 3 3 M M TAKSTAR E126W TAKSTARE126W IPAD 5 E126W...
Страница 7: ...1 2 CCC 4 5 6 7 3 6 M M E126W...
Страница 8: ...7 E126W...
Страница 17: ......
Страница 18: ......


