2.1.3.2
Recorder Setting
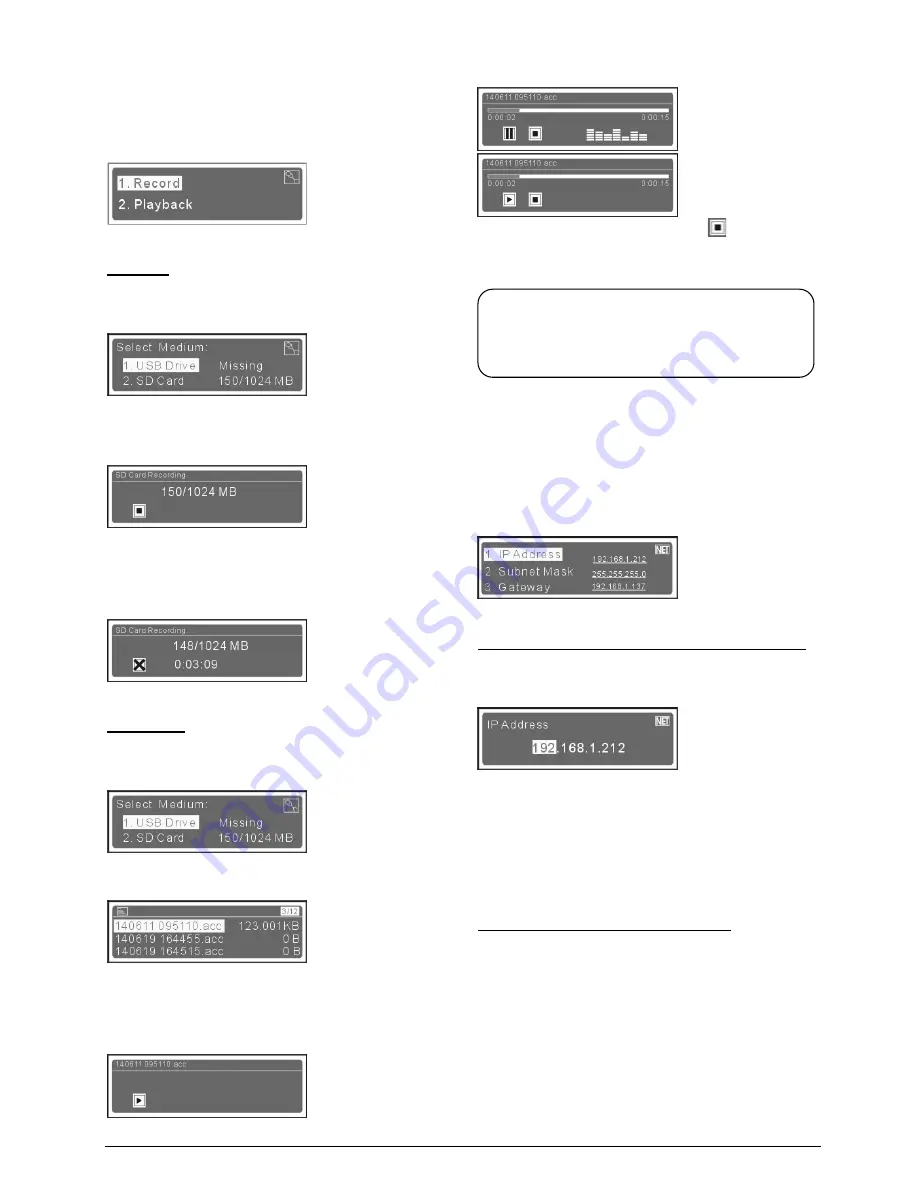
“Recorder Setting” includes two submenus:
“Record”
“Playback”
UUUUUU
a) Record
1).
After enter the record interface, press the “
/
” button
to select a recorder media;
You can select “USB Drive” or “SD Card” and their status
and capacity information will be displayed in behind.
2).
Press the “MENU” button to record;
Now the REC indicator light on the front panel of CMU will
turn on or flash and it will turn off when the storage
capacity is less than 10 M (stop recording).
3).
Press the “MENU” button to stop and save the record.
UUUUUU
b). Playback
1).
After enter the playback interface, press the “
/
”
button to select a recorder media;
2).
Press the “
/
” button to select a record and press
the “MENU” button to entre;
The record is named according to the recording time, for
example, a file by the name of “140611 095110” means it
is recorded at 09:51:10 on 2014-06-11.
3).
Press the “MENU” button to playback;
4).
Press the “MENU” button to stop or continue playing;
5).
Press the “
/
” button to select
and press the
“MENU” button to turn off, and then press the “EXIT”
button to exit.
2.1.3.3
Network Setting
“Network Setting” includes three submenus:
“IP address”
“Subnet Mask”
“Gateway”
UUUUUUU
a) Setting up unique “IP Address” for the main unit:
1).
Select “IP address” and press the “Menu” button to go
to setup IP address interface:
2).
Use “
/
” to switch between the four numbers;
3).
Use the “MENU” button to edit selected number;
4).
Use “
/
” to increase/decrease the number;
5).
Press “EXIT” to save and return to the upper level
menu.
UUUUUUU
b) Setup “Subnet Mask” and “Gateway”
Same chronological order as for “IP address” set up.
Note:
Because playback will use an audio channel, at
most 5 microphones can be active when playback.
16
Содержание EP-820AS
Страница 57: ...Appendix Dedicated 6 PIN Extension Cable 49...


