XT-1 Installation Manual
13-111 02, 2014-RO-012, 2014-04-30
Page 7 of 32
3
Interfaces
Cables
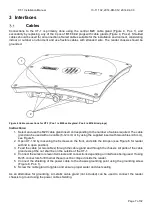
Connections to the XT-1 is primarily done using the central M20 cable gland (Figure 4, Pos 1), and
secondarily by replacing any of the 4 pcs of M16 blind plugs with cable glands (Figure 4, Pos 2). Shielded
cables should be used for all connections. Select cables suitable for the installation environment, considering
indoor or outdoor environment and use flexible cables with stranded wire. The reader chassis should be
grounded.
Figure 4 Cable connections for XT-1 (Pos. 1 is M20 cable gland, Pos. 2 is M16 blind plugs)
Instructions:
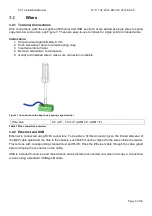
1. Select and use the M20 cable gland insert corresponding to the number of cables required. The cable
gland can be used with one cable (6-12 mm) or by using the supplied insert with two cables (2-6 mm),
see Figure 5.
2. Open XT-1 lid by loosening the 8 screws on the front, and slide the lid open (see Figure 6 for reader
with lid in open position).
3. Feed the cable (or two cables) through the cable gland and through the chassis. All parts of the cable
gland except the nut shall be on the outside of the XT-1.
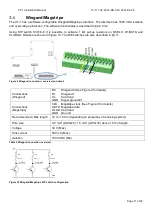
4. Connect the wires to relevant terminals and connections depending on interfaces being used. If using
RJ45 connectors for Ethernet these must be crimped inside the reader.
5. Connect the shielding of the power cable to the chassis grounding point using the grounding screw
(Figure 6, Pos. 1).
6. Screw the cable gland to tighten and ensure proper water and dust sealing.
As an alternative for grounding, a metallic cable gland (not included) can be used to connect the reader
chassis to ground using the power cable shielding.
2
1


