


Factory Settings
Carry out the following steps to reset the REX 300 back
to its default, factory settings:
•
Switch on the device
• Wait until the Rdy LED flashes
•
Press the Dial Out key and hold it depressed
until TxD flashes
•
Press the Dial Out key again (RxD lights up)
•
Press the Dial Out key once more
(TxD changes to orange)
•
To complete the reset, press the Dial Out key
one more time
The complete configuration details have now been
deleted.
The REX 300 is now reset to its factory settings and
can be configured anew.
Important:
The IP address of the REX 300 is set back to
192.168.0.100.
Note
We have checked the content of this Quick Start Guide for conformity with the hardware and software described. Nevertheless, because
deviations cannot be ruled out, we cannot accept any liability for complete conformity. The information in this Quick Start Guide is regularly
updated. When using purchased products, please heed the latest version of the Quick Start Guide, which can be viewed in the Internet at www.
helmholz.com, from where it can also be downloaded.
Our customers are important to us. We are always glad to receive suggestions for improvement and ideas.
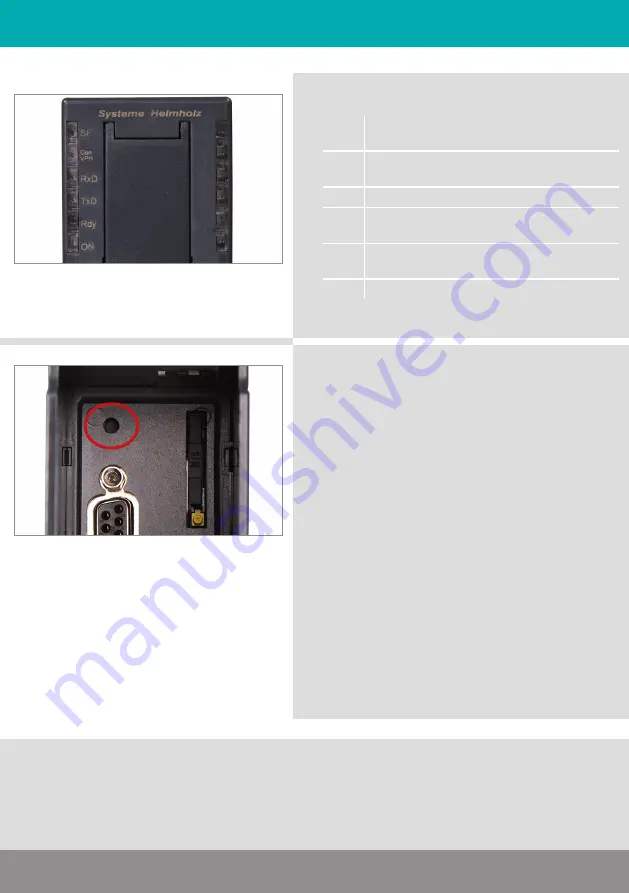
LED description
SF
Indicates an error in the router
(see Logging in Webinterface)
Con
VPN
Continuously lit: Internet connection
active flashing: VPN connection active
RxD
REX 300 is logged on to the MPI/PROFIBUS
TxD
Data is being transferred on the
MPI/PROFIBUS interface
Rdy
This LED must be continuously lit after
approx. 75 sec.
ON
Indicator light for power supply
Quick Start Guide
RE
X
300
Systeme Helmholz
GmbH
| Phone: +49 9135 7380-0 | Fax: +49 9135 7380-110
E-Mail: [email protected] | Internet: www.helmholz.com


