


14
Chapter 4: Get Started with Surveillance Station
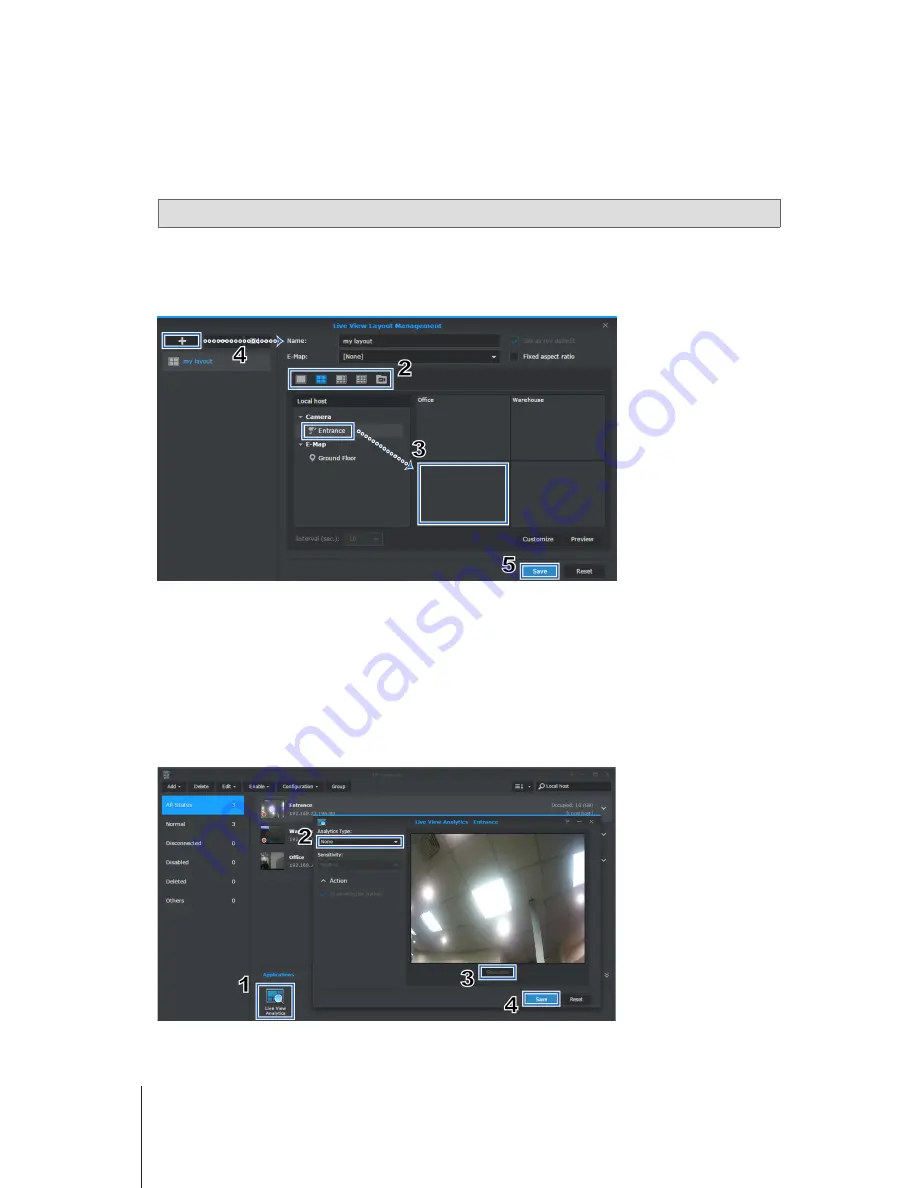
Start Monitoring by Configuring Live View Layout
To configure your live view layout and start monitoring your camera feeds, please do the following:
1
Click
Management
on the
Layout Panel
.
2
Select your preferred type of live view layout.
For details, please refer to Surveillance Station
Help
>
Live View
>
Monitor
Live Views
.
Note:
Supported number of channels depends on the configuration of the NVR you purchased.
3
Drag an IP camera and drop it onto a certain channel of the layout. Repeat this step to display more video feeds on your live
view layout.
4
According to your surveillance requirements, you can add more layouts by clicking the plus button, enter the
Name
, and
repeat steps 2 and 3. After finishing the configuration, you can quickly switch among the saved layouts on the
Layout Panel
.
5
Click
Save
to finish the configuration.
Get Alerted with Live View Analytics
With Alerts feature, you can easily choose from several alert events for your IP cameras, and track suspicious events
intelligently to trigger recording on-the-fly. For more information, please refer to Surveillance Station
Help
>
Live View
>
Alerts
.
To track events with live view analytics, please do the following:
1
Go to Surveillance Station
Main Menu
>
IP Camera
, select a camera, and click
Live View Analytics
.
2
Select an
Analytics Type
from the drop-down list. For detailed functions and settings of each analytics type, please refer to
Surveillance Station
Help
>
IP Camera
>
Live View Analytics
.
3
You can click
Simulation
to fine-tune the sensitivity, detection zone, and object size for individual cameras to obtain the best
results. To stop simulation mode, please click the button again.
4
Click
Save
to finish Live View Analytics settings.
5
Go to Surveillance Station
Main Menu
>
Live View
, and click
Management
on the
Alerts Panel
.


