


10
Chapter 2: Hardware Setup
Add a RAM Module on DiskStation
The optional Synology DDR4 RAM module is designed for DiskStation memory expansion. Follow the steps
below to install, check, or remove a RAM module on your DiskStation.
To install the RAM module:
1
Shut down your DiskStation. Disconnect all cables connected to your DiskStation to prevent any possible
damages.
2
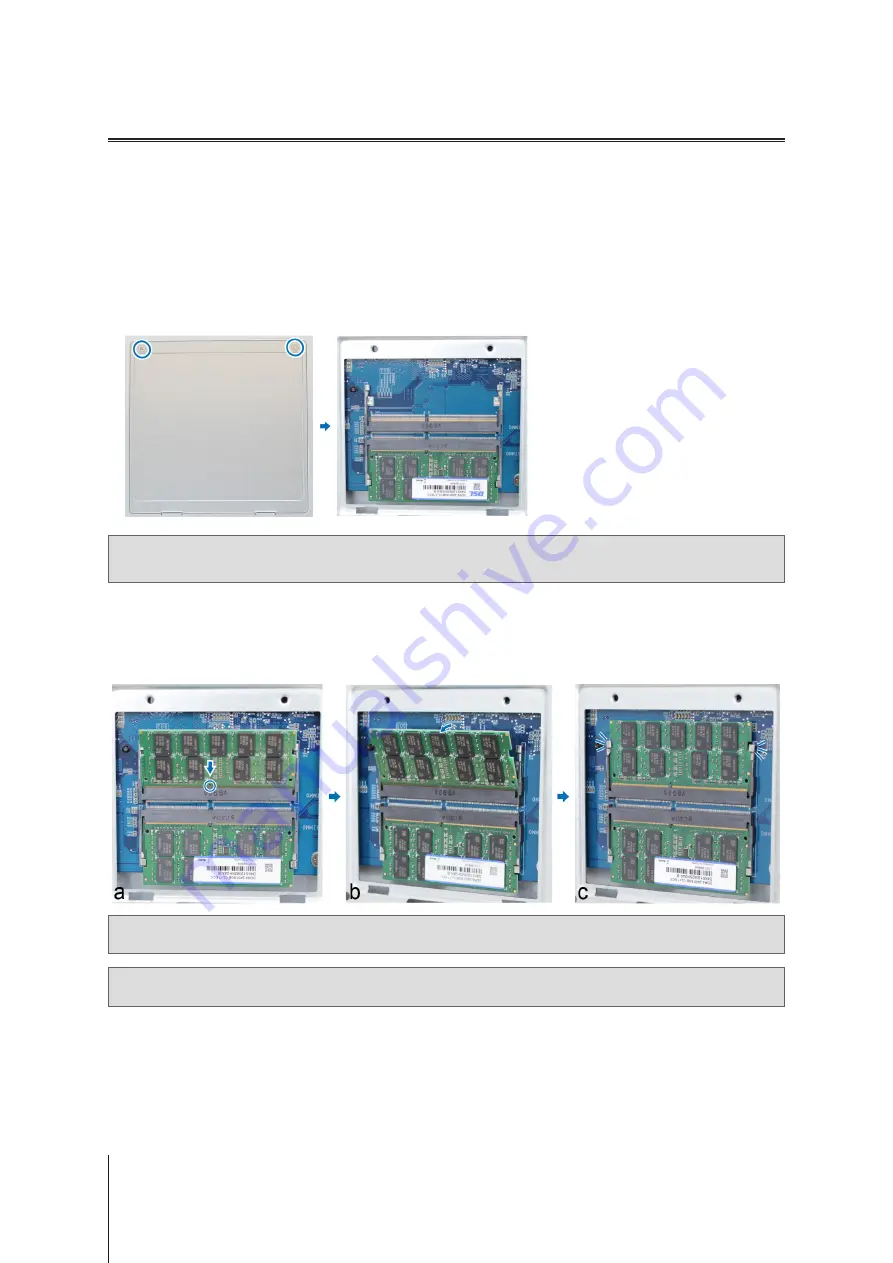
The RAM modules are located at the bottom of DS3018xs.
3
Remove the 2 screws that secure the bottom lid. Lift off the lid and place it to the side. You will see one 8GB
module pre-installed.
Important:
When you remove the lid, you expose sensitive internal components. Avoid touching anything other than
the memory assembly when you remove or add memory.
4
Insert the new memory module in the slot:
a
Align the notch on the gold edge of the module with the notch in the lower memory slot.
b
Tilt the card and insert the module into the slot. Make sure the module is properly inserted.
c
Push down on the memory module with moderate pressure until you hear a click.
d
c
o
r
r
e
c
t
l
Important:
Hold the memory module by its edges, and do not touch the golden connectors.
Note:
Synology offers RAM modules
1
for memory upgrade. For more information, please visit
products/Synology_RAM_Module
.
5
Replace the bottom lid. Replace and tighten the 2 screws you removed in step 3.
6
Reconnect the cables you removed in step 1, and then press and hold the power button to turn on your
DiskStation.
1
Synology will not provide complete product warranty or technical support if non-Synology RAM modules are used for memory upgrade.


