4.4.1 Network Settings Dialog
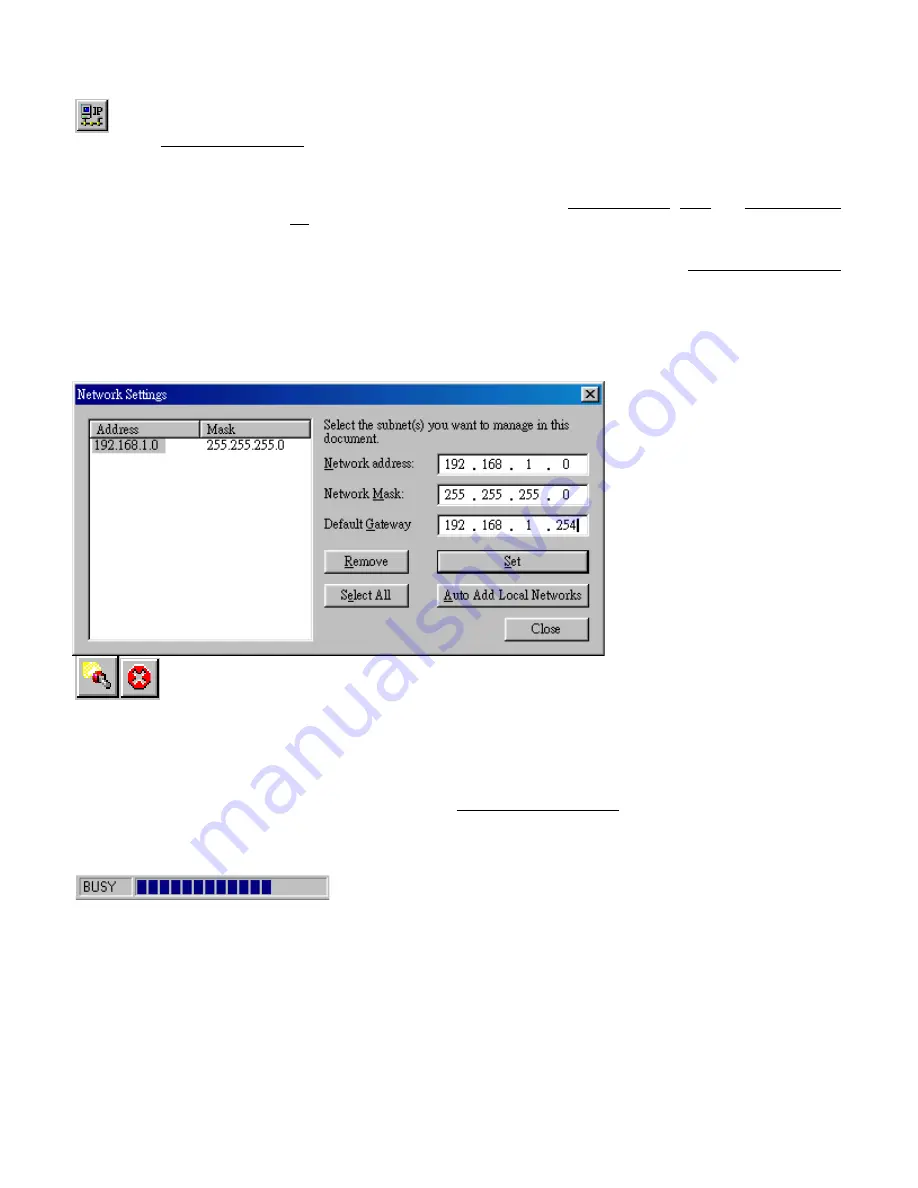
Selecting the Edit/Network Settings… menu item (or clicking the corresponding toolbar button) pops up the Network Settings
dialog. Use this dialog to inform APManager about your network configuration. APManager needs this information to be able to
scan for Access Points.
Add your network addresses (subnets) by entering the correct information in the Network address, mask and default gateway
fields in the dialog, and clicking the Set button for each network/subnet. To view the details of a particular network, click on the
Address field in the list. Click the Remove button to delete a network from the list.
If the computer on which APManager is running is connected to all your networks directly, you can try Auto Add Local Networks
to insert them in the list. Note: if subnetting is used, the network addresses and masks generated by this function may not be
correct and should be adjusted manually.
4.4.2 Searching for Access Points
APManager has an easy-to-use Access Point discovery function that simplifies the administration of the Access
Points in your network. You normally apply the Search function in one of the following situations:
•
New Access Points have been added to the network
•
The IP address of one or more Access Points is no longer valid or known, possibly because the DHCP or BOOTP server
has assigned it a different IP address. You may be informed of this fact because the Access Points will be reported off-line
by APManager.
Invoke the Search function by selecting the menu command Edit/Search Access Points, or pressing the associated toolbar
button. While APManager is scanning the network, you may continue work on the document. If necessary you can abort a scan
by clicking on the Abort Search button.
A progress indicator will be shown in the status bar.


