background image

SYNETICA enLink Zone 

Quick Start Guide Rev 1.4 


2.


Join enLink devices to the LoRaWAN network 


enLink devices in wireless range and with the correct AppEUI and AppKey settings set will automatically join the 
LoRaWAN network when they are first powered up. 


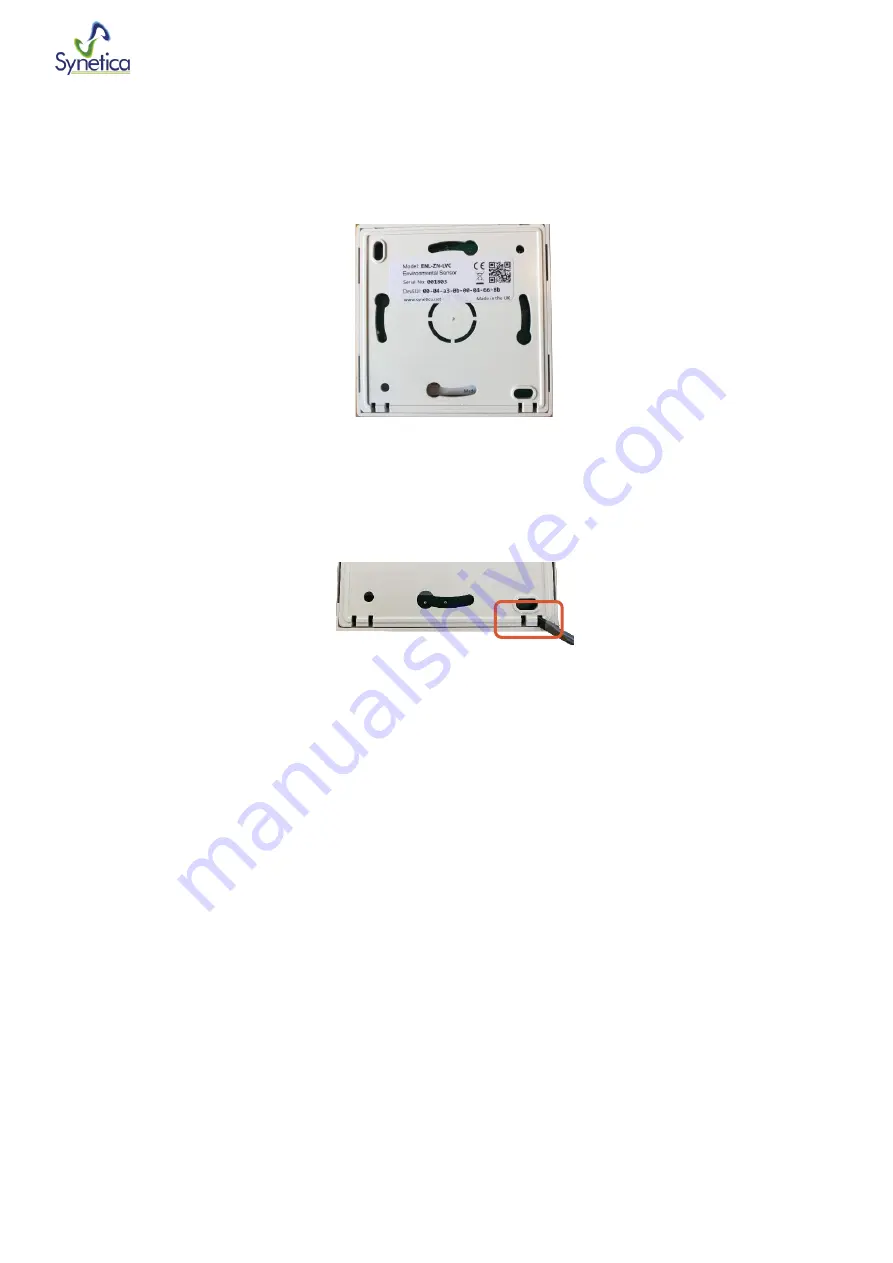
enLink Zone Unit and Label 


The unique 

DevEUI

 is printed on all enLink devices and is also present in the QR code. The 

DevEUI

 can be used to identify 

the device once joined to the network. 
 
To power the device ON, remove the rear cover of the enLink Zone by inserting a small screwdriver blade into the slots on 
the bottom of the unit as shown below. 


Cover Removal 


Содержание enLink Zone

Страница 1: ...ings office equipment glues adhesives and alcohol can be detected Readings are transmitted to the cloud using long range LoRa wireless where the data can be displayed and analysed The unit is battery powered with long life of 3 years A built in USB port allows all parameters including sensor air quality data wireless signal strength and wireless network configuration to be viewed and set using sim...

Страница 2: ...que for every device and is set at device manufacture AppEUI JoinEUI Application Identifier Used to identify the end application AppKey Application key Used to create the session keys Note In LoRaWAN 1 1 AppEUI was renamed to JoinEUI For many applications Synetica can supply enLink Zone units with the AppEUI and AppKey pre configured so providing the LoRa gateway has the matching values the join p...

Страница 3: ...es in an explosive gas atmosphere When installing batteries do not snag the battery terminal on the clip or the battery may be damaged Do not apply excessive force Do not drop Dropping the battery may cause damage If a battery is dropped do not install the dropped battery into the unit Dispose of dropped battery promptly per local regulations or per the battery manufacturer s recommendations Guida...

Страница 4: ...es to connect to the Conduit the AppEUI and AppKey must match those of the enLink devices For Multitech Conduit units running V1 6 4 1 7 0 follow the process below Detailed instructions can be found on the Multitech Web Site www multitech net Logon to the Conduit and select LoRaWAN Network Settings Set the Mode to Network Server then set the Channel Plan required and set the Mask to 00FF as shown ...

Страница 5: ...ce the unit has restarted you are ready to join enLink devices to the network The Conduit gateway is now ready to receive devices onto the network On the Conduit select LoRaWAN Devices as shown below This screen shows details of devices which have joined the network when they joined and when the last message was received from them As you add devices to the network this is where they will appear ...

Страница 6: ...SYNETICA enLink Zone Quick Start Guide Rev 1 4 ...

Страница 7: ... LoRaWAN network when they are first powered up enLink Zone Unit and Label The unique DevEUI is printed on all enLink devices and is also present in the QR code The DevEUI can be used to identify the device once joined to the network To power the device ON remove the rear cover of the enLink Zone by inserting a small screwdriver blade into the slots on the bottom of the unit as shown below Cover R...

Страница 8: ...hilst the Join process is taking place Depending on factors such as signal strength RF interference etc the join process may take several seconds to complete Blinking Red LED Attempting Join When the device has successfully joined the network the Status LED will blink GREEN five times to show that the join has been completed The LED s will then switch off to conserve the batteries Blinking Green L...

Страница 9: ...ift the board up and out of the enclosure Connect a micro USB cable to the enLink unit The device will attach to a COM port on your PC Using a terminal program e g Tera Term https ttssh2 osdn jp connect to the COM port used by the enLink device To verify which COM port is being used check the Windows Device Manager In Windows Click the Start button type device manager into the search box and tap D...

Страница 10: ... k Enter the 32 character Appkey using numbers and letters a to f Do not include spaces or any other characters Pressing S will enter the default AppKey which you can then edit Press Enter when the key is correctly entered to return to the Quick Start Settings Menu AppKey setting Press X from the Quick Start Settings Menu to return to the enLink Main menu The header will show Reboot Required as sh...

Страница 11: ...g to the enLink Zone model and the installed sensors Live Display Configuration Menu The enLink Zone configuration menu allows you to view current sensor readings and also to change various functions of their behaviour such as calibration data To enter the Configure Device menu press c from the main menu A screen similar to the one below will show The exact parameters shown will vary according to ...

Страница 12: ... value is 50 and the minimum reading is 451 or more the calibration routine is ignored I Initial Interval It is possible for the first auto calibration to take place more quickly than the regular auto calibration events This can be useful to stabilise the readings quickly after installation R Regular Interval This is the standard calibration interval it is set to 8 days by default to accommodate a...

Отзывы: