


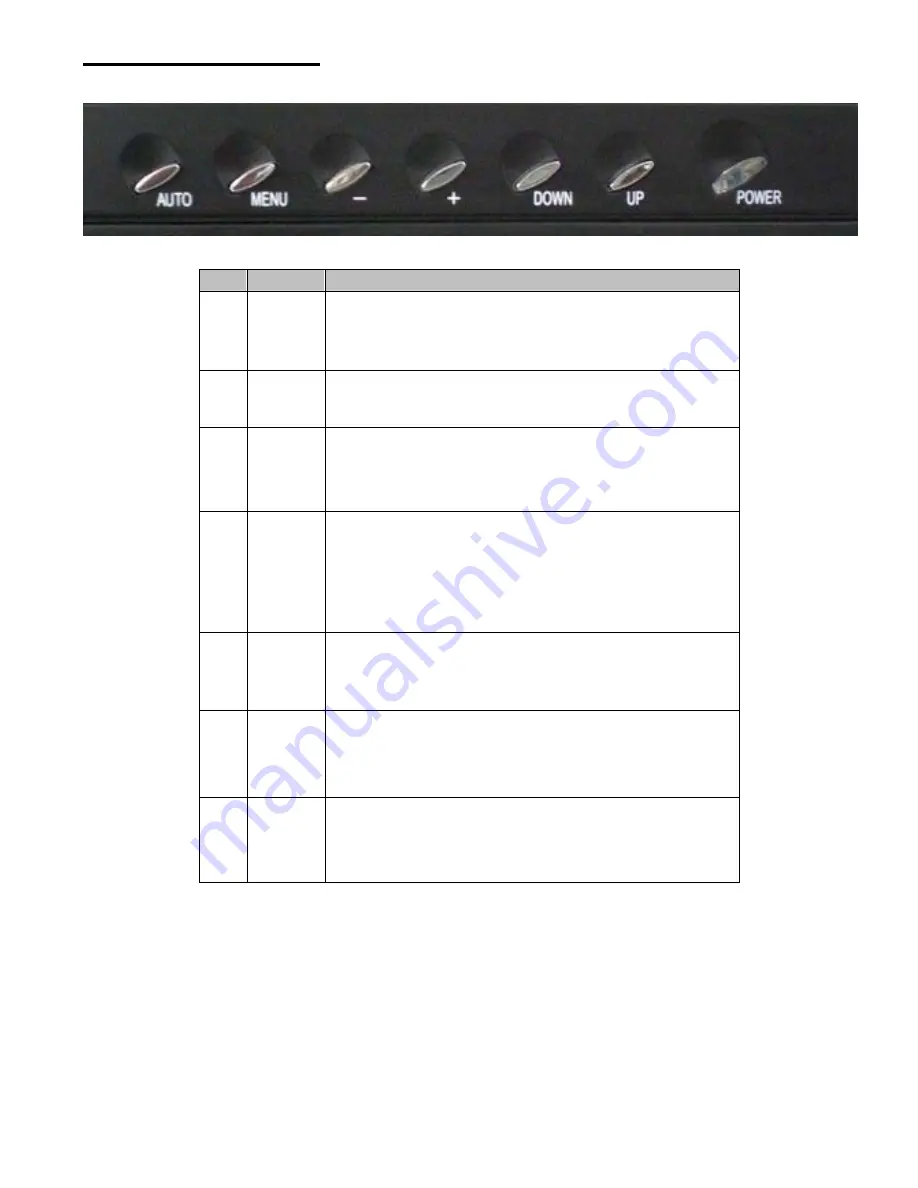
Menu Control Buttons
No.
Button
Function
1
AUTO
1. Automatically Adjusts the screen, when not in the
OSD menu.
(
Note:
This feature will not work when in DVI mode).
2. To exit a submenu.
2
MENU
1. Show the main OSD menu.
2. To enter a submenu.
3
-
1. Decreases an option value.
2. When not in the OSD Menu, decreases the Volume
control.
4
+
1. Increases an option value.
2. When not in the OSD Menu, mutes the Volume
control.
(
Note:
To restore the Volume control when muted,
press the "+" button again).
5
DOWN
1. To navigate down / left through the menu option
selection.
2. When not in the OSD Menu, changes the signal
source to/from VGA - DVI.
6
UP
1. To navigate up / right through the menu option
selection.
2. When not in the OSD Menu, toggles the aspect ratio
from 16:10 / 4:3.
7
POWER
1. Turns the power on / off.
2. Blue: Power LED indicator on.
3. Red:
Standby
•
Press the AUTO button to auto adjust to the default factory settings.
•
Press the MENU button to display the OSD menu.
•
Press the DOWN or UP buttons to navigate through the submenus.
•
Select the desired option menu by pressing the MENU button.
•
Push the - or + button to decrease or increase the value of the current OSD selection.
•
The OSD menu will close automatically after 16 seconds of inactivity.
6


