background image

For more information, visit www.symmetryoffice.com

.

To report any issues with this product, please contact our customer service department at (888) 552-5699

.

SWITCHBACK 2-LEG 2-STAGE ASSEMBLY INSTRUCTIONS

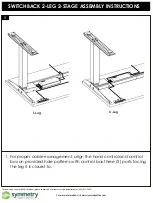
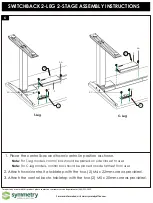
1. For proper cable management, align the hand control and control

box on provided hole patterns with control box three (3) ports facing

the leg it is closest to.

1

T-Leg

C-Leg

Содержание SWITCHBACK

Страница 1: ... report any issues with this product please contact our customer service department at 888 552 5699 REQUIRED TOOLS FINAL ASSEMBLY EXAMPLE COMPONENTS 1 1 SCALE SWITCHBACK 2 LEG 2 STAGE ASSEMBLY INSTRUCTIONS S A x7 S B x8 S C x2 S D x2 S E x4 S F x4 G A x1 6mm Allen Key Alt only for specific models A x2 B x2 E x2 C x2 D x1 F x1 M6x16mm Screw S E S F S D M10x17mm Set Screw M6x8mm Screw H x1 S B Alter...

Страница 2: ...duct please contact our customer service department at 888 552 5699 SWITCHBACK 2 LEG 2 STAGE ASSEMBLY INSTRUCTIONS 1 For proper cable management align the hand control and control box on provided hole patterns with control box three 3 ports facing the leg it is closest to 1 T Leg C Leg ...

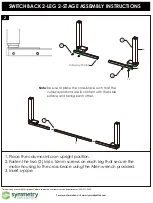
Страница 3: ...SEMBLY INSTRUCTIONS 2 A S E D C 1 Place the columns into an upright position 2 Fasten the two 2 M6 x 16mm screws on each leg that secure the motor housing to the cross brace using the Allen wrench provided 3 Insert u pipe 1 3 Note Be sure to place the cross brace such that the cutaway portions are in contact with the table surface and facing each other 2 II II I 0 Cutaway Portion ...

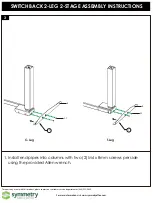
Страница 4: ...side using the provided Allen wrench For more information visit www symmetryoffice com To report any issues with this product please contact our customer service department at 888 552 5699 3 SWITCHBACK 2 LEG 2 STAGE ASSEMBLY INSTRUCTIONS T Leg C Leg 1 S F S F 1 B B ...

Страница 5: ...ymmetryoffice com To report any issues with this product please contact our customer service department at 888 552 5699 4 SWITCHBACK 2 LEG 2 STAGE ASSEMBLY INSTRUCTIONS 1 Note For C leg models make sure the end pipes and feet are extended in the same direction T Leg C Leg S B S B 1 30 C Leg Alternate Design S B Alternate ...

Страница 6: ...he legs are located center the u pipe and fasten the two 2 M10 x 17mm set screws as shown For more information visit www symmetryoffice com To report any issues with this product please contact our customer service department at 888 552 5699 5 SWITCHBACK 2 LEG 2 STAGE ASSEMBLY INSTRUCTIONS 1 T Leg Shown S D ...

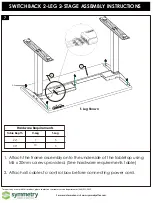
Страница 7: ... 1 Place the control box and hand control in position as shown Note For T leg models control box should be placed on side closest to user Note For C leg models control box should be placed on side farthest from user T Leg C Leg H F F H S A S C S A 1 3 2 Attach hand control to tabletop with the two 2 M4 x 22mm screws provided 3 Attach the control box to tabletop with the two 2 M5 x 20mm screws prov...

Страница 8: ... all cables to control box before connecting power cord For more information visit www symmetryoffice com To report any issues with this product please contact our customer service department at 888 552 5699 7 SWITCHBACK 2 LEG 2 STAGE ASSEMBLY INSTRUCTIONS 1 Table Depth 24 7 13 5 5 30 C Leg T Leg S A 2 T Leg Shown Hardware Requirements ...

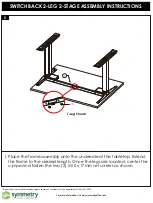
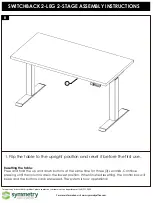
Страница 9: ...2 STAGE ASSEMBLY INSTRUCTIONS 1 Flip the table to the upright position and reset it before the first use Resetting the table Press and hold the up and down buttons at the same time for three 3 seconds Continue pressing until the columns are in the lowest position When finished resetting the control box will beep and the buttons can be released The system is now operational ...

Отзывы: