background image

80

08/2009 Rev. 0.4        

S1000 All in One

S3000 All in One (MAXI)

S1000 / S3000 / S3000 MAXI

08/2009 Rev. 0.4

81

S1000 All in One

S3000 All in One (MAXI)

S1000 / S3000 / S3000 MAXI

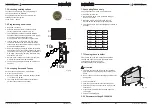
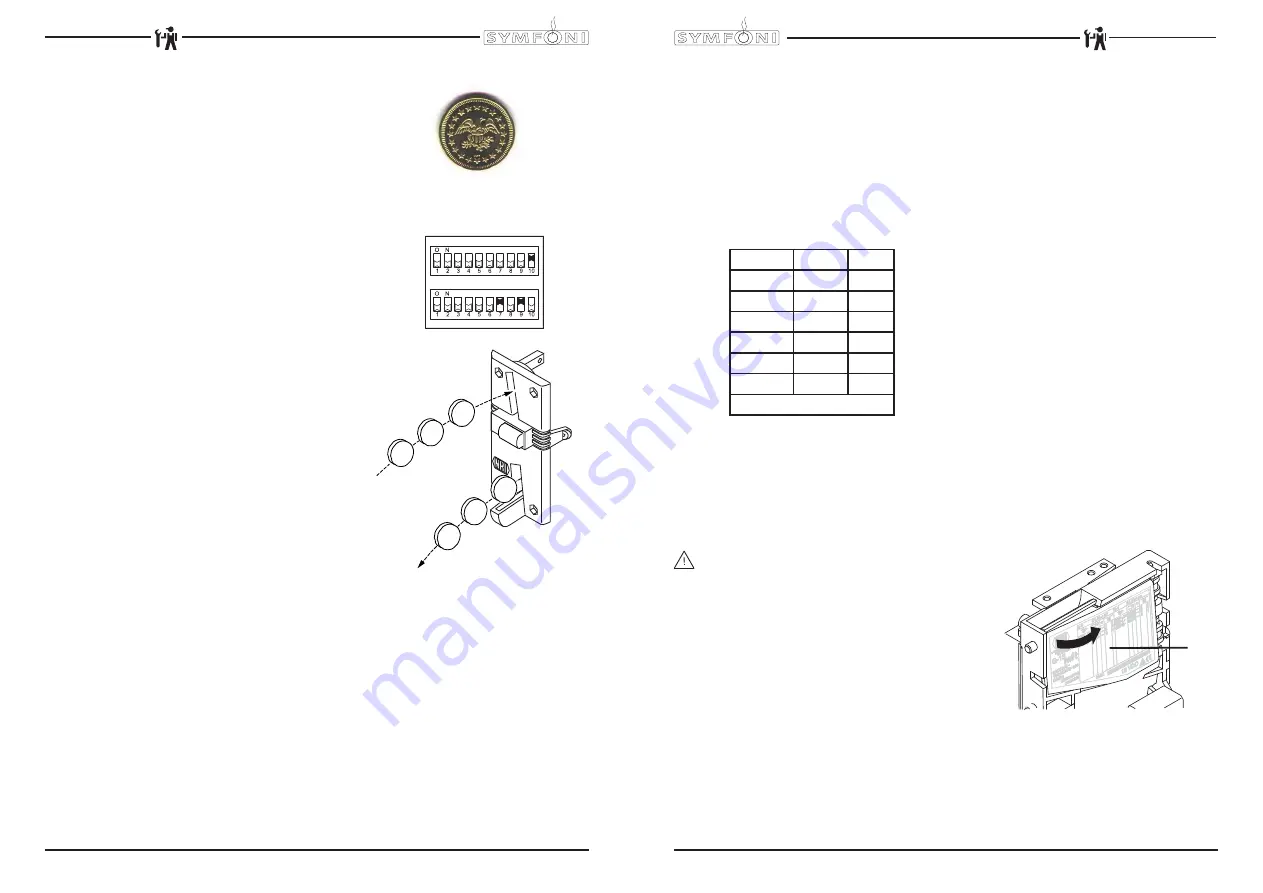
7.3 Activating existing tokens

The token shown here (

fi

 g. 24) is programmed in

the coin mechanism as standard.
Con

fi

 gure the service menu as described in the

following section from point 4.
Token Art. No. : 03344

7.4 Programming a new token

  Required: 10 tokens

  Attention: remember the DIL switch positions


for any rejected coins. Leave S1.10 ON!

1.  The following DIL switches on Switch Block S2
 

should be facing upwards and switch to ON (

fi

 g. 25).


a) First switch S2-9 Teach Mode to ON


b) Then, switch S2-7 coin channel 6 (TM) to ON

2.  Insert a minimum of ten tokens (Fig. 26). These 
 

ten tokens should not be the same. After the ten


tokens have been inserted the (internal) reject coil


will be automatically drawn.

3.  End programming by switching the DIL switch S2-9 
 

downwards to OFF. If saved successfully, the reject


coil will be drawn once again. After this, switch S2-7


OFF again. (To halt programming, 

fi

 rst switch S2-7


and then S2-9 to OFF).

4.  Service menu: change coin channel 6 (menu item 
 

2.5 Payment system) from €2 to TOKEN.

5.  The device now accepts the token as a method of  
 payment.

7.5 Accepting Euros and Tokens

Carry out section 5.3.3 and 5.3.4 beforehand.

  Open the service menu

  Set a price using menu 2.2 Button settings / Button


1-10 / Price (e.g. €0.50)

  The recipe buttons are activated after suf

fi

 cient


euros or tokens have been inserted!

S1

S2

10x

10x

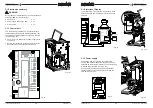
Fig. 24

Fig. 25

Fig. 26

7.6 Accepting Tokens only

Carry out sections 5.3.3 and 5.3.4 beforehand.
1.  Open the service menu
2.  Set to TOKEN using menu 2.2 Button settings /
 

Button 1-10 / Price.

3.  Block the € 0.05 - 2.00 coins using the coin  


mechanism DIL switches and the table below.

4.  The recipe buttons are only activated after a token is
 inserted!
 

Coin

DIL    +

DIL    

€ 0,05

S1-1

S1-7

€ 0,10

S1-2

S1-8

€ 0,20

S1-3

S2-1

€ 0,50

S1-4

S2-2

€ 1,00

S1-5

S2-3

€ 2,00

S1-6

S2-4

ON = rejected / OFF = accepted

7.7 Cleaning the coin holder

From time to time, the coin mechanism should be 
cleaned with a light, damp cloth (lukewarm water
containing a mild cleaning agent).
No further maintenance is necessary.

ATTENTION

  The cloth should not be too wet as any liquid that


gets into the device will damage the printed circuit  

 board.

  Do not use any solvents or scouring agents that may  

 damage 

the

1.  Turn off the device.
2.  Take the coin mechanism out of the side panel.
3.  Carefully open the coin holder valve (

fi

 g. 27A) and  


hold it open.

4.  Clean the coin holder with a cloth and close the  
 valve 

again.

5.  Turn on the device again.

3.2.3 Parameter settings S1000 Milk

A

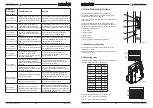
Fig. 27

Содержание S1000 All in One

Страница 1: ...Service boek Service book Manuel de service maintenance NL GB F S3000 All in One S3000 All in One MAXI S1000 All in One ...

Страница 2: ...nfiguration 58 3 2 Button settings 59 3 2 1 Parameter settings S3000 60 3 2 2 Parameter settings S3000 MAXI 61 3 2 3 Parameter settings S1000 Coffee 62 3 2 4 Parameter settings S1000 Cacao 63 3 2 5 Parameter settings S3000 Milk 64 3 3 Detailed recipe settings 65 3 4 Timebar recipe settings 65 3 5 Calibrating the hot water valves 66 4 SERVICE 67 4 1 Setting a service parameter 67 4 2 Preventative m...

Страница 3: ...in access to the service menu It is recommended not to leave this document with the user after installation and to change the standard factory PIN code All sections and paragraphs are numbered The various figures referred to in the text can be found in the figures section at the beginning of the manual or with the corresponding subjects Pictograms and symbols CAUTION General indication for IMPORTA...

Страница 4: ...ed in a holder fig 1 13 The ingredient slide inside the holder is driven via a special mechanism by a gear motor fig 1 15 The instant product ingredient is dispensed by a drawer in the bottom of the cartridge and directly dispensed into the mixer unit fig 1 15 At the same time the dispensing valves fig 1 10 dispense hot water into the mixer unit The mixer motor fig 1 7 blends the instant product w...

Страница 5: ...ttings including product settings are protected by a PIN code This PIN code ensures that users do not gain access to the service menu It is recommended not to leave this document with the user after installation and to change the standard factory PIN code This section describes how the various settings can be changed by trained authorized service staff You can read about how to gain access to the ...

Страница 6: ...press the number 2 key five times 2 3 The service menu Service menu Main item Sub item Item Range Set Description 2 1 Quick recipe Recipe name 1 Recipe name 10 Cup volume 50 300 ml 125ml Use this for setting the volume per recipe drink key 2 2 Button setting Button 1 Button 10 Recipe name Recipe list See section 3 2 Change any recipe buttons here that standard factory settings All settings that co...

Страница 7: ...ts Coffee middle cartridge Ingredient 4 WT 0 0 30 0 s Not used Ingredient 4 0 6 x Not used Mixer 2 WT 0 0 30 0 s Waiting time Mixer 2 Mixer 2 0 0 50 0 s Mixing time Mixer 2 Pause open IM3 0 0 10 0 s Pause time IM 3 when dosing slide is totally open Pause rest IM3 0 0 10 0 s Pause time IM 3 in between 2 shots motor pauses in home position Pause open IM4 0 0 10 0 s Not used Pause rest IM4 0 0 10 0 s...

Страница 8: ...ued Main item Sub item Item Range Set ting Description 2 4 Settings continued Coin system G13 Coin channel 1 Coin channel 6 0 100 00 Token 0 05 0 10 0 20 0 50 1 00 2 00 Coin value setting for each channel 0 05 2 respectively 0 00 free TOKEN coffee token Single vend ja nee ja Yes any excess credit is not retained for next drink No credit retained for next drink Max coin accep 0 05 100 00 1 00 Coins...

Страница 9: ... factory settings and changed programmed values will be lost After loading defaults the PIN code reverts to 2 2 2 2 2 and the language reverts to English Change if necessary 2 10 Load defaults From software V3 08 sept 2009 Model S3000 S3000 MAXI S1000 S1000 S1000 Type code SY1A xx SY2A xx SY3A xx SY4A xx SY5A xx 2 11 SD menu Before saving or loading data insert an empty SD memory card into the car...

Страница 10: ...can easily be transferred over the 10 recipe buttons See service menu 2 2 Button settings page 49 The optional recipes table are already contained in the software and can easily be programmed under one recipe button See service menu 2 2 Button settings page 49 Table 3 S3000 S3000 MAXI S1000 Coffee S1000 Choco S1000 Milk Model 1A Model 2A Model 3A Model 4A Model 5A Cartridge 1 Cacao Cacao Coffee Ca...

Страница 11: ...0 0 0 0 0 0 0 0 0 0 0 0 0 0 0 0 0 0 0 0 0 0 0 0 0 0 0 0 Pause Open IM 6 sec 0 0 0 0 0 0 0 0 0 0 0 0 0 0 0 0 0 0 0 0 0 0 0 0 0 0 0 0 0 0 Pause Rest IM 6 sec 0 0 0 0 0 0 0 0 0 0 0 0 0 0 0 0 0 0 0 0 0 0 0 0 0 0 0 0 0 0 Table 5 SY2abb00 RCD Buttons Optional recipe 1 2 3 4 5 6 7 8 9 10 11 12 13 14 15 Symfoni 2A Standard Coffee Double Coffee Espresso Coffee Milk Chocolate Chocolate Milk Cappuccino Mocca...

Страница 12: ...0 0 0 0 0 0 0 0 0 0 Pause Rest IM 4 sec 0 0 0 0 0 0 0 0 0 0 Pause Open IM 5 sec 0 0 0 0 0 0 0 0 0 0 Pause Rest IM 5 sec 0 0 0 0 0 0 0 0 0 0 Pause Open IM 6 sec 0 0 0 0 0 0 0 0 0 0 Pause Rest IM 6 sec 0 0 0 0 0 0 0 0 0 0 SY4Age00 RCD Buttons Optional recipe 1 2 3 4 5 11 12 13 14 15 Symfoni 4A Standard Chocolate Small Chocolate Large Hot Water none none Jug Hot Water none none none none Recipe 62 63...

Страница 13: ...0 00 0 00 0 00 Cup volume ml 125 125 0 0 0 125 0 0 0 0 Multicup 0 0 0 0 0 12 0 0 0 0 Key switch 3 3 0 0 0 0 0 0 0 0 Push Hold 0 0 0 0 0 0 0 0 0 0 Leak out time sec 2 0 2 0 0 0 0 0 0 0 2 0 0 0 0 0 0 0 0 0 DV 1 WT sec 0 0 0 0 0 0 0 0 0 0 0 0 0 0 0 0 0 0 0 0 DV 1 ml 100 0 0 0 0 0 0 0 0 0 0 0 0 0 0 0 0 0 0 0 Rinse 1 WT sec 0 5 0 0 0 0 0 0 0 0 0 0 0 0 0 0 0 0 0 0 Rinse 1 ml 7 5 0 0 0 0 0 0 0 0 0 0 0 0 ...

Страница 14: ...ale the water reservoir the device must be opened This will expose live parts of the machine which can be touched easily This may lead to highly dangerous situations WARNING The device must not be submerged or hosed down Always stay with the device during maintenance work 4 1 Setting a service parameter During installation set a parameter for the device to be serviced See Service Menu item 2 8 Des...

Страница 15: ...n 03254 1x 3x Mounting ring incl seals 03253 1x 3x Inspection general Check that the entire machine is working Check parts for damage wear and tear and or leaks Cleaning general Brewer and mixer unit as for weekly cleaning The entire interior and exterior of the machine Table 10 WARNING Do not leave the device during maintenance work When descaling always follow the instructions for the descaler u...

Страница 16: ...g the tap fig 12 1 12 Turn on the device again the reservoir will refill with clean water Repeat instruction 10 one more time to rinse the reservoir completely free of acid 13 Turn on the device again the reservoir will refill with clean water Allow the water reservoir to heat up 14 Activate the MIXER programme fig 12 3 so that valves and pipe systems are rinsed clean Place the measuring jug under...

Страница 17: ... 9 8 7 6 5 4 3 2 1 2 1 HEATER RELAIS DOSING VALVES VALVES INGREDIENT MOTORS MIXERS 4 3 FAN INLET OUTPUTS G13 MDB RS232 COMMUNICATION POWER SUPPLY MICROCONTROLLER J15 J6 J2 USB J4 2 1 TEMP1 2 1 4 3 24V DC KEY DISPLAY INPUTS J12 J7 J16 J1 F1 BATT F6 3AT 1 2 3 4 5 6 7 8 9 10 11 12 18 17 16 15 14 13 12 11 10 9 8 7 6 5 4 3 2 1 SENSORS 5V LB LSL GND AS BS DS LSH GND GND GND GND 24Vdc CSI Fig 14 Fig 14a ...

Страница 18: ...8 9 10 11 12 18 17 16 15 14 13 12 11 10 9 8 7 6 5 4 3 2 1 SENSORS 5V LB LSL GND AS BS DS LSH GND GND GND Fig 17 5 3 Main circuit board exits Connector J2 Pin Motor Colour Comments 17 18 Mixer 1 Black Take care to rotate in the right direction Shared 24 DC red wire on red spot on Mixer and Ingredients Motor 15 16 Mixer 2 Violet 13 14 Mixer 3 Pink 11 12 Ingredient Motor 1 Brown 9 10 Not used 7 8 Ing...

Страница 19: ...illing up or is filling up too slowly After 60 sec the display will show E3 Level error Check the water pressure turn the water supply tap completely open and check the connection tube for any kinks Out of order Boiler heating The boiler temperature is temporarily too low because too much water has been used Once the temperature is restored the message automatically disappears and the drink select...

Страница 20: ...its Carry out the inspection actions as described for E11 and E12 Switch the device off and on again Valve exit group overload power too high Control unit has switched off the exits Carry out the inspection actions as described for E10 Switch the device off and on again Out of order E15 Shot error Ingredient motor has not returned in its home position Check the micro switch and ingredient motor fu...

Страница 21: ... method of payment 7 5 Accepting Euros and Tokens Carry out section 5 3 3 and 5 3 4 beforehand Open the service menu Set a price using menu 2 2 Button settings Button 1 10 Price e g 0 50 The recipe buttons are activated after sufficient euros or tokens have been inserted S1 S2 10x 10x Fig 24 Fig 25 Fig 26 7 6 Accepting Tokens only Carry out sections 5 3 3 and 5 3 4 beforehand 1 Open the service me...

Страница 22: ...Rev 0 4 08 2009 Symfoni 17 Avenue de l Artisanat 1420 Braine l Alleud Belgium Tel nr 00 32 2 389 08 29 Fax nr 00 32 2 384 77 54 Internet www symfoni be www symfoni koffie nl ...

Отзывы: