


2-6
iPOS TX Product Reference Guide
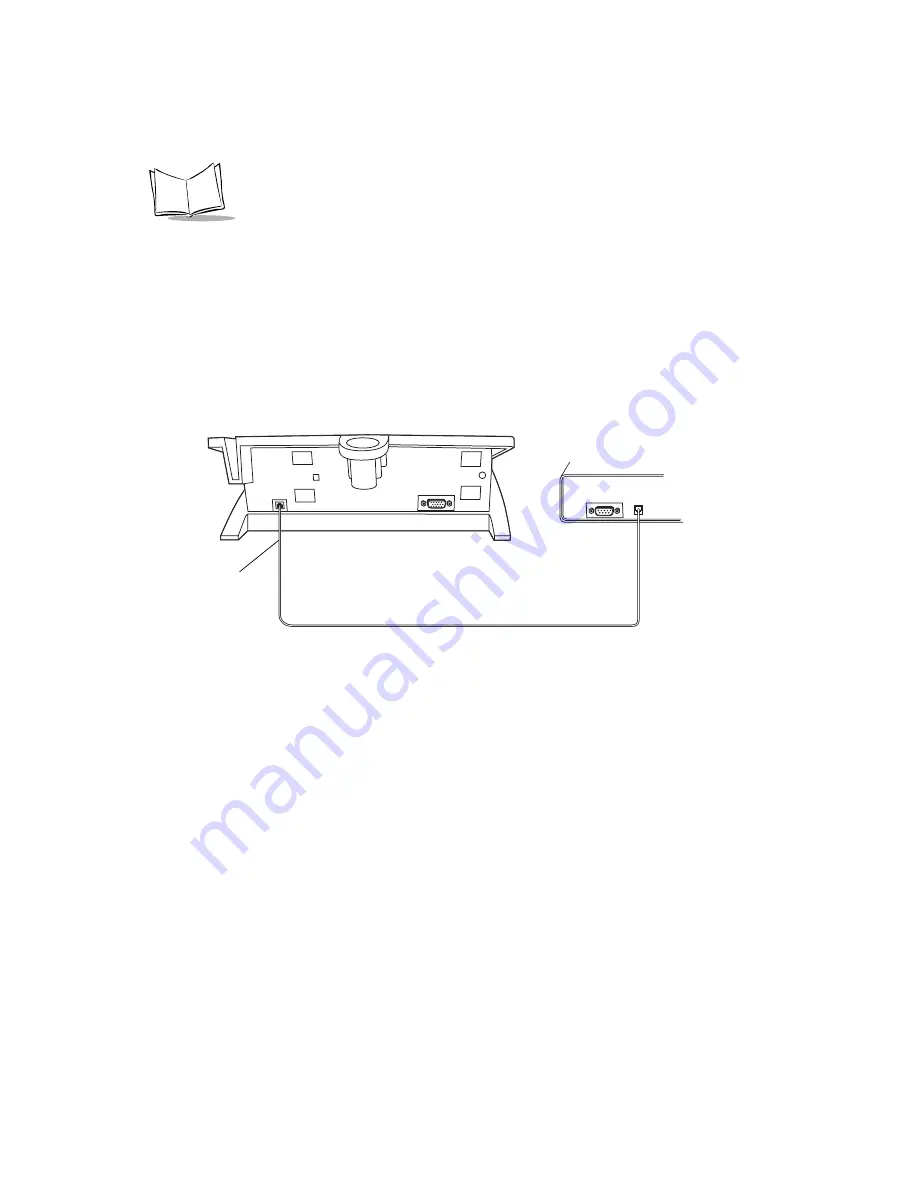
Powered USB Installation
To install the iPOS TX:
1. Shut off power on the host device.
2. Insert the Type B connector of the USB cable into the USB port on the back of the
iPOS TX.
3. Insert the Type A connector of the USB cable into the USB port on the host device.
4. Turn on the host device. The iPOS TX autoconfigures to USB.
Figure 2-4. Powered USB Configuration
iPOS TX
USB Cable
POS Host Device
Содержание iPOS TX
Страница 1: ...iPOS TX Product Reference Guide...
Страница 2: ......
Страница 3: ...iPOS TX Product Reference Guide 72 61856 01 Revision A July 2003...
Страница 12: ...x iPOS TX Product Reference Guide...
Страница 16: ...1 4 iPOS TX Product Reference Guide...
Страница 26: ...2 10 iPOS TX Product Reference Guide...
Страница 50: ...3 24 iPOS TX Product Reference Guide...
Страница 56: ...Index 4 iPOS TX Product Reference Guide...
Страница 58: ......
Страница 59: ......