


1
1.1 Getting to know your Android Netbook
Congratulations on the purchase of your new Android Netbook!
No.
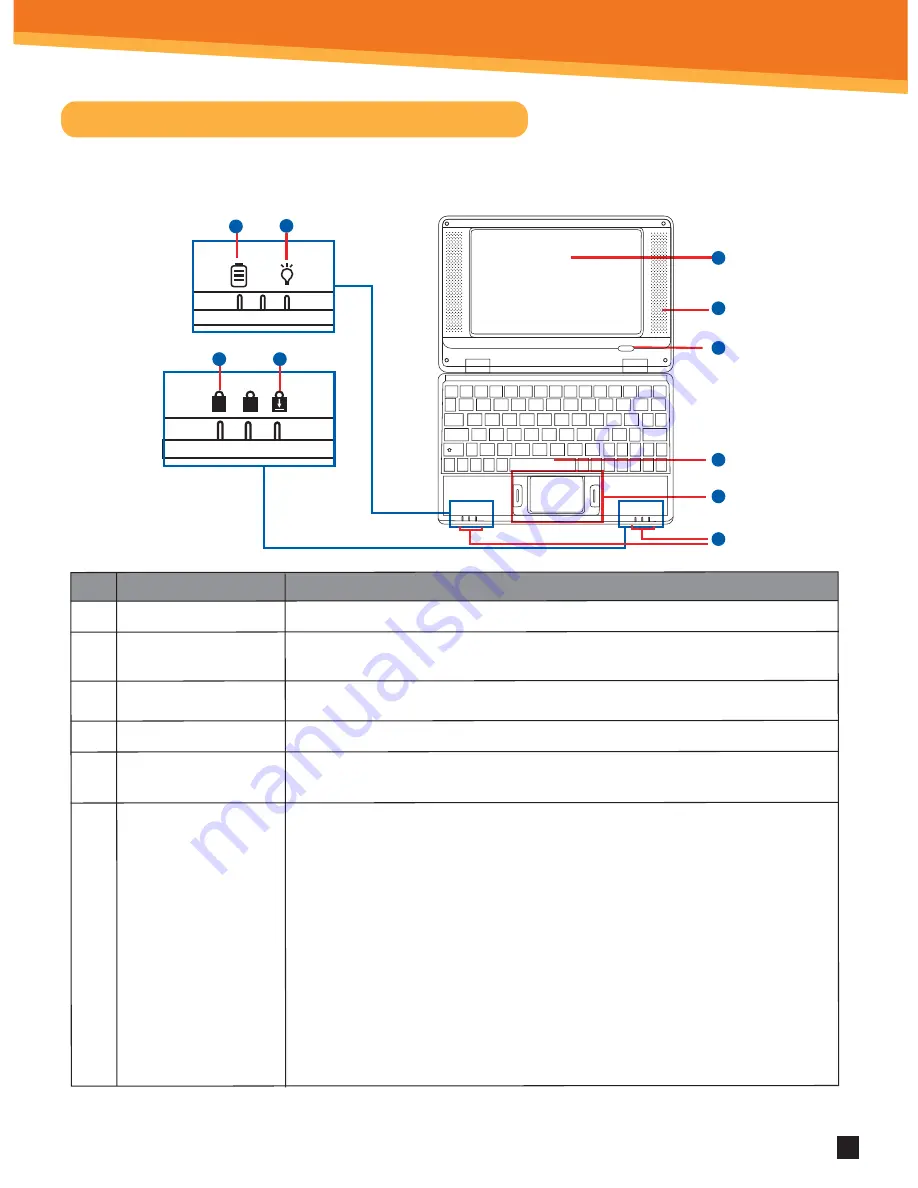
1.
2.
3.
4.
5.
6.
Item
LCD screen
Power On/Off button
Speakers
Keyboard
Touch pad and button
Status indicator
(from left to right)
Description
7” LCD screen display.
Press the power button to start up the Netbook. The power
button will also recover the Netbook from standby status.
These produce the sound for the Netbook.
Input Device used for Controlling the Netbook's various functions.
Works the same way as a mouse and is used for controling the cursor.
The buttons work the same way as a left and right mouse buttons
a) Battery charge indication lamp: A red colored light indicates the battery is being
charged. When the battery is fully charged the light will turn off.
b) Power indication lamp: When your Netbook is in use, the power indication lamp
will be lit green.
c) Num Lock indication lamp: When the green lamp is on, it indicates that the
digital keys (blue numebers) of the keyboard are active. When the light is off,
it means that the Num Lock application is not on. Press the Num Lock key to turn
this function on and off.
d) Caps Lock indication lamp: When the green light is on, it indicates the Caps Lock
function on the keyboard is activated and all the letters typed will be capitalized.
Q
W
E
R
T
Y
U
I
O
P
A
S
D
F
G
H
J
K
L
V
Z
X
C
B
N
M
1
2
3
4
5
6
7
8
9
0
!
@
#
$
%
^
&
*
(
)
~
`
_
_
+
=
\
|
;
:
<
>
.
,
?
/
{
}
[
]
“
‘
\
|
Alt
Ctrl
Shift
Caps
Lock
Tab
Pause
Break
Esc
Shift
Enter
Delete
Insert
F1
F2
F3
F4
F5
F6
F7
F8
F9
F10
F11
F12
1
A
1
a
b
c
d
2
3
4
5
6
d
c
SYNETA7


