background image

Precautions

Before you start

Laser Safety

2

This unit employs a laser. Only a qualified service person should remove the cover or attempt to service this device, due to possible eye injury.

CAUTION:

USE OF CONTROLS OR ADJUSTMENTS OR PERFORMANCE OF PROCEDURES OTHER THAN THOSE SPECIFIED HEREIN
MAY RESULT IN HAZARDOUS RADIATION EXPOSURE.

CAUTION:

VISIBLE AND INVISIBLE LASER RADIATION WHEN OPEN AND INTERLOCK DEFEATED. DO NOT STARE INTO BEAM.

LOCATION:

INSIDE, NEAR THE DECK MECHANISM.

WARNING

:

TO REDUCE THE RISK OF FIRE OR ELECTRIC SHOCK, DO NOT EXPOSE THIS APPLIANCE TO
RAIN OR MOISTURE.

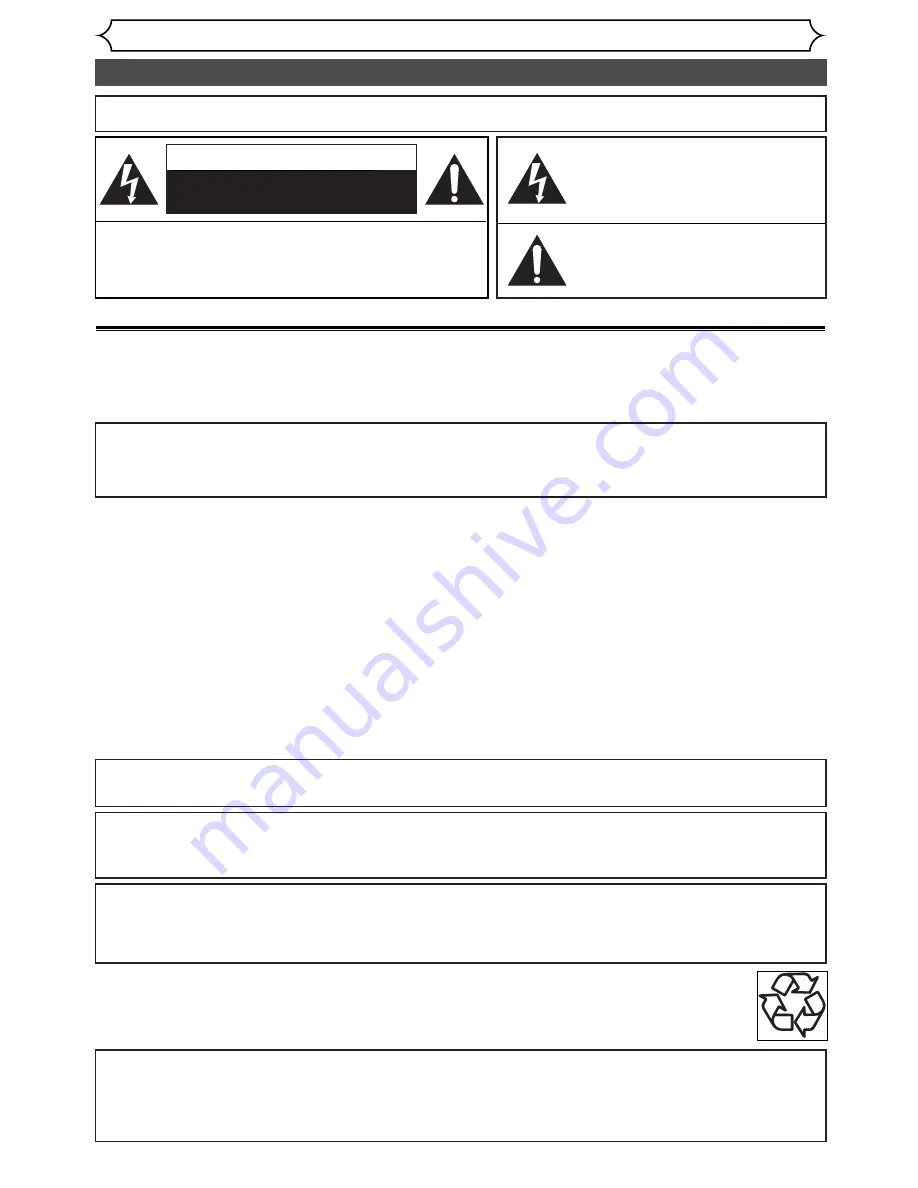
The lightning flash with arrowhead symbol, within
an equilateral triangle, is intended to alert the user
to the presence of uninsulated “dangerous voltage”
within the product’s enclosure that may be of 
sufficient magnitude to constitute a risk of electric
shock to persons.

The exclamation point within an equilateral 
triangle is intended to alert the user to the 
presence of important operating and maintenance
(servicing) instructions in the literature accompanying
the appliance.

CAUTION:

TO  REDUCE THE RISK OF ELECTRIC SHOCK, DO NOT REMOVE
COVER (OR BACK). NO USER SERVICEABLE PARTS INSIDE. REFER
SERVICING TO QUALIFIED SERVICE PERSONNEL.

CAUTION

RISK OF ELECTRIC SHOCK 

DO NOT OPEN

RADIO-TV INTERFERENCE

This equipment has been tested and found to comply with the limits for a Class B digital device, pursuant to Part 

15

of the

FCC Rules.These limits are designed to provide reasonable protection against harmful interference in a residential installa-
tion.This equipment generates, uses, and can radiate radio frequency energy and, if not installed and used in accordance with
the instructions, may cause harmful interference to radio communications. However, there is no guarantee that interference
will not occur in a particular installation. If this equipment does cause harmful interference to radio or television reception,
which can be determined by turning the equipment off and on, the user is encouraged to try to correct the interference by
one or more of the following measures:

1

) Reorient or relocate the receiving antenna.

2

) Increase the separation between the equipment and receiver.

3

) Connect the equipment into an outlet on a circuit different from that to which the receiver is connected.

4

) Consult the dealer or an experienced radio/TV technician for help.

This Class B digital apparatus complies with Canadian ICES-

003

.

Cet appareil numérique de la classe B est conforme à la norme NMB-

003

du Canada.

FCC WARNING-

This equipment may generate or use radio frequency energy. Changes or modifications to

this equipment may cause harmful interference unless the modifications are expressly approved in the instruc-
tion manual.The user could lose the authority to operate this equipment if an unauthorized change or modi-
fication is made.

CAUTION:TO PREVENT ELECTRIC SHOCK, MATCH WIDE BLADE OF PLUG TO WIDE SLOT, FULLY

INSERT.

ATTENTION: POUR ÉVITER LES CHOC ÉLECTRIQUES, INTRODUIRE LA LAME LA PLUS LARGE DE LA

FICHE DANS LA BORNE CORRESPONDANTE DE LA PRISE ET POUSSER JUSQU’AU
FOND.

A NOTE ABOUT RECYCLING

This product’s packaging materials are recyclable and can be reused. Please dispose of any materials in accordance with your local recy-
cling regulations.
Batteries should never be thrown away or incinerated but disposed of in accordance with your local regulations concerning chemical
wastes.

For Customer Use:
Read carefully the information located at the back of this unit and enter below the Serial No.
Retain this information for future reference.

Model No.

_____________________

Serial No.

_____________________

Make your contribution to the environment!!!
• Used up batteries do not belong in the dust bin.
• You can dispose of them at a collection point for used up batteries or special waste.

Contact your council for details.

Содержание SRDV495

Страница 1: ...5 after connections are completed You CANNOT copy any copyright protected DVD disc with this unit SRDV495 INSTRUCCIONES EN ESPAÑOL INCLUIDAS Owner s Manual DVD Recorder with Video Cassette Recorder Supplied Accessory Owner s Manual 1VMN20233 Quick Use Guide 1VMN20319 DVD R Blank Media 3 discs Owner s Manual CHANNEL OUTPUT SELECT VCR DVD DVD RECORD DVD RW R VCR RECORD S VIDEO VIDEO L AUDIO R OPEN C...

Страница 2: ...nstallation If this equipment does cause harmful interference to radio or television reception which can be determined by turning the equipment off and on the user is encouraged to try to correct the interference by one or more of the following measures 1 Reorient or relocate the receiving antenna 2 Increase the separation between the equipment and receiver 3 Connect the equipment into an outlet o...

Страница 3: ...onvenience receptacles and the point where they exit from the appliance 13 Outdoor Antenna Grounding If an outside antenna or cable system is connected to the product be sure the antenna or cable system is grounded so as to provide some protection against voltage surges and built up static charges Article 810 of the National Electrical Code ANSI NFPA No 70 provides infor mation with regard to prop...

Страница 4: ...turning the product When this unit becomes inoperative do not try to cor rect the problem by yourself There are no user service able parts inside Turn off unplug the power plug and please call our help line mentioned on the front page to locate an Authorized Service Center CLEANINGTHE CABINET Use a soft cloth slightly moistened with a mild detergent solution Do not use a solution containing alcoho...

Страница 5: ...ter or time Start to play from Original and Playlist VR mode Title playing is available from either an Original list or Playlist Quick search for what you want to watch You can easily find the part you want to watch using the Index search Time search functions An index mark will be assigned at the beginning of each recordings you make For Time search func tion you can go to a specific point on a t...

Страница 6: ...ng pictures for thumbnails 92 Adding titles to a Playlist 94 Deleting a Playlist 95 Editing DVD R discs 96 Deleting titles 96 Naming Titles 97 Others 98 Troubleshooting 98 Glossary 102 Specifications 103 Language code 103 Español 104 Before you start 2 Precautions 2 Features 5 Table of contents 6 Functional overview 7 Installing batteries in the remote control 9 Using a remote control 9 VCR DVD re...

Страница 7: ...e to start a recording Press repeatedly to set the time for One Touch Recording 19 PLAY button VCR Press to start playback 20 STOP EJECT button VCR EJECTbutton Press to remove the tape from the unit STOP button Press to stop the tape playback Press to cancel the proceeding timer recording inVCR 21 F FWD button VCR Press to rapidly advance the tape or view the picture rapidly in forward during play...

Страница 8: ... standby mode Press to cancel the timer standby mode then turn the unit on 2 Number buttons DVD VCR Press to select channel numbers Press to select a title chap ter track on display or a TV channel Also press to enter values for the settings in the SETUP menu 3 DISPLAY button DVD VCR Press to display or change the on screen display 4 VCR button Press to allow the remote control to operate the VCR ...

Страница 9: ...gh they may look similar different batteries may have different voltages Make sure that the plus and minus ends of each battery match the indications in the battery com partment Remove batteries from equipment that is not going to be used for a month or more When disposing of used batteries please comply with governmental regulations or environmental public instruction rules that apply in your cou...

Страница 10: ...icture S VIDEO OUT COMPONENT VIDEO OUT Required for progressive scan display from DVD Audio cable supplied Component Video cables not supplied This unit Note Connect this unit directly to the TV If the A V cables are connected to a VCR pictures may be distorted due to the copy protection system Method 2 and method 3 are only useful in DVD mode Method 1 Good picture VIDEO OUT Video cable supplied S...

Страница 11: ... pressVIDEO TV button on the remote control If you use channel 4 you need to change this unit s RF output to channel 4 Refer to RF converter out put on page 24 2 On the TV select channel 3 or 4 the same channel as you have selected at step 1 3 On the cable box or satellite box select the channel you want to view or record DVD VCR ANTENNA IN OUT RF Cable supplied RF Cable Back of TV IN OUT Cable bo...

Страница 12: ...nd set DTS to ON for the Digital Out setting in the SETUP menu Refer to pages 30 31 A Dolby Digital 5 1 channel surround format can not be recorded as digital sound by an MD or DAT deck Unless connected to a receiver with a Dolby Digital decoder or a DTS decoder set Dolby Digital to PCM and DTS to OFF for the Digital Out setting in the SETUP menu Playing a DVD using incorrect settings may generate...

Страница 13: ...nnel To preset the TV channels 1 Edit Turns on a title list When a disc with VR mode is inserted Original or PlayList is available which shows the recorded titles on the disc 2 Format Allows you to erase all of the recorded content on the disc The disc will be completely blank 3 Finalize Allows you to finalize a disc con taining recorded titles 4 Disc Protect VR mode only Allows you to protect a d...

Страница 14: ... number chapter number and the time elapsed of disc play 5 Icon Description Search Audio Subtitle Angle exceptVR mode Repeat Marker Noise Reduction Zoom DVD RW SP 1 25 Rem CH 1 Video mode 1 1 00 00 00 1 2 4 3 5 DVD DVD mode First Press DISPLAY button to call up the display menu 1 Playback status of the current tape 2 Indicates the current channel number and an audio status of the program 3 Indicat...

Страница 15: ...ed in the DVD VCR Appears when a DVD RW disc is inserted in the DVD VCR Appears when aVCR timer recording is pro ceeding Appears whenVCR is in the timer recording stand by mode Appears duringVCR to DVD duplication process Appears during DVD toVCR duplication process Display message 1 2 3 4 3 Recording speed Indicates the recording speed of the disc or the tape 4 Title Track and Chapter mark Appear...

Страница 16: ...nual Preset TV Audio Select Stereo VCR DVD Setup Playback Setting Note If the auto presetting is can celled during presetting some channels not yet preset may not be received The selection will depend on how you receive the TV chan nels To cancel the auto preset ting during scanning Press RETURN button or SETUP button to cancel To select a channel You can select a channel by directly entering chan...

Страница 17: ...t Manual Preset CH18 Add Delete CH2 Add Delete Setup Channel Preset Manual Preset Adding deleting channels The channels you no longer receive or seldom watch can be deleted from the memory You also may add channels into memory 1 Press SETUP button to dis play SETUP DISC menu SETUP DISC menu will appear Screen 2 Select SETUP using B buttons then press ENTER button SETUP menu will appear 3 Select Ch...

Страница 18: ...S chan nel number select Manual using K L buttons then press ENTER button Enter your PBS channel number using Number or K L buttons then press ENTER button 6 Press SETUP button to exit 7 Press POWER button to turn off the unit This unit will search for the time only when the power is off Leave it off for several minutes to give this unit time to set the clock on the display of the front panel Setu...

Страница 19: ... using K L buttons Press B buttons to move the cursor 6 Enter the time hour minute using K L buttons Press B buttons to move the cursor Setup Clock Clock Setting Auto Clock Setting Daylight Saving Time Auto JAN 12 2004 MON 09 24 AM ON VCR DVD Setup Clock Clock Setting Auto Clock Setting Auto Daylight Saving Time JAN 12 2004 MON 12 00AM ON VCR DVD Setup Clock Clock Setting Auto Clock Setting Daylig...

Страница 20: ...AUSE ABC DEF GHI JKL MNO PQRS REC OTR REC MONITOR MENU LIST CLEAR C RESET SEARCH MODE ENTER DISPLAY TUV WXYZ DVD ONE TOUCH DUBBING 8 7 4 ZOOM SKIP SKIP TOP MENU SETUP CM SKIP TIMER PROG RETURN STOP PLAY REC OTR REC MONITOR MENU LIST CLEAR C RESET SEARCH MODE ENTER ONE TOUCH DUBBING 6 5 4 Select Auto Clock Setting using K L buttons then press ENTER button Option window will appear Setup Clock Clock...

Страница 21: ... the unit clock will automati cally move forward one hour on the first Sunday in April and move back one hour on the last Sunday in October 1 Press SETUP button to dis play SETUP DISC menu SETUP DISC menu will appear Screen 2 Select SETUP using B buttons then press ENTER button SETUP menu will appear 3 Select Clock using K L B buttons then press ENTER button Clock menu will appear Setup Clock Cloc...

Страница 22: ...ng K L buttons then press ENTER button Option window will appear Refer to the Note on this page 5 Select a desired option using K L buttons then press ENTER button 6 Press SETUP button to exit Setup Playback TV Aspect Parental Lock Disc Menu Language Audio Language Subtitle Language Digital Out Dynamic Range Control Fast Forward with Audio 16 9 Wide 8 English Original OFF ON OFF 4 3 Letter Box 4 3...

Страница 23: ...ect Stereo or SAP using K L buttons then press ENTER button Stereo Outputs main audio SAP Secondary Audio Program Outputs second audio channel Refer to the item in Glossary on page 102 for more information 6 Press SETUP button to exit Setup Channel Preset Auto Preset Manual Preset TV Audio Select Stereo VCR DVD Stereo SAP Setup Channel Preset Auto Preset Manual Preset TV Audio Select Stereo VCR DV...

Страница 24: ...tput channel of the DVD VCR to CH 4 by pressing VIDEO TV button for 3 seconds The RF output channel will alternate between CH3 and CH4 as follows Press VIDEO TV button for more than 3 seconds RF on CH4 3 seconds RF on CH3 RF on CH4 3 seconds 3 seconds 3 seconds POWER REC SPEED AUDIO ZOOM SKIP SKIP OPEN CLOSE TOP MENU SPACE VCR SETUP CM SKIP TIMER PROG RETURN 1 2 3 4 5 6 7 8 0 9 STOP PLAY CH VIDEO ...

Страница 25: ... on Compressing the range of sound volume Outputting sound during playback in fast forward Set the parental level of your DVD discs Set and change the password Audio Language Subtitle Language OSD Background Transparency OSD Background Color OSD Language Screen Saver Digital Out Dynamic Range Control Fast Forward with Audio Parental Lock Change password English French Spanish Original English Fren...

Страница 26: ...trol Fast Forward with Audio 4 3 Letter Box All English Original OFF ON OFF DVD Setup Playback Setting Setup Menu Note Languages Only the languages supported by the disc can be selected Audio Language setting may not be available on some discs You can change or switch off the subtitles on a DVD disc also from the disc menu if it is available POWER REC SPEED AUDIO ZOOM SKIP SKIP OPEN CLOSE TOP MENU...

Страница 27: ...r Setup Playback TV Aspect Parental Lock Disc Menu Language Audio Language Subtitle Language Digital Out Dynamic Range Control Fast Forward with Audio 4 3 Letter Box All English Original OFF ON OFF DVD Original English French Spanish Other Setup Playback TV Aspect Parental Lock Disc Menu Language Audio Language Subtitle Language Digital Out Dynamic Range Control Fast Forward with Audio 4 3 Letter ...

Страница 28: ... L buttons then press ENTER button Setup Display OSD Background Transparency OSD Background Color OSD Language Screen Saver 10 minutes 1 English 35 DVD Setup Playback Setting Setup Menu POWER REC SPEED AUDIO ZOOM SKIP SKIP OPEN CLOSE TOP MENU SPACE VCR SETUP CM SKIP TIMER PROG RETURN 1 2 3 4 5 6 7 8 0 9 STOP PLAY CH VIDEO TV SLOW PAUSE ABC DEF GHI JKL MNO PQRS REC OTR REC MONITOR MENU LIST CLEAR C...

Страница 29: ... English Français Español OSD Background Transparency Default 35 Set the background transparency of OSD screen You can choose one among 0 through 100 Select a setting using K L buttons then press ENTER button Your setting will be activated Select a setting using K L buttons then press ENTER button Your setting will be activated Select a setting using K L buttons then press ENTER button Your settin...

Страница 30: ...ss ENTER button SETUP menu will appear 3 Select Playback using K L B buttons then press ENTER button Option window will appear 4 Select a desired item using K L buttons then press ENTER button Setup Playback TV Aspect Parental Lock Disc Menu Language Audio Language Subtitle Language Digital Out Dynamic Range Control Fast Forward with Audio 4 3 Letter Box All English Original OFF ON OFF DVD Setup P...

Страница 31: ...to ontrol Audio Original OFF OFF ON PCM Dolby Digital DTS Auto 48kHz 96kHz Select a setting using K L buttons then press ENTER button Your setting will be activated Auto Select Auto usually 48kHz If your amplifier receiver is NOT com patible with 96kHz PCM select 48kHz 96kHz sound will be output in 48kHz 96kHz If your amplifier decoder is compatible with 96kHz PCM select 96kHz 96kHz sound will be ...

Страница 32: ...MENU SPACE VCR SETUP CM SKIP TIMER PROG RETURN 1 2 3 4 5 6 7 8 0 9 STOP PLAY CH VIDEO TV SLOW PAUSE ABC DEF GHI JKL MNO PQRS REC OTR REC MONITOR MENU LIST CLEAR C RESET SEARCH MODE ENTER DISPLAY TUV WXYZ DVD ONE TOUCH DUBBING 1 2 Press STOP button if you are playing a disc 3 4 5 Some DVD Video discs feature a Parental control setting Playback will stop if the ratings exceed the levels you set it w...

Страница 33: ...exit SETUP menu A password has been set already Setup Playback TV Aspect Parental Lock Disc Menu Language Audio Language Subtitle Language Digital Out Dynamic Range Control Fast Forward with Audio 4 3 Letter Box All English Original OFF ON OFF DVD All 8 7 6 5 4 3 2 1 Change Password Yes No Setup Playback TV Aspect Parental Lock Disc Menu Language Audio Language Subtitle Language Digital Out Dynami...

Страница 34: ...play that DVD in this unit The number inside the globe refers to region of the world Region 1 represents the United States Canada Bermuda the U S Virgin Islands and small regions near Australia A DVD labeled for a specific region can only play on the unit with the same region code DVD playback The contents of a DVD disc are generally divided into titles Titles may be further subdivided into chapte...

Страница 35: ... change Original or Playlist of VR mode using MENU LIST button Video mode VR mode MENU LIST button 5 Select a desired title using K L B buttons then press ENTER button Playback will begin 6 Press STOP C button to stop playback To eject the disc press OPEN CLOSE A button to open the disc tray then remove the disc before turning off the DVD VCR Playlist 5 4 1 1 3 2 JAN 1 12 00AM JAN 1 3 00AM JAN 1 1...

Страница 36: ...ss POWER button then press DVD button When you are playing a DVD or an audio CD turn the TV on and be sure to select the input to which the DVD VCR is connected 2 Press OPEN CLOSE A but ton to open the disc tray The disc tray will open 3 Place the disc onto the disc tray with its label facing up and make sure to align the disc to the disc tray guide 4 Press PLAY B button to start playing Playback ...

Страница 37: ...ear If the feature is not available on the DVD disc may appear on the TV screen 2 Select an item using K L B buttons then press ENTER button to confirm Continue this step to set up all the features you want or to start playing the disc from the menu MENU LIST button Displays a DVD disc menu which varies with the disc and may be the same as the Title menu K L B buttons Moves the cursor around scree...

Страница 38: ...the K L B buttons then press ENTER button Playback will begin at the title you selected TOP MENU button Displays the Title menu of a DVD disc which varies with the disc K L B buttons Moves the cursor around screen Enter button Selects the currently highlighted menu option Number buttons Selects a numbered menu option some discs only Press ENTER button after 3 Press TOP MENU button to exit the titl...

Страница 39: ...only if you set Fast Forward with Audio to ON for the Playback setting in the SETUP menu For Audio CDs approximate speed is set at x8 with sound For MP3 files approximate speed is set at x16 To return to the normal playback press PLAY Bbutton x20 Normal speed playback x2 x20 x5 x40 x40 g h g h g h g h g h g h MP3 MP3 CD CD DVD RW DVD RW VR DVD RW DVD RW Video DVD R DVD R DVD V DVD V Note Slow Spee...

Страница 40: ... CM Skip 30 sec DVD RW DVD RW VR DVD RW DVD RW Video DVD R DVD R Pause 1 During playback press PAUSE F button Playback will pause and sound will be muted 2 Press PLAY B button to resume play MP3 MP3 CD CD DVD RW DVD RW VR DVD RW DVD RW Video DVD R DVD R DVD V DVD V ZOOM SKIP SKIP TOP MENU SPACE VCR SETUP CM SKIP TIMER PROG RETURN 7 8 0 9 STOP PLAY SLOW PAUSE REC OTR REC MONITOR MENU LIST CLEAR C R...

Страница 41: ...ack press PAUSE k button then press D or E button Every time you press D or E button approximate speed will be changed as follows The sound will remain mute To return to the normal playback press PLAY B button x1 8 Pause x1 16 x1 8 x1 16 x1 2 x1 4 g h g h g h g h g h g h DVD RW DVD RW VR DVD RW DVD RW Video DVD R DVD R DVD V DVD V Note Slow Speed Forward reverse speed will be indicated with icons ...

Страница 42: ...sc to be recalled later 1 During playback press DIS PLAY button The display menu will appear Screen 2 Select icon using B buttons then press ENTER button Marker setup menu will appear Screen for DVD Screen for CD 3 Select a desired marker num ber using B buttons When reaches the desired point press ENTER button 4 To return to the marker later select the desired marker number using B buttons then p...

Страница 43: ...reen 2 Select icon using B buttons then press ENTER button T for title will be highlighted Title Enter a desired title number to search using K L buttons or number buttons then press ENTER button Title search will start Chapter To move to C for chapter press B button Enter a desired chapter num ber to search using K L but tons or number buttons then press ENTER button Chapter search will start 1 1...

Страница 44: ...OW PAUSE ABC DEF GHI JKL MNO PQRS REC OTR REC MONITOR MENU LIST CLEAR C RESET SEARCH MODE ENTER DISPLAY TUV WXYZ DVD ONE TOUCH DUBBING 3 1 2 1 POWER REC SPEED AUDIO ZOOM SKIP SKIP OPEN CLOSE TOP MENU SPACE VCR SETUP CM SKIP TIMER PROG RETURN 1 2 3 4 5 6 7 8 0 9 STOP PLAY CH VIDEO TV SLOW PAUSE ABC DEF GHI JKL MNO PQRS REC OTR REC MONITOR MENU LIST CLEAR C RESET SEARCH MODE ENTER DISPLAY TUV WXYZ D...

Страница 45: ...The current track will be played repeatedly CD MP3 only Group The current group will be played repeatedly MP3 only OFF Title Chapter A B 1 1 01 23 45 DVD Video 1 1 01 23 45 DVD Video MP3 MP3 CD CD DVD RW DVD RW VR DVD RW DVD RW Video DVD R DVD R DVD V DVD V POWER REC SPEED AUDIO ZOOM SKIP SKIP OPEN CLOSE TOP MENU SPACE VCR SETUP CM SKIP TIMER PROG RETURN 1 2 3 4 5 6 7 8 0 9 STOP PLAY CH VIDEO TV S...

Страница 46: ...de menu will appear 3 Select Program Play using K L buttons then press ENTER button Program play list will appear 4 Select a desired track using K L buttons then press ENTER button or B button A cursor will move to the next 5 Press PLAY B button to start program playback Program playback will start CD Playback Mode Program Play Total 00 04 30 07 CD Playback Mode Program Play Total 00 00 00 CD Play...

Страница 47: ... 1 During playback press DIS PLAY button The display menu will appear Screen 2 Select icon using B buttons then press ENTER button Audio menu will appear DVD Video DVD RW VR mode 3 Select a desired audio sound track using K L buttons then press ENTER button DVD Video Audio soundtrack will switch DVD RW VR mode 4 Select a desired audio chan nel using K L buttons then press ENTER button Audio channe...

Страница 48: ...utton The display menu will appear Screen 2 Select icon using B buttons then press ENTER button Subtitle menu will appear 3 Select a desired subtitle lan guage using K L buttons then press ENTER button Subtitle will be displayed in the selected language When selecting OFF subtitle will disappear 1 1 00 00 00 OFF 1English 2Japanese DVD Video 1 1 01 23 45 DVD Video DVD RW DVD RW VR DVD V DVD V POWER...

Страница 49: ...tion using K L buttons then press ENTER button Your setting will be activated This function reduces noise in the playback picture When playing back discs recorded in long time mode such as SLP or SEP mode select Type 1 or Type 2 Type 2 is more effective When playing back discs with lit tle noise such as prerecorded DVD Video discs select OFF 1 1 00 00 00 OFF Type 1 Type 2 DVD Video 1 1 01 23 45 DV...

Страница 50: ...with a record tab in the DVD VCR The desired recording speed is selected in SP standard play or SLP super long play mode by pressing REC SPEED button on the remote control Recording speed Stereo or SAP is selected Refer to page 64 for instructions on timer recording First 1 Press REC OTR button to begin the recording To temporarily stop recording or to resume it press PAUSE F but ton After the uni...

Страница 51: ...ding you make You may skip to a specif ic marked point by following the steps below First 1 Press SEARCH MODE button twice so that the index search menu appears 2 Enter the number of record ings you wish to skip using Number buttons with in 30 seconds 3 Press g h buttons to start index search If you want to go in the forward direction press g button If you want to go in the reverse direction press...

Страница 52: ...C MONITOR MENU LIST CLEAR C RESET SEARCH MODE ENTER DISPLAY TUV WXYZ DVD ONE TOUCH DUBBING 1 3 2 This feature allows you to go to a specific point on a tape by enter ing the exact amount of time you wish to skip in order to reach the point First 1 Press SEARCH MODE button repeatedly so that the Time search menu appears 2 Enter your desired time to skip using Number buttons with in 30 seconds 3 Pre...

Страница 53: ...otion Press SLOW button during playback or the still mode If the noise bars appear on the TV screen you can reduce it by pressing CHANNEL K L or CHK CHL buttons When you playback a tape recorded in Hi Fi stereo Press AUDIO button on the remote control to select HIFI or MONO for playback sound mode If you have connected a stereo TV to this unit select HIFI If you have connected a monaural TV to thi...

Страница 54: ...o record repeatedly on the same disc or when you want to edit the disc after recording select the rewritable DVD RW type disc When you want to save recordings without any alteration a non rewritable DVD R can be your choice Step 2 Insert a blank disc POWER REC SPEED AUDIO OPEN CLOSE 1 2 3 C ABC DEF POWER REC SPEED AUDIO OPEN CLOSE 1 2 3 ABC DEF Remote Control Open the disc tray Close the disc tray...

Страница 55: ...functions which are possible only with DVD R RW discs You can edit the following from a title list Putting names on titles Setting pictures for thumbnails VR mode Setting clearing chapter markers Deleting parts of titles or scenes VR mode Title Delete This deletes an entire scene permanently from the disc Scene Delete This allows a user to edit within a specific scene ex commercials Original and P...

Страница 56: ...gets poorer as the recording time becomes longer Restrictions on recording You cannot record copy protected video using this unit Copy protected video includes DVD Video discs and some satellite broadcasts If copy protected material is encountered during a recording the unit will pause or stop automatically and an error message will be displayed on screen Video that is copy once only can only be r...

Страница 57: ... Video mode VR mode DVD R ver 2 0 Video mode This Unit DVD player Not Playable Playable Finalizing Finalizing You cannot finalize discs in other DVD recorders Disc type format Copy free Copy once Copy prohibited Recordable Not Recordable DVD RW DVD RW VR DVD RW DVD RW Video DVD R DVD R ver 1 1 ver 1 1 CPRM compatible ver 1 1 ver 1 1 CPRM compatible ver 2 0 Note Recording The audio and video qualit...

Страница 58: ...e DVD RW Recording Format VR mode 10 minutes Dubbing Mode VCR DVD DVD Video mode VR mode Setup Recording Auto Chapter Timer Programming Dubbing Mode Video mode VCR DVD DVD RW Recording Format 10 minutes DVD Setup Playback Setting Setup Menu DVD RW DVD RW VR DVD RW DVD RW Video Note Disc Error Massage When inserting a blank DVD R or DVD RW disc the error message Disc Error will appear This unit is ...

Страница 59: ...e select ed time interval 8 Press SETUP button to exit Setup Recording Auto Chapter Timer Programming DVD RW Recording Format VR mode 10 minutes Dubbing Mode VCR DVD DVD OFF 5 minutes 10 minutes 15 minutes 30 minutes 60 minutes 6 POWER REC SPEED AUDIO ZOOM SKIP SKIP OPEN CLOSE TOP MENU SPACE VCR SETUP CM SKIP TIMER PROG RETURN 1 2 3 4 5 6 7 8 0 9 STOP PLAY CH VIDEO TV SLOW PAUSE ABC DEF GHI JKL MN...

Страница 60: ...n Formatting will start 6 Formatting is complete 100 will be indicated This operation may take a few minutes to complete Formatting 100 Formatting 58 Disc Edit Format Finalize Yes No Disc Protect OFF ON Are you sure Yes No Disc Edit Format Finalize Yes No Disc Protect OFF ON Disc Edit Format Finalize Disc Protect OFF ON Setup Menu DVD RW DVD RW VR DVD RW DVD RW Video Reformatting a disc Caution Wh...

Страница 61: ...at the recording format is set to the desired mode Refer to Formatting a disc on pages 58 60 When a DVD RW disc is loaded You can choose Video mode or VR mode from SETUP menu Video mode has been selected as the default Refer to Choosing the recording format of a blank disc on pages 58 59 When a DVD R disc is loaded DVD R discs will always be in Video mode 4 Select a desired channel to record using...

Страница 62: ...to change the recording speed press REC SPEED button repeatedly The recording speed will be changed as you press the button as shown Refer to Recording speed on page 56 You cannot change the record ing speed during recording 2 Press REC MONITOR button again to exit XP SP LP EP SLP SEP CH 18 Rec Monitor XP DVD DVD RW DVD RW VR DVD RW DVD RW Video DVD R DVD R Checking the recording picture quality P...

Страница 63: ...recording format is set to the desired mode Refer to Formatting a disc on pages 58 60 When a DVD RW disc is loaded You can choose Video mode or VR mode from SETUP menu Video mode has been selected as the default Refer to Choosing the recording format of a blank disc on pages 58 59 When a DVD R disc is loaded DVD R discs will always be in Video mode 4 Select a desired channel to record using CH K L...

Страница 64: ... FRI L SAT L FRI L SUN L L Setup Recording Timer Programming Date Start End CH Speed JAN 01 AM AM CH8 DVD DVD VCR Setup Recording Timer Programming Date Start End CH Speed DVD VCR Setup Recording Auto Chapter Timer Programming Dubbing Mode Video mode VCR DVD DVD RW Recording Format 10 minutes DVD Setup Playback Setting Setup Menu VCR VCR DVD RW DVD RW VR DVD RW DVD RW Video DVD R DVD R POWER REC S...

Страница 65: ...the front display 2 Press TIMER PROG button Timer Programming list will appear 3 Check the information on the list 4 To clear the timer programming select your desired program using K L buttons then press CLEAR C RESET button To correct the timer program ming select your desired pro gram using K L buttons then press ENTER button Next correct the timer programming using K L B buttons Finally press ...

Страница 66: ...e below for details During timer recording or timer standby indicator is on the front display any operations on the unit will not be available To make these operations available cancel the timer recording or timer standby first indicator disappears To cancel the timer standby mode press POWER button When the Start and the End time are the same the length of the recording will be set for 24 hours W...

Страница 67: ...ct Video L1 Rear L2 Front Video In Video In DVD 1 Press SETUP button to display SETUP DISC menu 2 Select SETUP using B buttons then press ENTER button 3 Select Select Video using K L B buttons then press ENTER button 4 Select L1 Rear using K L buttons then press ENTER button 5 Select the input jack type to connect using K L buttons then press ENTER button If you want to use S VIDEO IN select S Vid...

Страница 68: ...control or the CH K L buttons To use the input jacks on the front of this unit select L2 position by pressing 0 0 2 on the remote control or the CH K L but tons 4 Select a recording speed using REC SPEED button Refer to Recording speed on page 56 for DVD or page 50 forVCR 5 Press REC OTR button on the DVD VCR to start recording 6 Press PLAY button on the external source that you are recording from...

Страница 69: ...ss ENTER button Recording menu will appear 4 Select Dubbing Mode using K L buttons then press ENTER button Option window will appear Setup Recording Auto Chapter Timer Programming Dubbing Mode Video mode VCR DVD DVD RW Recording Format OFF VCR DVD Setup Recording Auto Chapter Timer Programming Dubbing Mode Video mode VCR DVD DVD RW Recording Format 10 minutes DVD Setup Playback Setting Setup Menu ...

Страница 70: ...te control to stop the recording DVD VCR Setup Recording Auto Chapter Timer Programming Dubbing Mode Video mode VCR DVD DVD RW Recording Format OFF VCR DVD VCR DVD VCR DVD DVD to VCR VCR Setup Recording Auto Chapter Timer Programming Dubbing Mode Video mode VCR DVD DVD RW Recording Format OFF VCR DVD VCR DVD VCR DVD VCR to DVD POWER REC SPEED AUDIO ZOOM SKIP SKIP OPEN CLOSE TOP MENU SPACE VCR SETU...

Страница 71: ...ideo mode can take up to 15 minutes A disc recorded in VR mode can take up to 60 minutes A shorter recording period on the disc will require a longer time period for finalization Do not unplug the power cord during finalization Details are an pages 56 57 1 Press SETUP button to dis play SETUP DISC menu SETUP DISC menu will appear Screen 2 Select DISC using B buttons then press ENTER button DISC me...

Страница 72: ...sc Protect OFF ON Yes No Disc Edit Format Finalize Disc Protect OFF ON Setup Menu DVD RW DVD RW VR POWER REC SPEED AUDIO ZOOM SKIP SKIP OPEN CLOSE TOP MENU SPACE VCR SETUP CM SKIP TIMER PROG RETURN 1 2 3 4 5 6 7 8 0 9 STOP PLAY CH VIDEO TV SLOW PAUSE ABC DEF GHI JKL MNO PQRS REC OTR REC MONITOR MENU LIST CLEAR C RESET SEARCH MODE ENTER DISPLAY TUV WXYZ DVD ONE TOUCH DUBBING 1 2 3 4 Note Disc Prote...

Страница 73: ...bar of the title to show length of title 7 The arrow icon which means the title list includes a next or a previous page Press Bor button by following direction of the icon 8 Playback status of the current disc Editing discs in Video mode You can edit discs inVideo mode for the following items Note that once you edit titles they will not remain as recorded originally Deleting titles Refer to page 7...

Страница 74: ...s you can edit with a playlist Deleting titles Refer to page 87 Deleting parts of titles Refer to pages 88 89 Naming Titles Refer to pages 89 90 Setting or clearing chapter markers Refer to pages 91 92 Setting pictures for thumbnails Refer to pages 92 93 Adding titles to a Playlist Refer to page 94 Deleting a Playlist Refer to page 95 Editing discs in VR mode For discs in VR mode you can edit from...

Страница 75: ...er writing to disc is com pleted press SETUP button to exit DISC menu This operation may take a few minutes to complete Disc Edit 1 Title Delete Edit Title Name Chapter Mark Yes No Writing to Disc JAN 1 1 00AM CH12 XP Disc Edit 1 0 01 25 Title Delete Edit Title Name Chapter Mark Yes No JAN 1 1 00AM CH12 XP Disc Edit 1 Title Delete Edit Title Name Chapter Mark 0 01 25 JAN 1 1 00AM CH12 XP Disc Edit...

Страница 76: ...it Edit Title Name 1 0 01 25 A B C a b c 1 2 3 JAN 1 1 00AM CH12 XP Disc Edit Edit Title Name 1 0 01 25 A B C a b c 1 2 3 JAN 1 1 00AM CH12 XP Disc Edit 1 Title Delete Edit Title Name Chapter Mark 0 01 25 JAN 1 1 00AM CH12 XP Disc Edit 1 1 3 2 5 4 JAN 1 1 00AM JAN 1 4 00AM JAN 1 2 00AM JAN 1 3 00AM JAN 1 5 00AM Disc Edit Format Finalize DVD DVD RW DVD RW Video Putting names on titles Press ABC DEF...

Страница 77: ...dit menu will appear 4 Select Chapter Mark using K L buttons then press ENTER button Option window will appear 5 Select a desired time using K L buttons then press ENTER button Option window will appear 6 Select Yes using B but tons then press ENTER but ton Chapter markers will be added at a specified time 7 After writing to disc is com pleted press SETUP button to exit DISC menu 1 0 01 25 Title D...

Страница 78: ...Scene Delete Edit Title Name Chapter Mark Index Picture Protect OFF Yes No Writing to Disc JAN 1 1 00AM CH12 XP ON Disc Edit Original 1 0 01 25 Title Delete Scene Delete Edit Title Name Chapter Mark Index Picture Protect OFF Yes No JAN 1 1 00AM CH12 XP ON Disc Edit Original Disc Edit Original 1 Title Delete Scene Delete Edit Title Name Chapter Mark Index Picture Set Protect OFF JAN 1 1 00AM CH12 X...

Страница 79: ...an end point A cursor will move to Preview You can check a preview 1 0 00 55 Title Delete Scene Delete Edit Title Name Chapter Mark Index Picture Protect OFF Start End Preview Delete JAN 1 1 00AM CH12 XP Disc Edit Original Disc Edit Original 1 Title Delete Scene Delete Edit Title Name Chapter Mark Index Picture Set Protect OFF JAN 1 1 00AM CH12 XP 0 01 25 ON Disc Edit Original 1 1 3 2 5 4 JAN 1 1 ...

Страница 80: ...OPEN CLOSE TOP MENU SPACE VCR SETUP CM SKIP TIMER PROG RETURN 1 2 3 4 5 6 7 8 0 9 STOP PLAY CH VIDEO TV SLOW PAUSE ABC DEF GHI JKL MNO PQRS REC OTR REC MONITOR MENU LIST CLEAR C RESET SEARCH MODE ENTER DISPLAY TUV WXYZ DVD ONE TOUCH DUBBING 1 2 1 Note Marker numbers greater than 900 You cannot select Scene Delete when the number of chapter markers in the original or playlist is more than 900 7 Sel...

Страница 81: ...2 3 JAN 1 1 00AM CH12 XP Disc Edit Original Edit Title Name 1 0 01 25 A B C a b c 1 2 3 JAN 1 1 00AM CH12 XP Disc Edit Original 1 Title Delete Scene Delete Edit Title Name Chapter Mark Index Picture Set Protect OFF JAN 1 1 00AM CH12 XP 0 01 25 ON Disc Edit Original 1 1 3 2 5 4 JAN 1 1 00AM JAN 1 4 00AM JAN 1 2 00AM JAN 1 3 00AM JAN 1 5 00AM Press ABC DEF GHI JKL MNO PQRS TUV WXYZ space abc def ghi...

Страница 82: ...will appear 6 Select Add or Delete using K L buttons then press ENTER button Option window will appear Add 1 0 01 25 Title Delete Scene Delete Edit Title Name Chapter Mark Index Picture Protect OFF Yes No JAN 1 1 00AM CH12 XP ON Add Delete Disc Edit Original Chapter 1 1 F Disc Edit Original 1 0 01 25 Title Delete Scene Delete Edit Title Name Chapter Mark Index Picture Protect OFF JAN 1 1 00AM CH12...

Страница 83: ...Add Delete Disc Edit Original Chapter 2 2 F Note Thumbnail Picture When you delete part of a title the picture you chose to be the thumbnail for that part is deleted A default picture will then be used by the unit instead Setting pictures for thumbnails POWER REC SPEED AUDIO ZOOM SKIP SKIP OPEN CLOSE TOP MENU SPACE VCR SETUP CM SKIP TIMER PROG RETURN 1 2 3 4 5 6 7 8 0 9 STOP PLAY CH VIDEO TV SLOW ...

Страница 84: ...ure Set Protect OFF ON Writing to Disc JAN 1 1 00AM CH12 XP Disc Edit Original 1 0 01 25 Yes No Title Delete Scene Delete Edit Title Name Chapter Mark Index Picture Set Protect OFF ON JAN 1 1 00AM CH12 XP F Disc Edit Original 1 Title Delete Scene Delete Edit Title Name Chapter Mark Index Picture Set Protect OFF JAN 1 1 00AM CH12 XP 0 01 25 ON Disc Edit Original 1 1 3 2 5 4 JAN 1 1 00AM JAN 1 4 00A...

Страница 85: ... 00AM CH12 XP ON Title Delete Scene Delete Edit Title Name Chapter Mark Index Picture Set Protect OFF Disc Edit Original 1 0 01 25 Title Delete Scene Delete Edit Title Name Chapter Mark Index Picture Set Protect OFF Yes No JAN 1 1 00AM CH12 XP ON Disc Edit Original 1 Title Delete Scene Delete Edit Title Name Chapter Mark Index Picture Set Protect OFF JAN 1 1 00AM CH12 XP 0 01 25 ON Disc Edit Origi...

Страница 86: ... Disc Edit Original 2 Yes No Writing to Disc JAN 1 2 00AM CH12 XP OFF Title Delete Scene Delete Edit Title Name Chapter Mark Index Picture Set Protect ON Disc Edit Original 2 0 01 25 Title Delete Scene Delete Edit Title Name Chapter Mark Index Picture Set Protect ON Yes No JAN 1 2 00AM CH12 XP OFF B Disc Edit Original 2 Title Delete Scene Delete Edit Title Name Chapter Mark Index Picture Set Prote...

Страница 87: ...d press SETUP button to exit DISC menu This operation may take a few minutes to complete Disc Edit Playlist 1 Title Delete Scene Delete Edit Title Name Chapter Mark Index Picture Set Yes No Writing to Disc JAN 1 1 00AM CH12 XP Disc Edit Playlist 1 0 01 25 Title Delete Scene Delete Edit Title Name Chapter Mark Index Picture Set Yes No JAN 1 1 00AM CH12 XP Disc Edit Playlist 1 Title Delete Scene Del...

Страница 88: ...sor will move to Preview You can check a preview Disc Edit Playlist 1 0 00 55 Title Delete Scene Delete Edit Title Name Chapter Mark Index Picture Start End Preview Delete JAN 1 1 00AM CH12 XP Disc Edit Playlist 1 Title Delete Scene Delete Edit Title Name Chapter Mark Index Picture Set 0 01 25 JAN 1 1 00AM CH12 XP Disc Edit Playlist 1 1 3 2 5 4 Add New Title Delete Playlist JAN 1 1 00AM JAN 1 4 00...

Страница 89: ...C MONITOR MENU LIST CLEAR C RESET SEARCH MODE ENTER DISPLAY TUV WXYZ DVD ONE TOUCH DUBBING 9 7 8 POWER REC SPEED AUDIO ZOOM SKIP SKIP OPEN CLOSE TOP MENU SPACE VCR SETUP CM SKIP TIMER PROG RETURN 1 2 3 4 5 6 7 8 0 9 STOP PLAY CH VIDEO TV SLOW PAUSE ABC DEF GHI JKL MNO PQRS REC OTR REC MONITOR MENU LIST CLEAR C RESET SEARCH MODE ENTER DISPLAY TUV WXYZ DVD ONE TOUCH DUBBING 1 1 2 3 Note Chapter Mark...

Страница 90: ...e Name 1 0 01 25 A B C a b c 1 2 3 JAN 1 1 00AM CH12 XP Disc Edit Playlist 1 Title Delete Scene Delete Edit Title Name Chapter Mark Index Picture Set 0 01 25 JAN 1 1 00AM CH12 XP Press ABC DEF GHI JKL MNO PQRS TUV WXYZ space abc def ghi jkl mno pqrs tuv wxyz space space _ 2 3 4 5 6 7 8 9 0 1 1 1 ABC abc Select 123 1 1 2 3 4 5 6 7 8 9 0 Press button character set will be changed to the mode automat...

Страница 91: ...Edit using K L but tons then press ENTER but ton Original PlayList menu will appear Screen 3 Select PlayList using B buttons then press ENTER button Playlist will appear 4 Select a desired title using K L B buttons then press ENTER button Playlist menu will appear 5 Select Chapter Mark using K L buttons then press ENTER button Option window will appear 6 Select Add or Delete using K L buttons then...

Страница 92: ...e for a thumbnail is deleted by delet ing a part of a title a default picture will be selected Setting pictures for thumbnails You can set a picture to each title for a thumbnail It helps you to remember the contents of the title you are playing The begin ning picture has been selected as the default First 1 Press SETUP button Select DISC using B buttons then press ENTER button DISC menu will appe...

Страница 93: ...exit DISC menu This operation may take a few minutes to complete 1 Yes No Title Delete Scene Delete Edit Title Name Chapter Mark Index Picture Set Writing to Disc JAN 1 1 00AM CH12 XP Disc Edit Playlist Disc Edit Playlist 1 0 01 25 Yes No Title Delete Scene Delete Edit Title Name Chapter Mark Index Picture Set JAN 1 1 00AM CH12 XP F Disc Edit Playlist 1 Title Delete Scene Delete Edit Title Name Ch...

Страница 94: ...tle from Playlist refer to Deleting titles on page 87 To delete a Playlist refer to Deleting a Playlist on page 95 Disc Edit Playlist 6 1 1 3 2 5 4 JAN 1 1 00AM JAN 1 4 00AM JAN 1 2 00AM JAN 1 5 00AM JAN 1 3 00AM JAN 12 8 00PM Disc Edit Playlist Add New Title Writing to Disc 58 Disc Edit Playlist Add New Title 1 1 3 2 JAN 12 5 00PM JAN 12 8 00PM JAN 10 10 30AM Disc Edit Playlist 1 1 3 2 5 4 Add Ne...

Страница 95: ...ons then press ENTER but ton Playlist will be erased After writing to disc is completed the DVD VCR will be in stop mode 1 1 3 2 5 4 JAN 1 2 00AM JAN 1 3 00AM JAN 1 5 00AM JAN 1 1 00AM JAN 1 4 00AM Add New Title Delete Playlist Yes No Disc Edit Playlist Disc Edit Playlist 1 1 3 2 5 4 Add New Title Delete Playlist JAN 1 1 00AM JAN 1 4 00AM JAN 1 2 00AM JAN 1 3 00AM JAN 1 5 00AM Disc Edit Original D...

Страница 96: ...is operation may take a few minutes to complete Disc Edit 1 Title Delete Edit Title Name Chapter Mark Yes No Writing to Disc JAN 1 1 00AM CH12 XP Disc Edit 1 0 01 25 Title Delete Edit Title Name Chapter Mark Yes No JAN 1 1 00AM CH12 XP Disc Edit 1 Title Delete Edit Title Name Chapter Mark 0 01 25 JAN 1 1 00AM CH12 XP Disc Edit 1 1 3 2 5 4 JAN 1 1 00AM JAN 1 4 00AM JAN 1 2 00AM JAN 1 3 00AM JAN 1 5...

Страница 97: ... abc Yes No Writing to Disc Disc Edit Edit Title Name 1 0 01 25 A B C a b c 1 2 3 JAN 1 1 00AM CH12 XP Disc Edit Edit Title Name 1 0 01 25 A B C a b c 1 2 3 JAN 1 1 00AM CH12 XP Disc Edit 1 Title Delete Edit Title Name Chapter Mark 0 01 25 JAN 1 1 00AM CH12 XP Disc Edit 1 1 3 2 5 4 JAN 1 1 00AM JAN 1 4 00AM JAN 1 2 00AM JAN 1 3 00AM JAN 1 5 00AM Disc Edit Format Finalize DVD DVD R DVD R Naming Tit...

Страница 98: ...ure by pressing CHANNEL o p buttons on this unit or CH o p buttons while you are playing a video tape Check the antenna cable wire connections TV program pictures are distorted Adjust TV antenna Adjust the picture see the TV s instruction manual Place the unit and TV farther apart Place the TV and any bunched antenna cables farther apart TV station does not appear Try to set the channels with Auto...

Страница 99: ...lasted for more than 30 seconds Reset the clock pages 19 20 Disconnect the AC power cord from the AC outlet and connect it again The program contains copy protection signals that restricts copying The timer setting overlapped with another setting that was set later or has priority The subtitle language cannot be changed or turned off Multilingual subtitle are not recorded on the DVDVIDEO The DVDVI...

Страница 100: ...lease eject the disc The current selected parental level Prohibits playback This program is not allowed to be recorded Recording Error This program is not recordable inVideo mode This program is not allowed to be recorded on this disc Unplayable disc is inserted in the unit Insert the standardized disc which bear the marks on page 34 Recording Error This disc is protected and not recordable Can no...

Страница 101: ...imum 99 You are trying to record onto the VR mode DVD RW disc on which the number of recording chapters comes up to the maximum 999 This disc has no space to write the Control Information when recording or deleting contents When editing has been repeatedly performed the control Information area may come up to be full even the recording area has enough space This disc s working area for recording i...

Страница 102: ...nalize To make DVD discs which have been recorded on possible to play in DVD players With this unit it is possible to finalize DVD R DVD RW discs PCM 2 channel stereo Pulse Code Modulation The most common system of encoding digital audio found on CDs and DAT Excellent quality but requires a lot of data com pared to formats such as Dolby Digital and MPEG audio For com patibility with digital audio ...

Страница 103: ... Estonian 5166 Faroese 5261 Fiji 5256 Finnish 5255 French 5264 Frisian 5271 Galician 5358 Georgian 5747 German 5051 Greek 5158 Greenlandic 5758 Guarani 5360 Gujarati 5367 Hausa 5447 Hebrew 5569 Russian 6467 Samoan 6559 Sangho 6553 Sanskrit 6547 Scots Gaelic 5350 Serbian 6564 Serbo Croatian 6554 Sesotho 6566 Setswana 6660 Shona 6560 Sindhi 6550 Singhalese 6555 Siswat 6565 Slovak 6557 Slovenian 6558...

Страница 104: ...ir Para cerrar Importante Formato del disco Coloque el disco en el grabador Haga el formato del disco del menú SETUP existen los formatos de video modo deVideo o de grabación de video modoVR según el tipo de disco colocado Esto es necesario para preparar el disco para grabación Vea los detalles en las páginas 58 60 Al formatear todo el contenido de ese disco se borrarán Tipos de disco DVD DVD RW V...

Страница 105: ...do borrando marcadores de capítulos Borrado de partes de títulos o escenas Modo VR Title Delete Esto borra permanentemente una escena completa del disco Scene Delete Esto permite que el usuario edite dentro de una escena específica anuncios comerciales por ejemplo Original y Playlist modo VR Puede editar las grabaciones en la lista a reproducir sin cambiar las grabaciones originales Cualquier list...

Страница 106: ...eproduc ción 5 Presione el botón STOP C para detener la reproducción 6 Presione el botón STOP EJECT C A en el panel frontal de la unidad para expulsar la cinta VCR VCR VCR Nota Cuando se coloca una cinta sin la lengüeta de grabación la unidad empezará a reproducir automáticamente El seguimiento se ajustará automáticamente para la reproducción Para ajustar manualmente el seguimiento presione los bo...

Страница 107: ... TIMER PROG RETURN 4 5 6 7 8 0 9 STOP PLAY CH VIDEO TV SLOW PAUSE GHI JKL MNO PQRS REC OTR REC MONITOR MENU LIST ENTER DISPLAY TUV WXYZ DVD 1 Grabación con temporizador de un toque 0 30 1 00 Canal a grabar 7 30 8 00 1 1 1 Grabación Prevención contra borrado accidental Para evitar una grabación por accidente en un casete grabado rompa la lengüeta de grabación Para volver a grabar posterior mente cu...

Страница 108: ...of carry in items like vacuums lawn equipment and electronics call or go on line for the location of your nearest Sears Parts Repair Center 1 800 488 1222 Call anytime day or night U S A only www sears com To purchase a protection agreement on a product serviced by Sears 1 800 827 6655 U S A 1 800 361 6665 Canada Para pedir servicio de reparación a domicilio y para ordenar piezas 1 888 SU HOGARSM ...

Отзывы: